


Register MCP Server
Create an MCP Server asset to expose your pipeline as MCP tools for AI agents.
Before registering an MCP Server, ensure you have:
- An MCP Server Pipeline created and validated (see MCP Server Pipeline Builder or create it manually)
- A running Snaplex (Cloudplex or Groundplex) for pipeline execution
- A load balancer configured for your Snaplex.
- An authentication policy configured (optional but recommended for production)
You can register an MCP Server from Designer (with the Pipeline open) or from Manager. When creating from Designer, the Pipeline is automatically pre-filled.
-
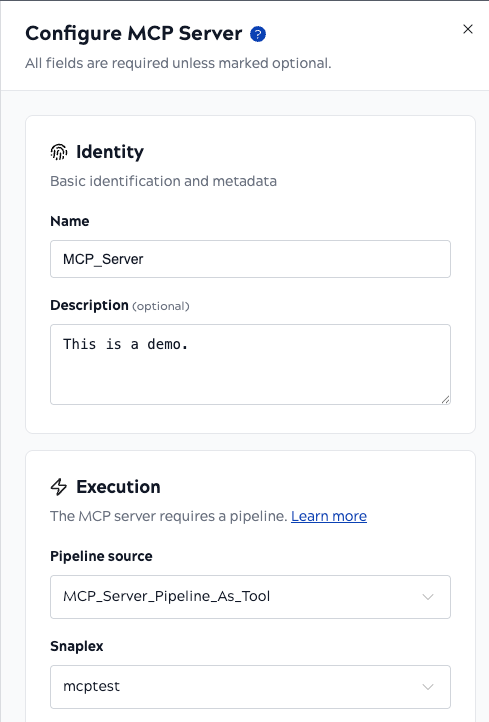
Fill out the MCP Server configuration form:
-
Select a Snaplex.
Choose the Snaplex (Cloudplex or Groundplex) where the MCP Server Pipeline will execute.
-
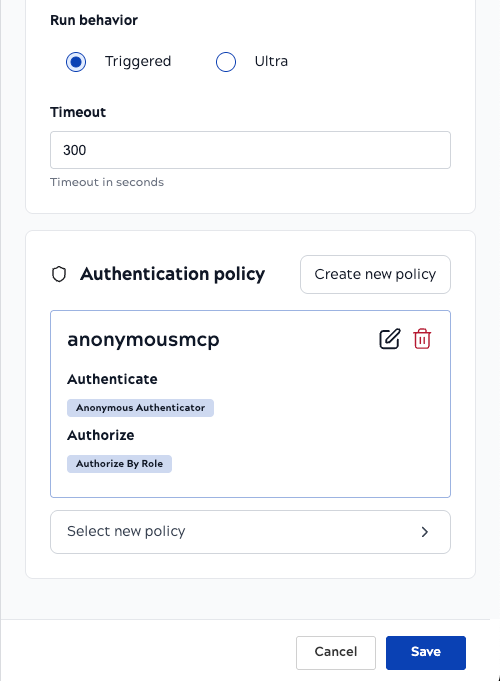
Choose an Authentication Policy.
Select an MCP policy for authentication. Options include:
- Anonymous Authenticator (no authentication)
- API Key Authenticator
- MCP OAuth2 Client Credentials Rule
- MCP OAuth2 JWT Validator Rule
If no suitable policy exists, see Create Authentication Policy to create one.
-
Select a Snaplex.
-
Click Save.
The MCP Server details page opens. Displayed are URLs you can use to invoke your MCP Server:
Streamable HTTP URL:
/mcpserver/{serverId}/mcp- Stateless HTTP transport (recommended for production)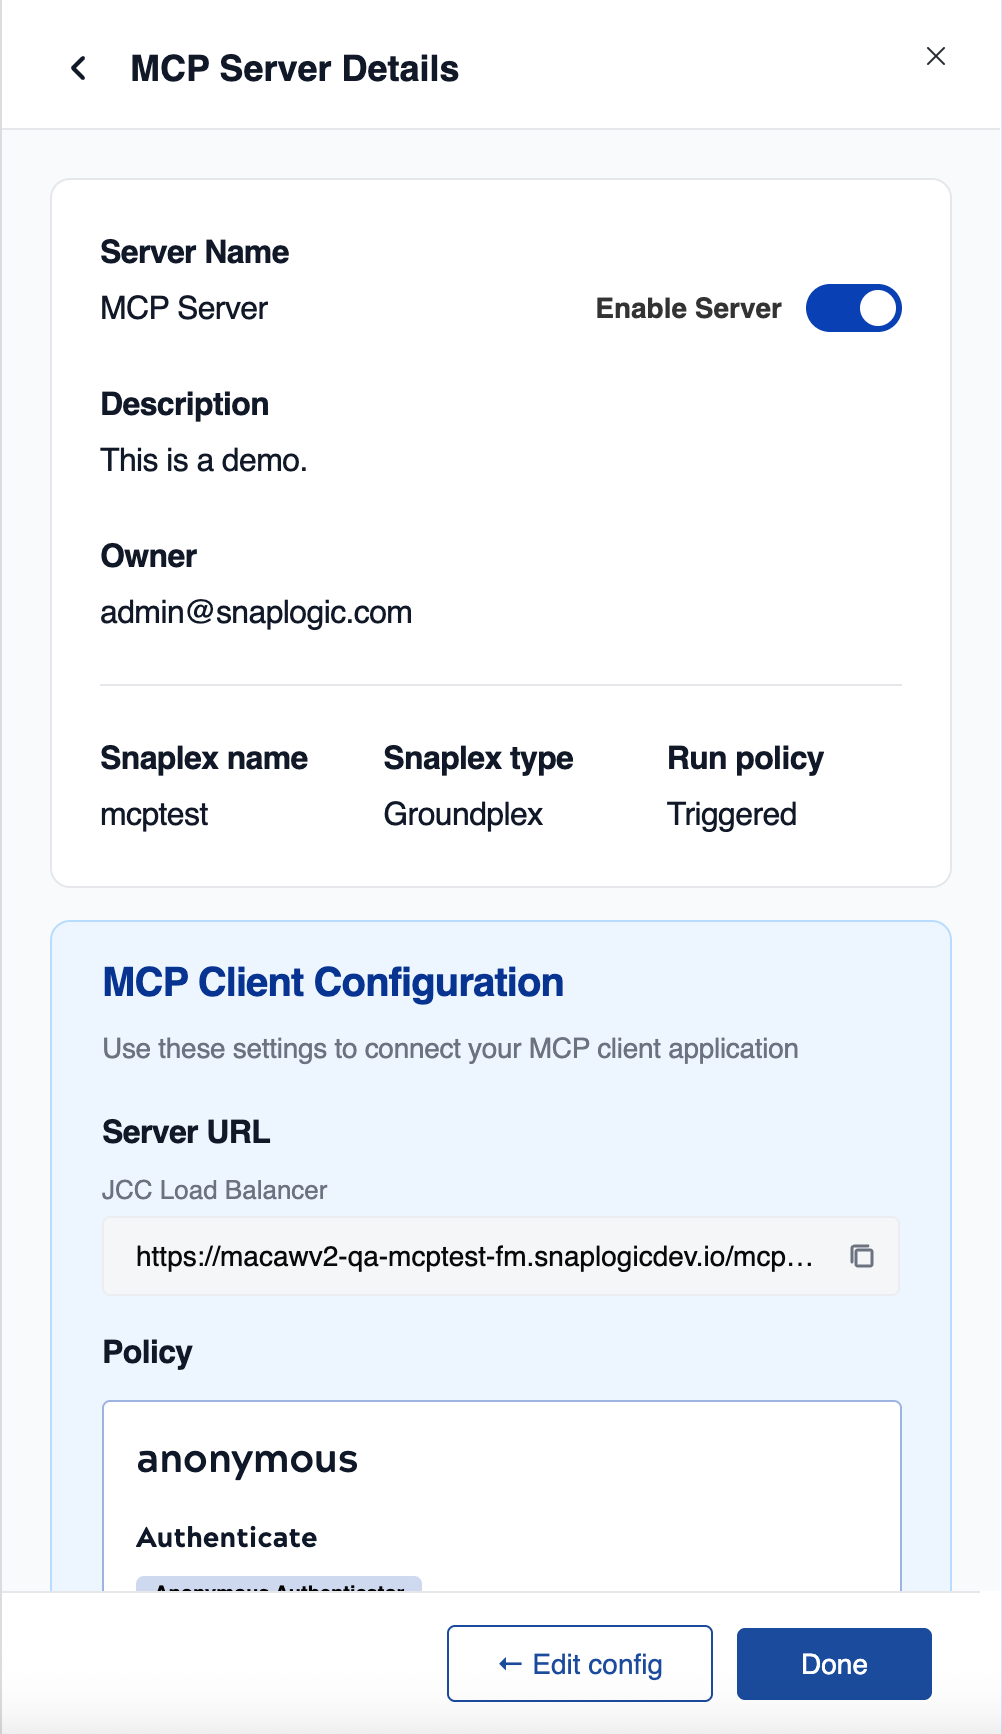
Your MCP Server is now registered and ready to accept connections. The server is enabled by default.
To disable the MCP Server without deleting it, use the Enable/Disable toggle in Manager.
Next steps:
- See Get Server URL and Connect Client to connect AI agents to your MCP Server
- See Troubleshooting MCP Server Errors to diagnose and resolve common errors