- A Git repository to associate with the Project Space
- Go to SnapLogic Manager.
- In the navigation tree, locate the project space, and click the down arrow to open the project space menu.
- Select Checkout Git Repository.
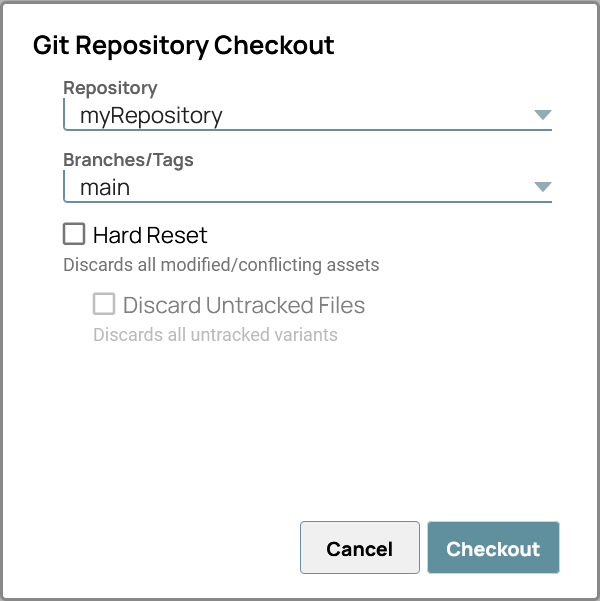
- Configure the Git Repository Checkout settings.

- Repository: Select the repository to checkout from.
- Branches/Tags: Select the branch or tag to checkout. You can filter the list by typing the first letters of the branch or tag name.
-
Hard Reset: Select this checkbox to replace all assets in your project or
Project Space with the ones in your Git repository. This discards all uncommitted changes
(modified or conflicting assets) and the assets with an Added, Tracked, or Removed status from
the Project or Project Space.
-
Discard Untracked Files: With the Hard Reset
checkbox selected, select this checkbox to delete all untracked files from your project/project
space during the checkout.
Important: You can select Hard
Reset and leave Discard Untracked Files unchecked if you want
to retain a set of assets and not track them. A fix has been implemented to address an issue where untracked changes were moved to the Recycle Bin during branch checkout.
When the system detects uncommitted changes and displays the message, Aborting checkout since the following projects have assets with uncommitted changes no assets are deleted.
- Click Checkout.
The Git Integration associates the project space with the branch or tag and checks out any existing assets.