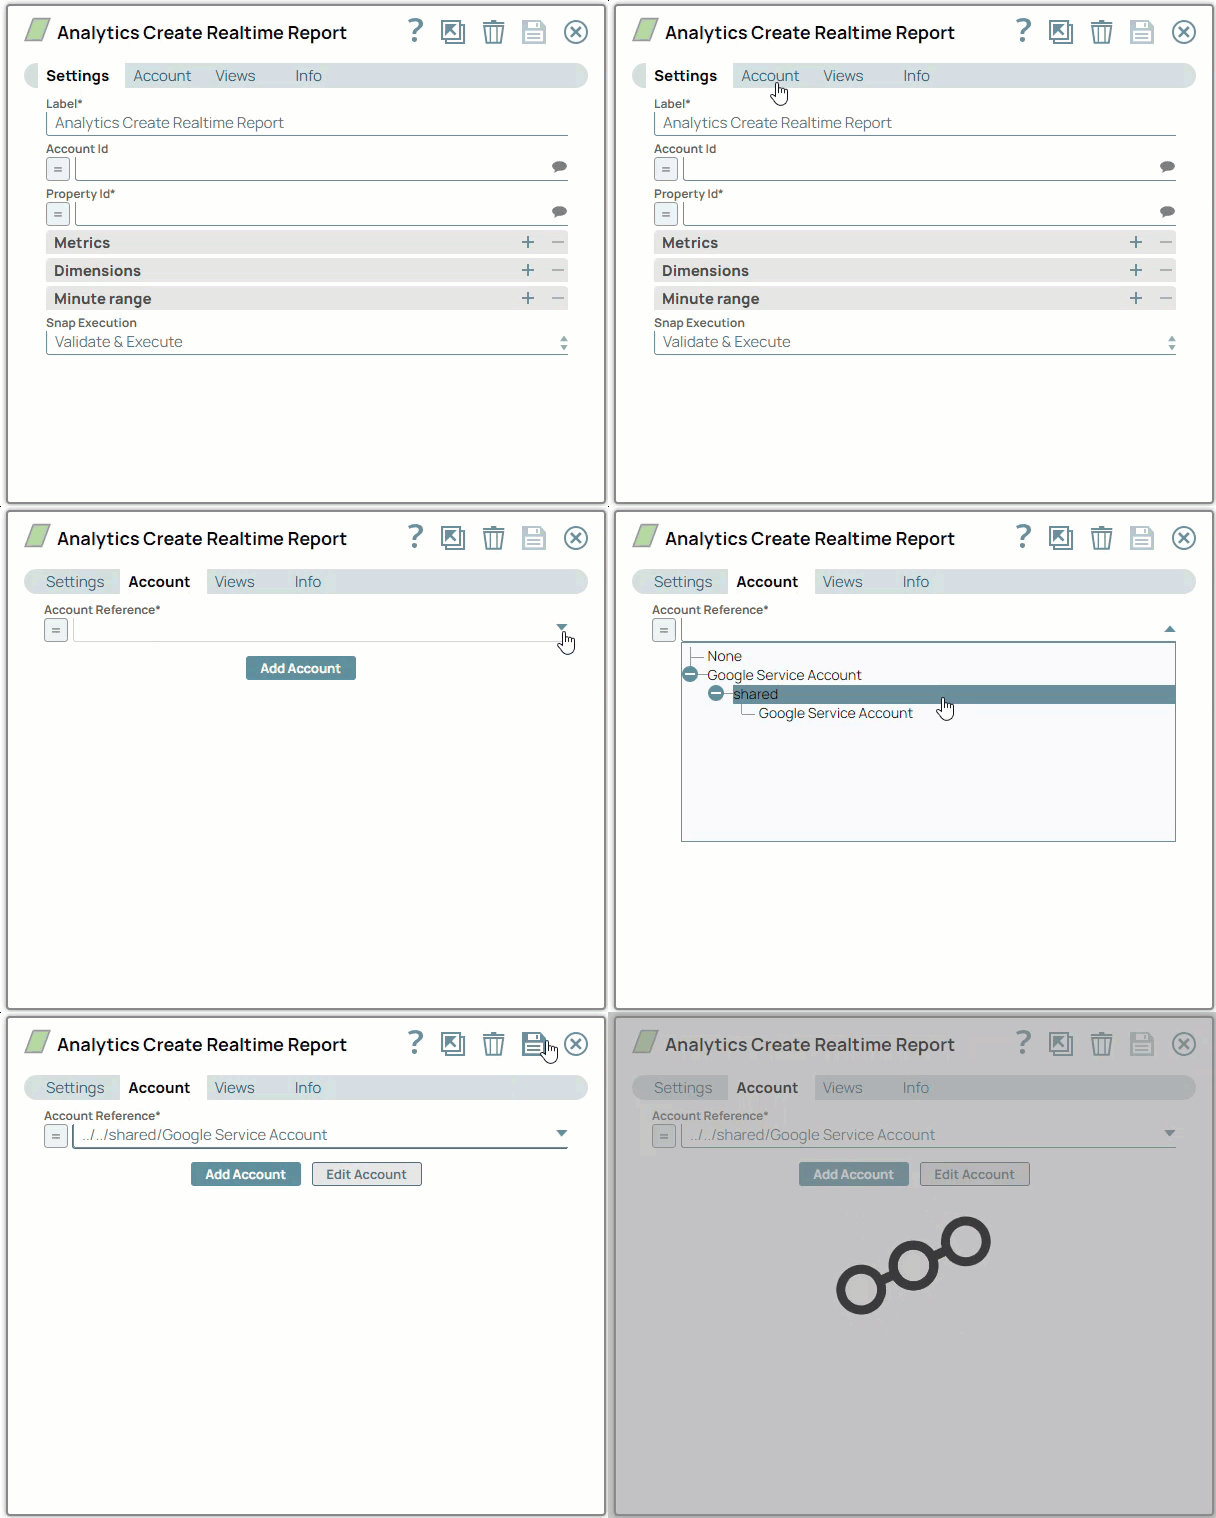
SnapLogic Designer organizes and displays all accessible accounts, sorting them based on account type and location.
- Write permissions for the SnapLogic Project in which to create the Account.
- All of the values necessary to access the endpoint, such as hostname or server path, username, and credentials.
-
In the Account tab, click the Expand
 icon to view the accounts to which you have access, and select the account that you want to use.
-
Click the Save
 icon.
icon.
Tip:
Enter additional information on this account in the Notes field of the Info tab.
This will help you–and other users–understand the purpose of the account, especially if there are multiple accounts of the same type.
Note:
When account labels are renamed, the Snap UI displays the old account name to users with read-only access.


