Synchronization schedules
SnapLogic AutoSync offers options for keeping the data in your CDW synchronized with the source. Cloud storage and CDW providers charge based on data volumes. For data pipelines that will move a lot of data, you might want to do a cost benefit analysis that weighs the importance of data freshness against the cost.
For example, an analytics package might tally up monthly expenses, so weekly or monthly synchronization might work well. However, when tracking data that changes frequently, such as buying trends, synchronizing every few minutes could enable a quicker response. When a use case involves historical data or data that changes infrequently, it might make sense to run the data pipeline on demand.
The following sections describe how to:
- Create a data pipeline without setting a schedule.
- Run a data pipeline once.
- Schedule a begin and an end date for synchronization in the wizard or when changing the schedule.
- Change a schedule.
- Run a data pipeline on demand..
- Run a data pipeline for a specified number of times.
Set the synchronization schedule
The last step in the AutoSync wizard gives you the option to set a synchronization schedule.
- Save the data pipeline without running it by selecting No schedule.
- Run the data pipeline once by selecting Run once. At the bottom of the screen, optionally select the time to start synchronization.
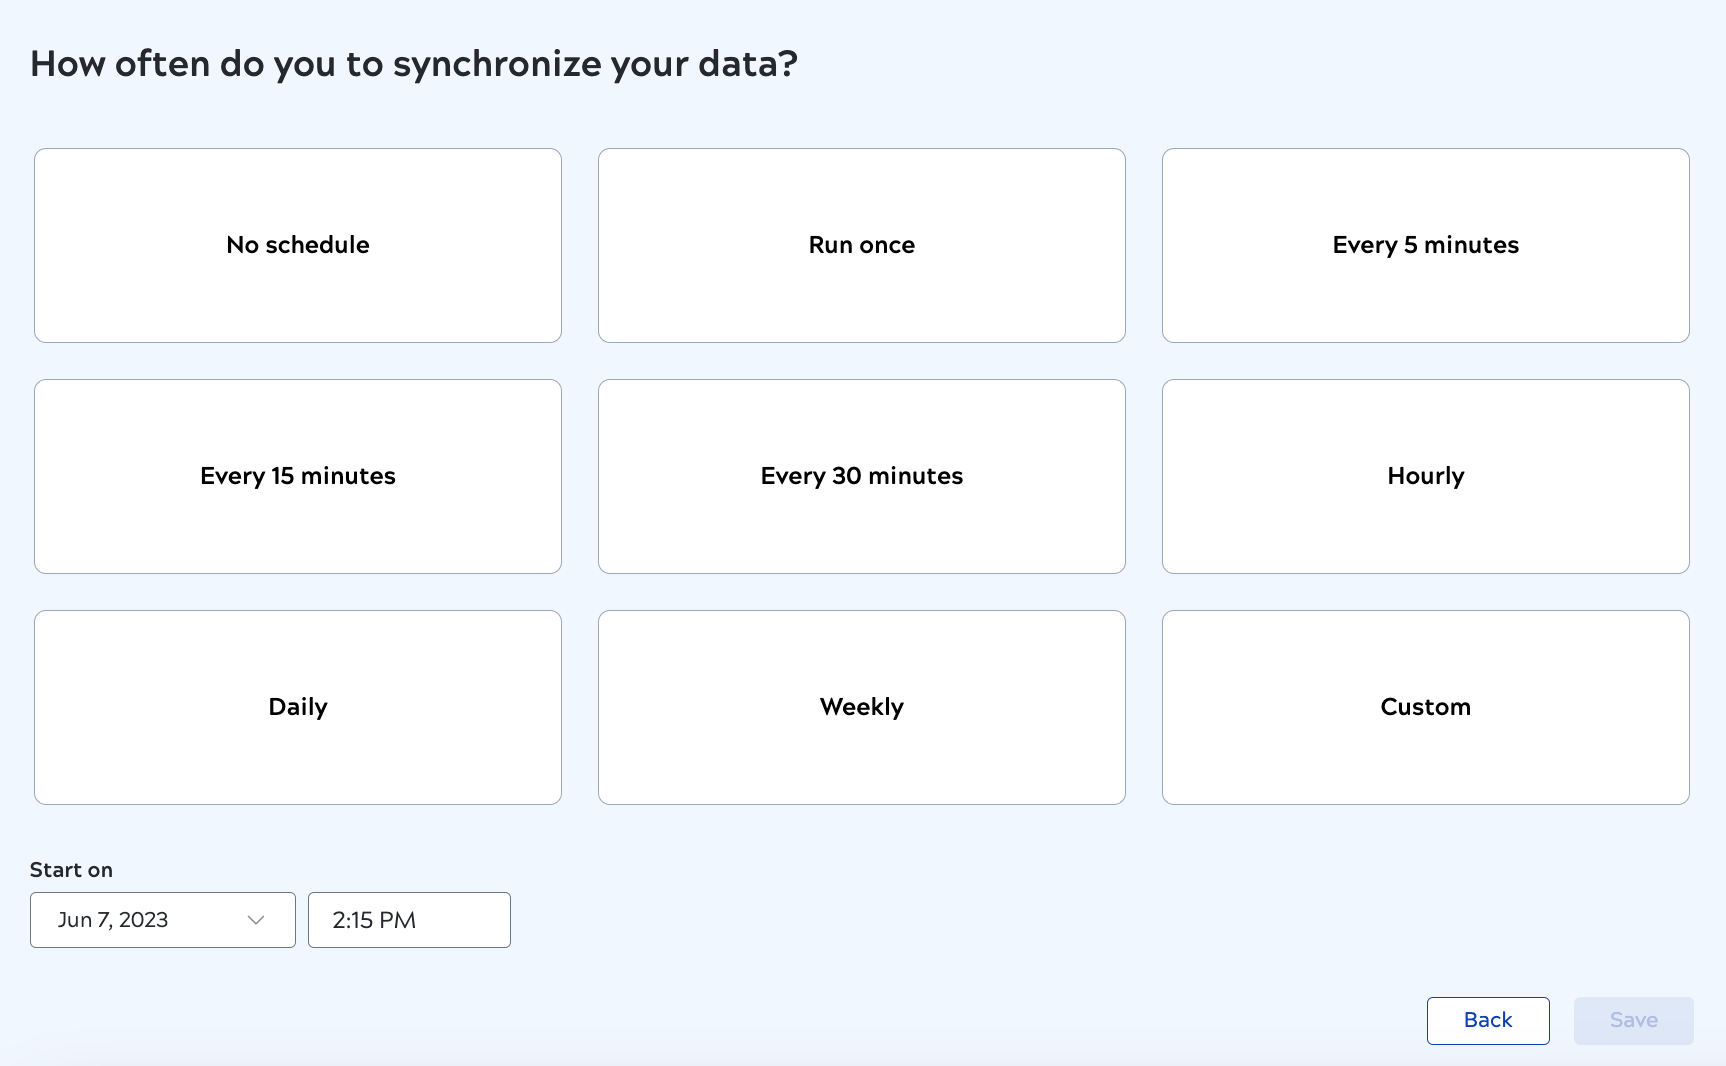
- Choose one of the preset schedules and optionally select the time to start.
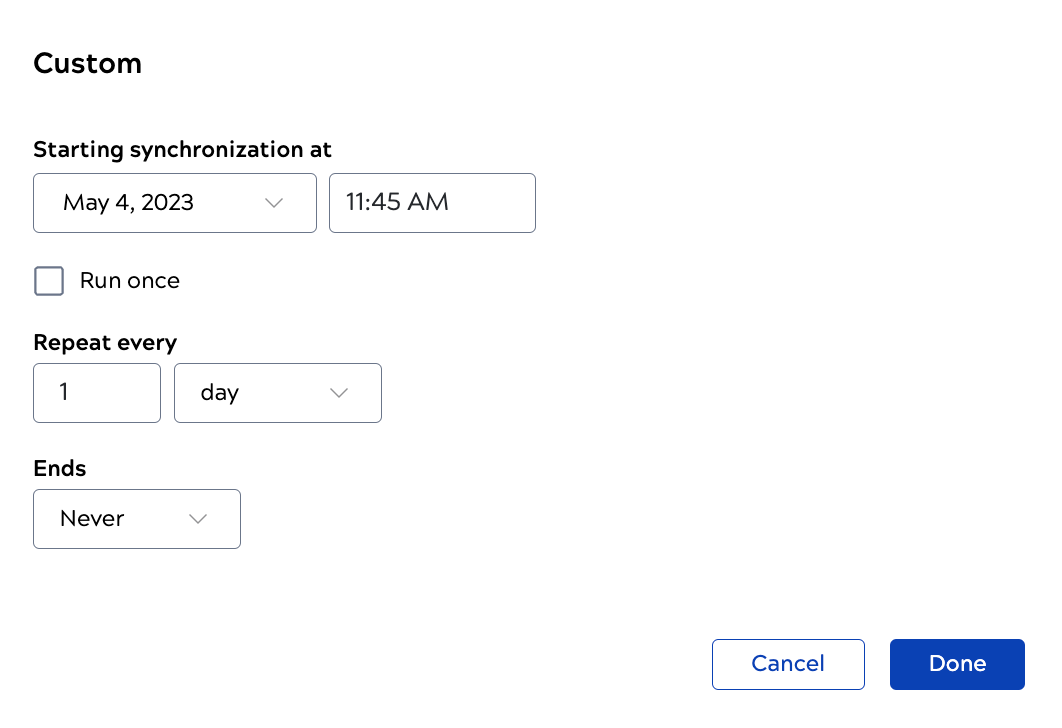
- Choose Custom if none of the preset schedules meet your needs. This option allows you to choose an end date to discontinue synchronization or set the schedule to run the data pipeline a specified number of times.
Run a data pipeline on demand
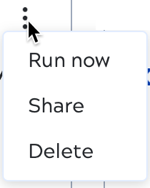
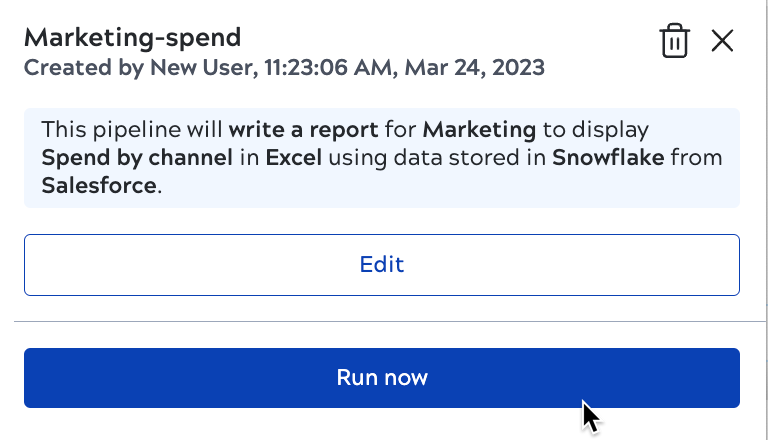
You can run a data pipeline at any time from the dashboard in two ways:
- Click the three dot menu on the card and select Run now:
- Click the card to open the details panel and click Run now:
Change the synchronization schedule
To change the synchronization schedule:
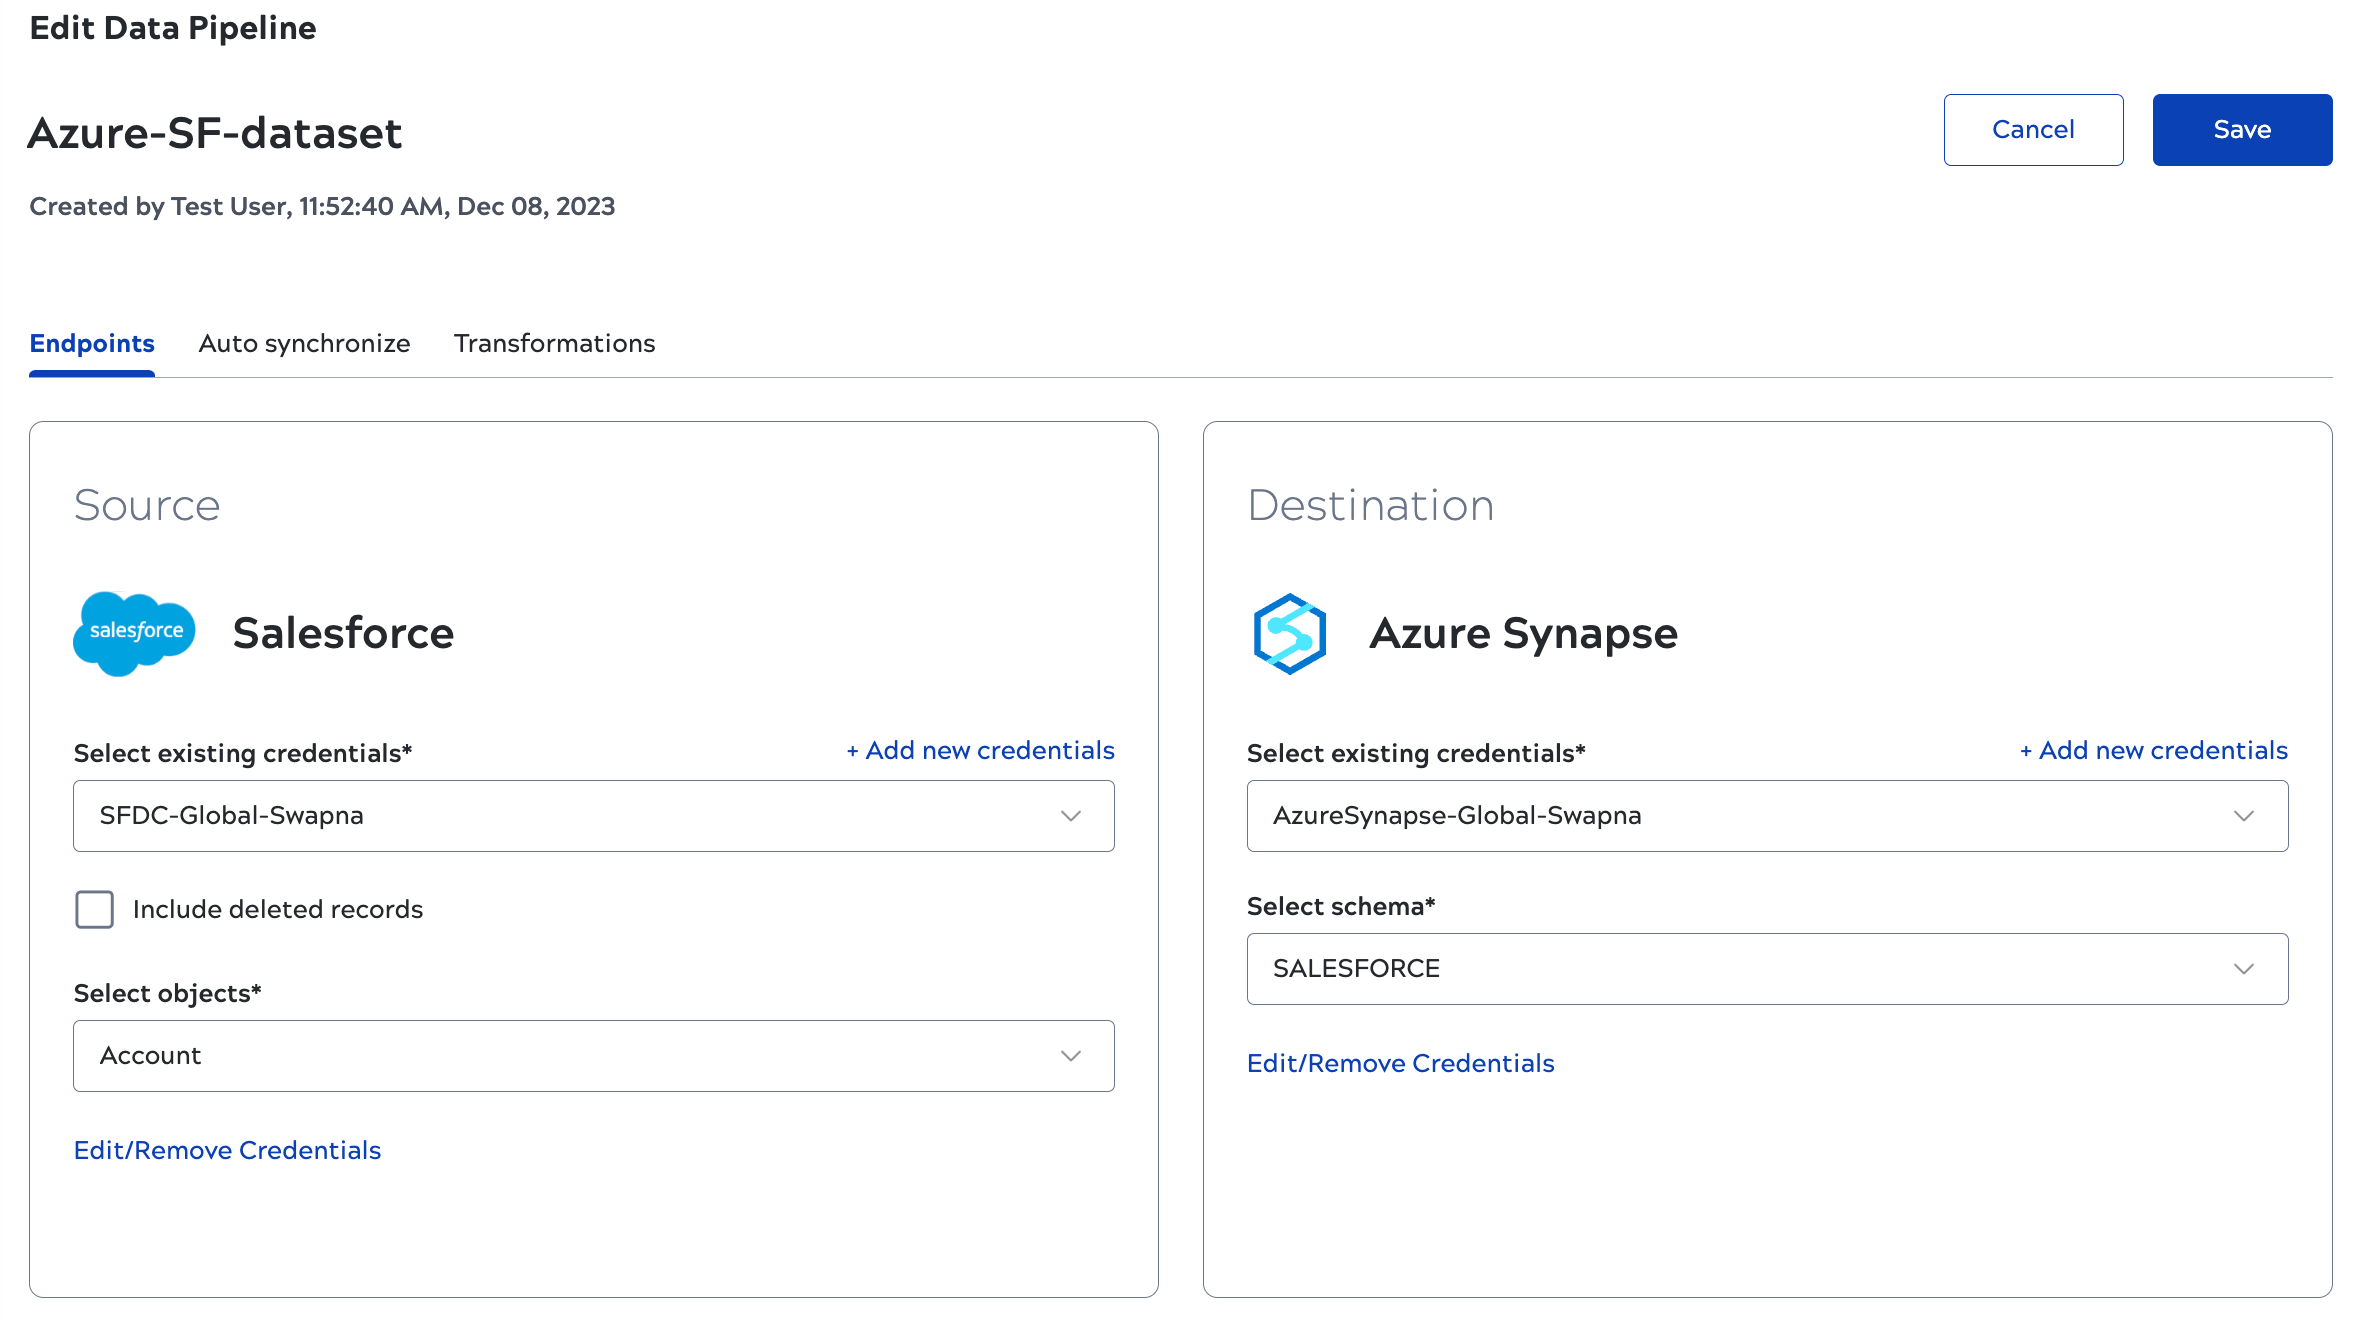
- Click the edit icon on the data pipeline card:
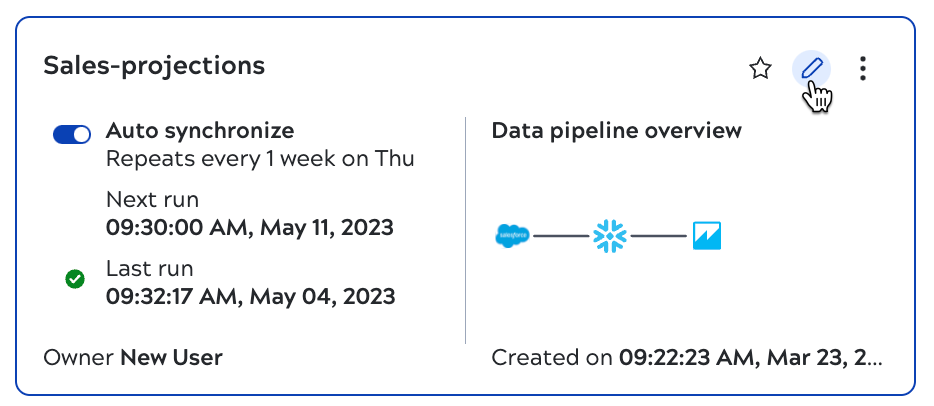
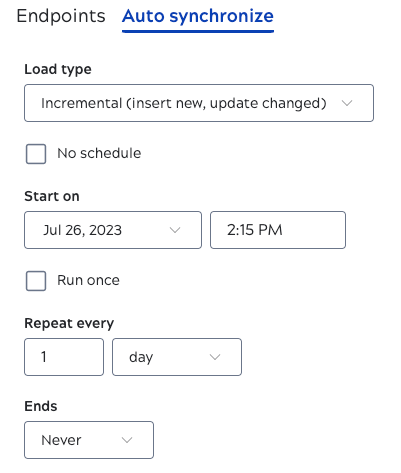
- The Edit data pipeline screen opens. Click the Auto synchronize tab:
- Set the schedule:
- Click Save.
Set the start and end time for synchronization
You can set a start and end time for synchronization when creating or editing a data pipeline.
- To set the synchronization schedule:
- When creating a data pipeline, in the wizard How often do
you want to synchronize your data? screen, click Custom to open
the dialog:
- To edit an existing schedule:
- Click the edit icon on the data pipeline card:

- The Edit data pipeline screen opens. Click the Auto
synchronize tab:

- Click the edit icon on the data pipeline card:
- When creating a data pipeline, in the wizard How often do
you want to synchronize your data? screen, click Custom to open
the dialog:
- For the Start on field, select a date and time.
- Select Run once or a value for Repeat every.
- From the Ends dropdown, select On.
- Set a time for the schedule to end.
- Click Done.
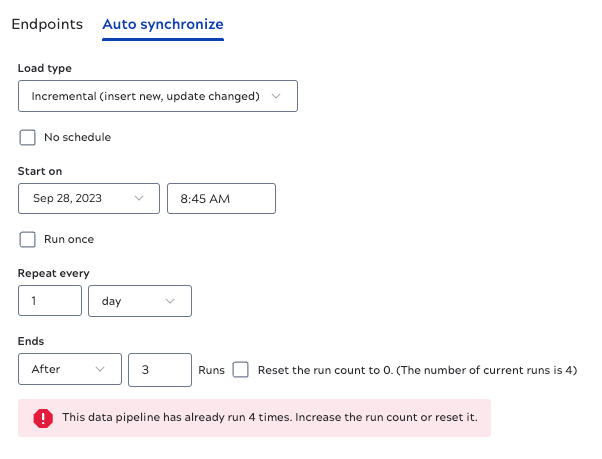
Run a data pipeline for a specific number of times
Specify the number of times a data pipeline will run when creating or editing a data pipeline.
- Open the synchronization schedule in one of the following ways:
- When creating a data pipeline, in the wizard How often do
you want to synchronize your data? screen, click Custom to open
the dialog:
- To edit an existing schedule:
- Click the edit icon on the data pipeline card:
- The Edit data pipeline screen opens. Click the Auto
synchronize tab:
- Click the edit icon on the data pipeline card:
- When creating a data pipeline, in the wizard How often do
you want to synchronize your data? screen, click Custom to open
the dialog:
- For the Start on field, select a date and time.
- Select a value for Repeat every.
- From the Ends dropdown, select After.
- Set a number of times to run.
- Click Done.