


OAuth2.0 account configuration in Microsoft Entra
The Snaps in the Azure OpenAI LLM Snap Pack require an OAuth2 account to access the resources. To authorize the OAuth2 account successfully, create and configure an application corresponding to the account as shown in the workflow.

-
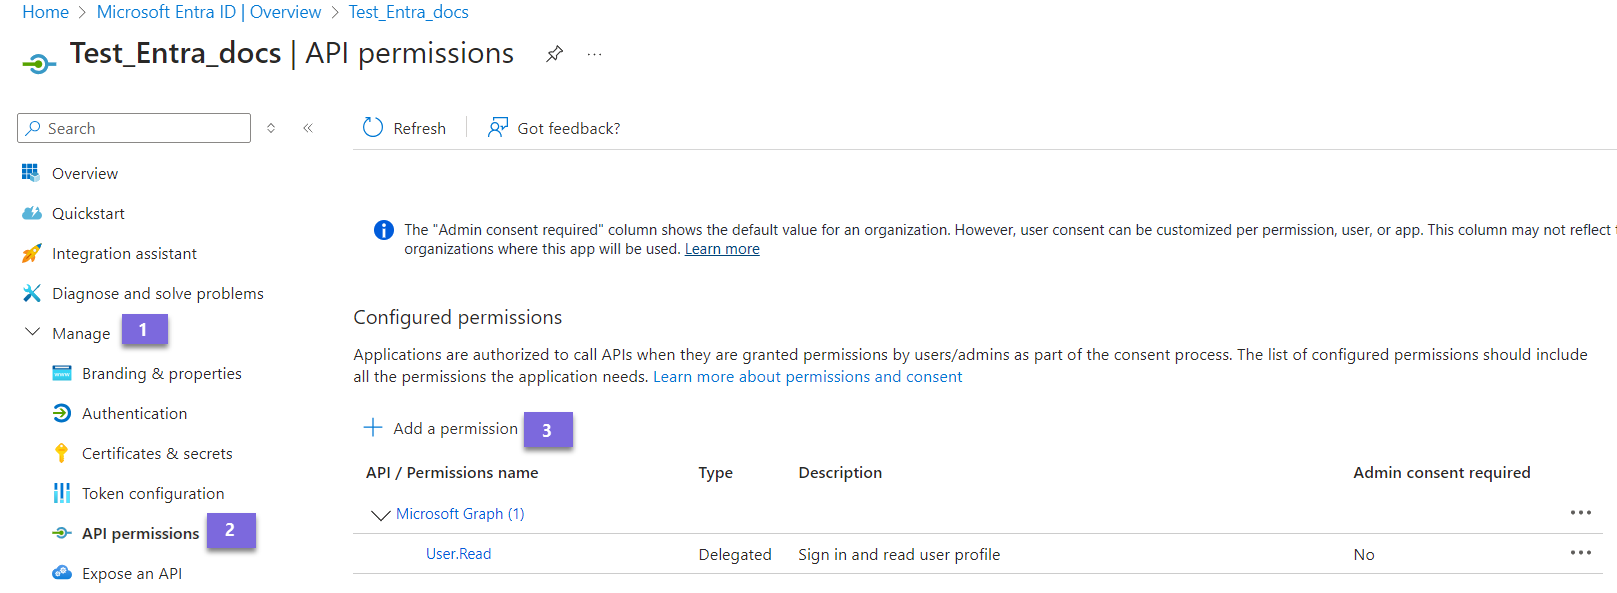
Define Permissions.
-
On the left navigation panel, navigate to Manage, select .
-
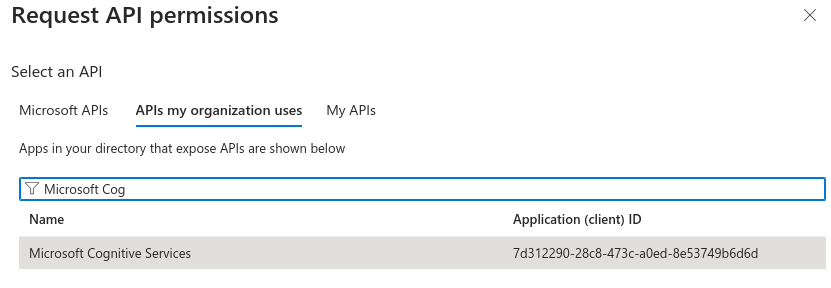
On the Request API permissions window, click the APIs my Organization uses.
-
Search for Microsoft Cognitive Services and select it.
-
On the left navigation panel, navigate to Manage, select .
-
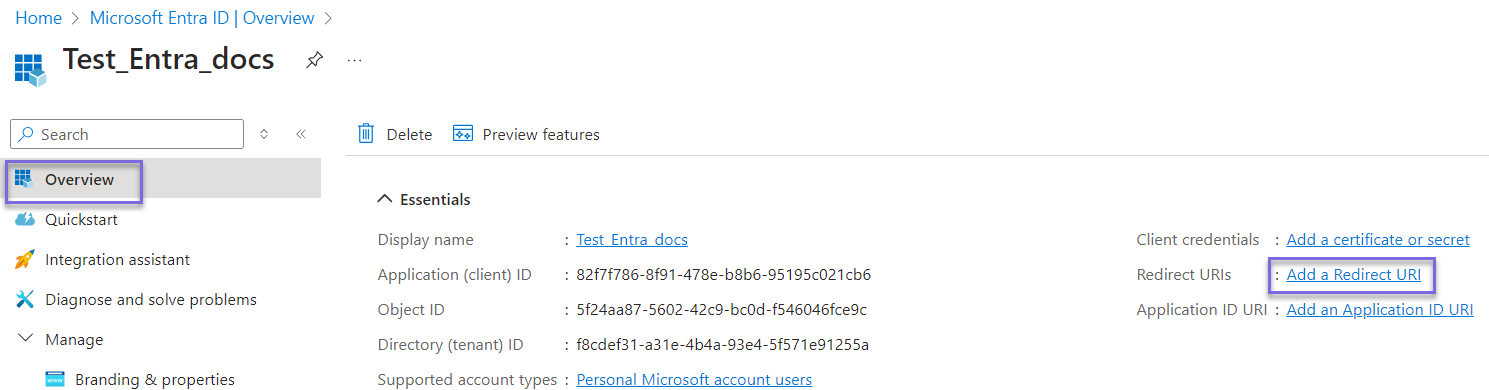
Add a Redirect URI.
-
In the navigation panel, click . You will be redirected to the Platform configurations page.
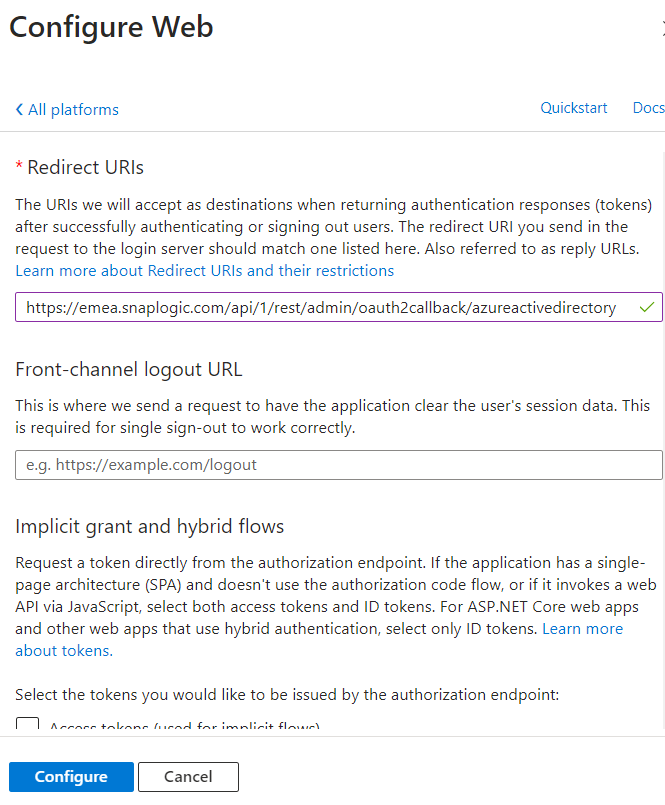
- Under Platform configurations, click Add a platform.
The Configure platforms window displays.
- Select Web and specify the Redirect URI in the following format:
where thehttps://<control-plane-name>.snaplogic.com/api/1/rest/admin/oauth2callback/<snap-pack-name><control-plane-name>corresponds to the domain part of your SnapLogic URL — elastic (global control plane) or emea (EMEA control plane)For example:
https://emea.snaplogic.com/api/1/rest/admin/oauth2callback/azureactivedirectoryhttps://elastic.snaplogic.com/api/1/rest/admin/oauth2callback/azureactivedirectory
- Click Configure. A popup message displays indicating that the application is successfully updated.
- Click Save. The Redirect URIs are added in the application.
- Under Platform configurations, click Add a platform.
-
In the navigation panel, click . You will be redirected to the Platform configurations page.
-
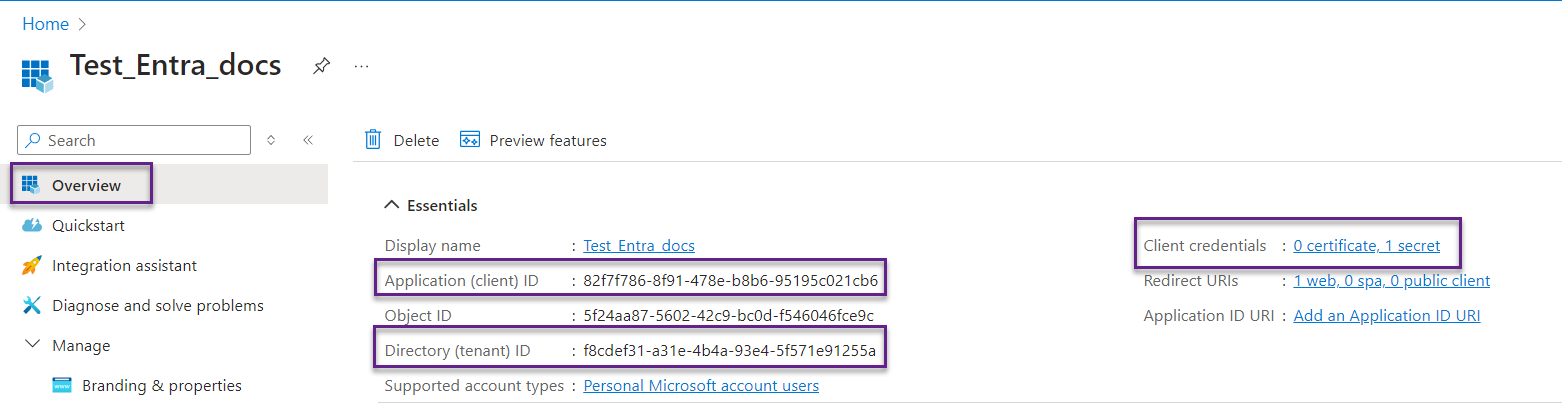
Locate the application credentials in the Azure Portal.
To authorize your account in SnapLogic, you must have the following application credentials:
- Application (client) ID
- Directory (tenant) ID
- Client secret value
-
Under Essentials, note the Application (client) ID and Directory (tenant) ID needed for the Snap account.
-
In the Add a client secret window, enter the Description, select an option for Expires from the dropdown list, and click Add.
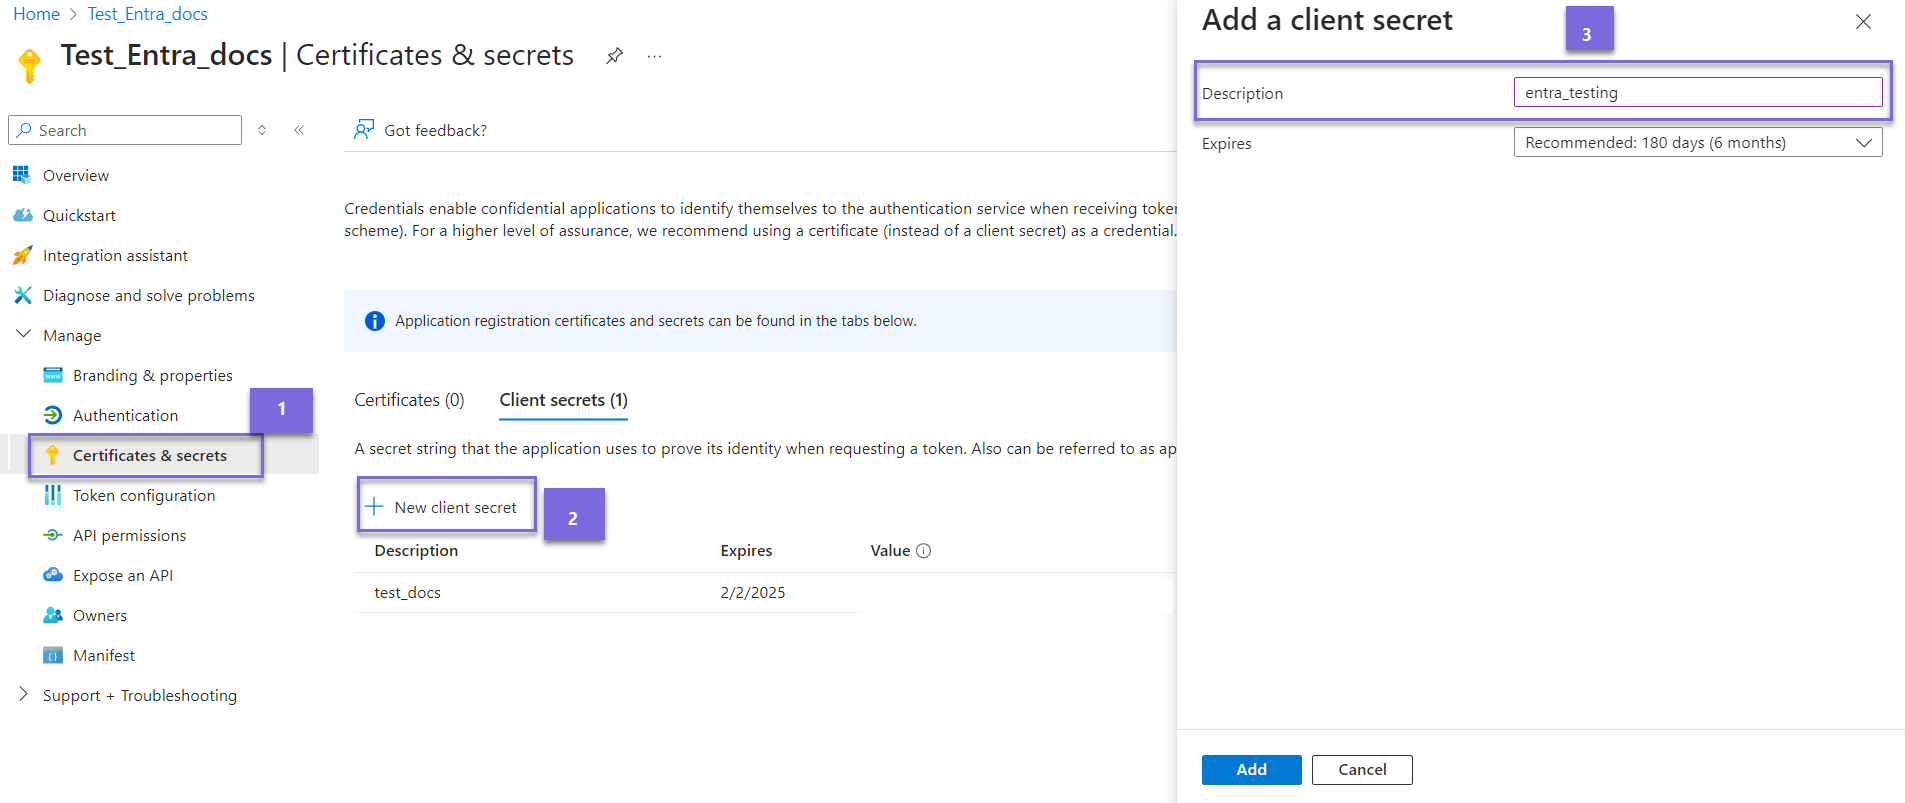 Note: You can copy the client secret value only after it is generated.The client secret value and secret ID are generated. This value and ID are required to configure the OAuth2 account.
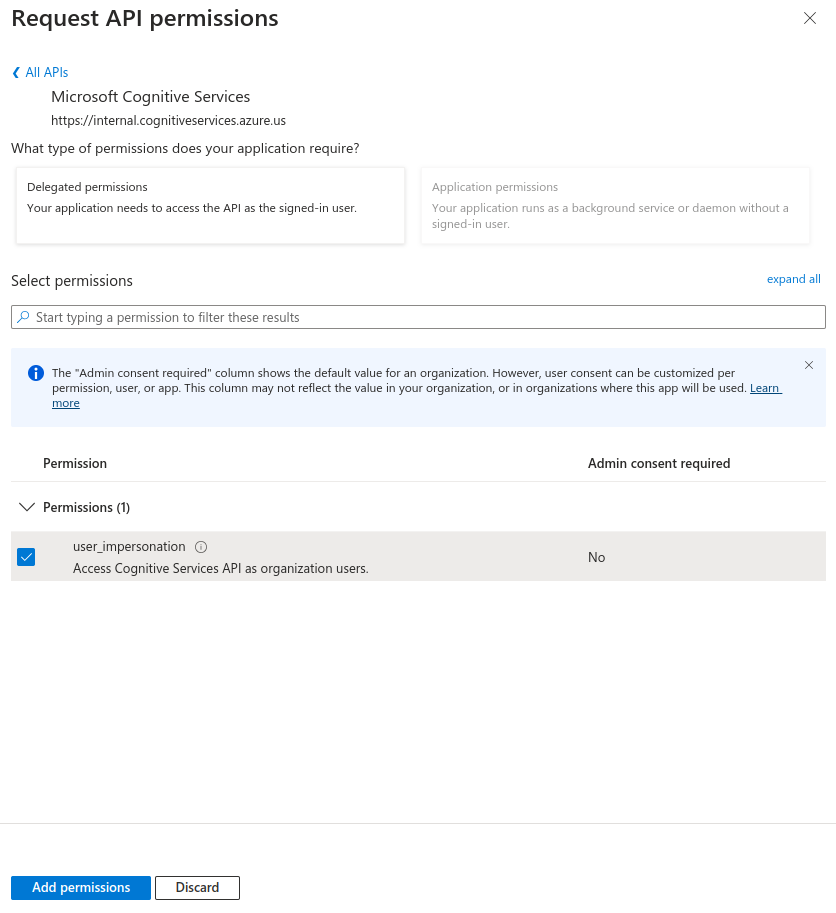
Scopes and permissions required
Permission Display String Description Admin Consent Required? Cognitive Services OpenAI User OpenAI User Basic access for viewing and using deployed models. No Cognitive Services OpenAI Contributor OpenAI Contributor Create, edit, and deploy models. No Cognitive Services Contributor Contributor Full access including resource management. No Cognitive Services Usages Reader Usages Reader View usage and quotas. No
Error 401
Token is invalid.
Provide a valid token and reauthorize the account.
The redirect URI specified does not match the reply URI configured for the application.
Incorrect redirect URI specified by user.
Add the following redirect_uri: https://elastic.snaplogic.com/api/1/rest/admin/oauth2callback/azureactivedirectory.
URL error when invoking the operation
Ensure the tenant domain name is correct.
Ensure that Directory (tenant) ID noted from the application is in the correct format. Example: 2060aafa-89d9-423d-9514-eac46338ec05