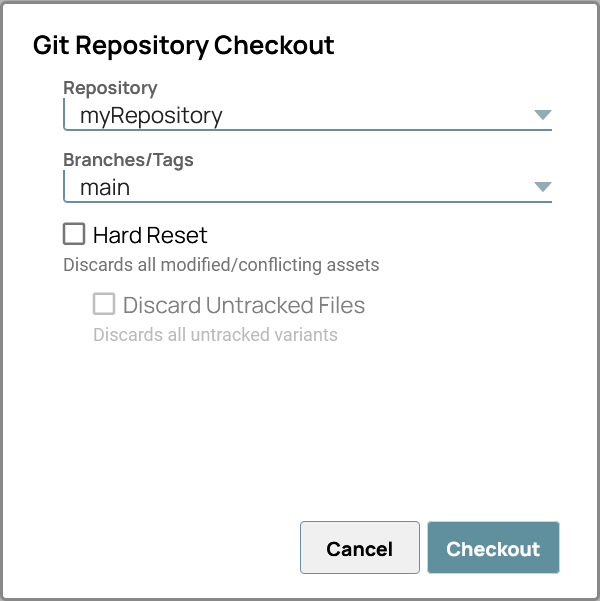
- Repository. Select the repository to switch to.
- Branches/Tags. Select the branch or tag to switch to or enter a unique
name to create a new branch. You can filter the list by typing the first letters of the branch or tag name.
-
Hard Reset: Replaces all assets in the project or project space with those
in the Git repository. Discards all uncommitted changes (modified or conflicting assets) and
assets with an Added, Tracked, or Removed status.
-
Discard Untracked Files: With Hard Reset selected, deletes all untracked files from the project or project space during checkout.
Important: You can select Hard
Reset and leave Discard Untracked Files unchecked if you want
to retain a set of assets and not track them.