


Install a Groundplex on Docker
Steps to install a Groundplex on Docker
SnapLogic support for the Groundplex on a Docker container empowers you to optimize IT infrastructure costs while benefiting from containerized technology. Our latest Docker image is built on AlmaLinux, ensuring compatibility and reliability. To access the most recent Docker image, simply execute a pull operation from our Docker Hub repository as suggested in the installation steps below.
- Familiarity with the SnapLogic Snaplex.
- Review the Groundplex requirements and depending on your OS, review Groundplex installation for Linux or Windows.
Install Groundplex in a Docker container
For Docker-based Snaplex installation, updating the Docker images also updates the Java Runtime Environment (JRE) version.
Important: We recommend installing the latest JRE 11 version available at Latest Releases | Adoptium.Note: If you are running with 11.0.10 onwards, endpoint connections to TLS 1.0 and 1.1 are disabled by default. We recommend that you update the endpoint to support TLS 1.2 or higher, for security.- Retrieve the latest Docker image from Docker Hub using the following pull command:
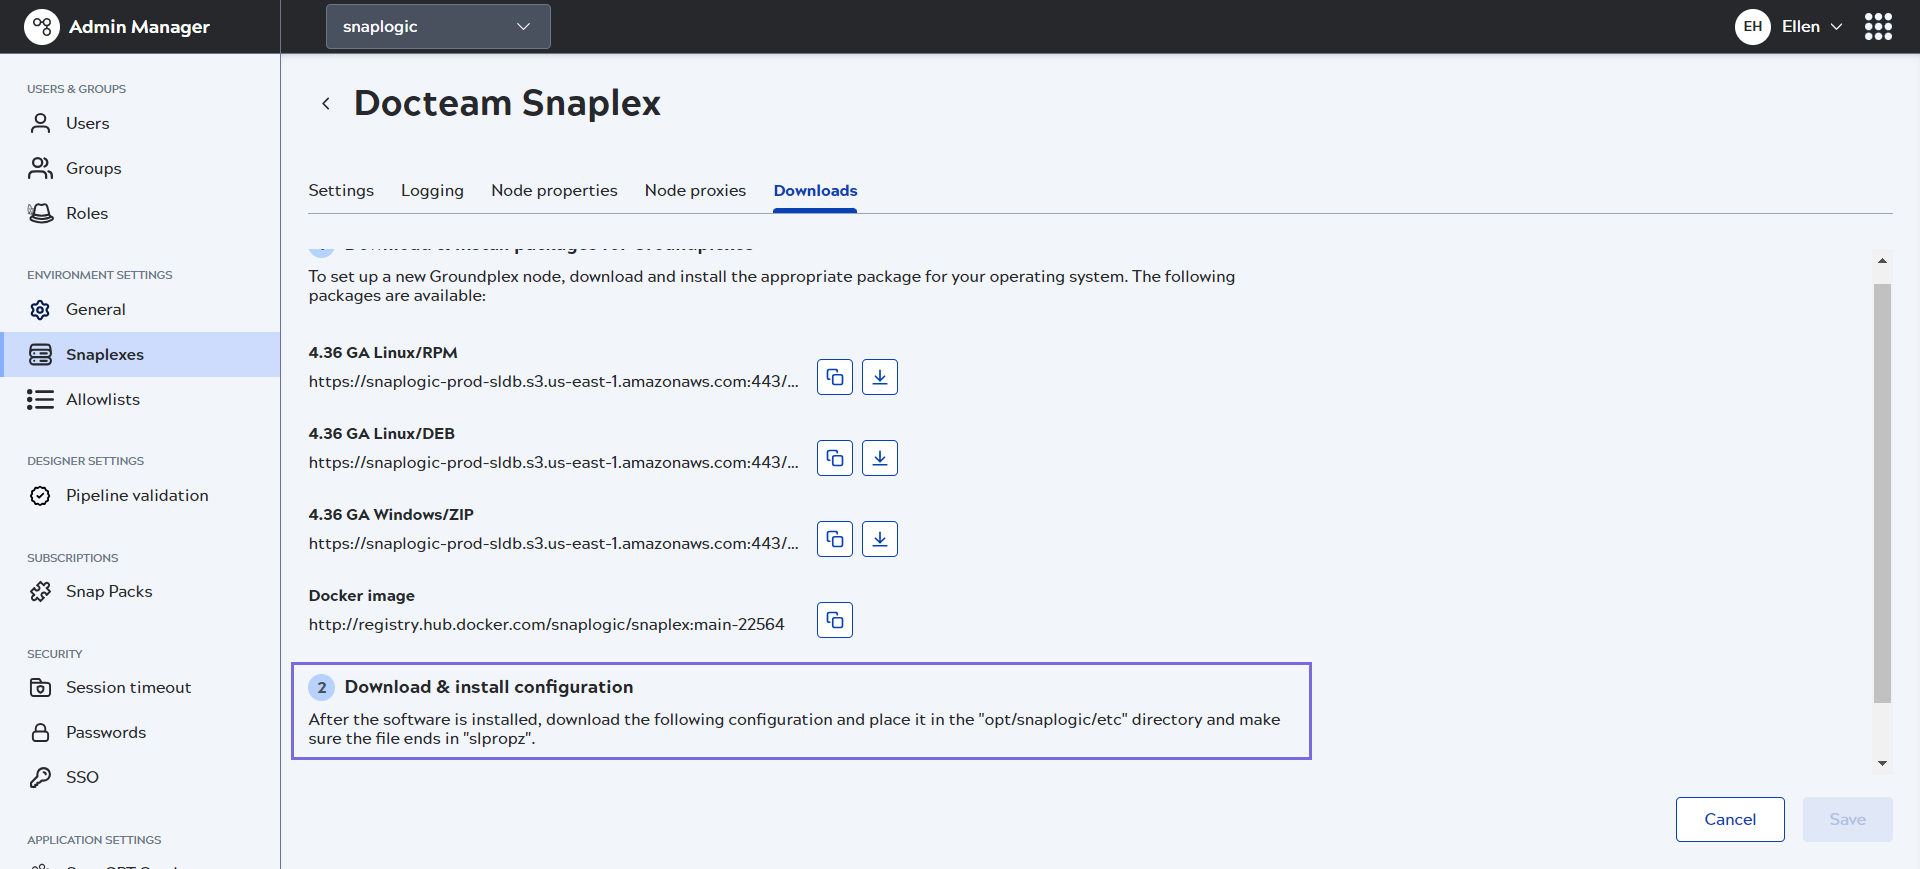
docker pull snaplogic/snaplex:main-<build number> - In Admin Manager, navigate to Snaplexes screen to view pages listing the Snaplexes and select the Groundplex instance to display the Update screen.
- In the Downloads tab, click
 in the Configuration option to download the slpropz file for your Groundplex node.
- After downloading the configuration file, you are ready to launch your Groundplex as a Docker container.
Important: Following the upgrade of the Docker Image to version 4.39 GA, the JDK
version has been updated from 11.0.17 to 11.0.24. This upgrade does not impact any existing
pipelines.

Important: Depending on how you install Docker, you may need to use sudo.
For more information on the Docker run command, refer to Docker Run.