


OAuth 2.0 setup in Google
This document provides a step-by-step guide on how to create and configure an OAuth2 Client in the Google API Console for integrating Google Drive with external applications. To authorize the OAuth2 account successfully, create and configure an application corresponding to the account as shown in the workflow.
- A Google account with access to the Google API Console.
- Understanding of OAuth 2.0 authentication flow.
- Permissions to enable APIs and manage credentials.
-
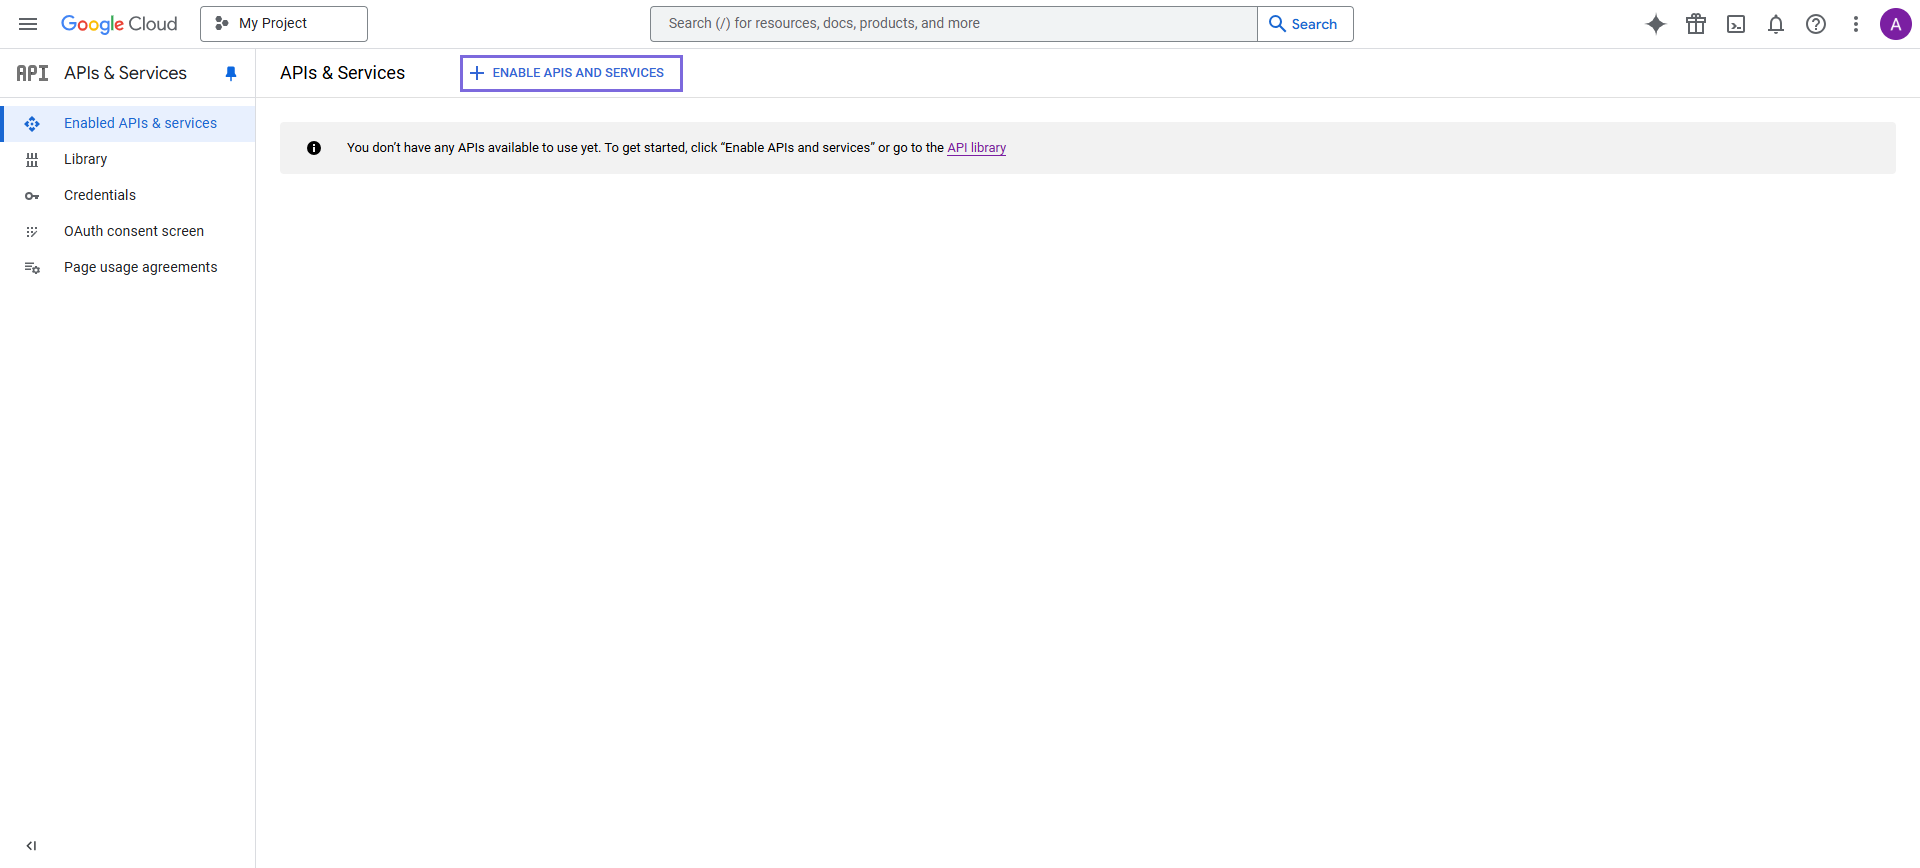
Enable the Required API
-
Click Enable.
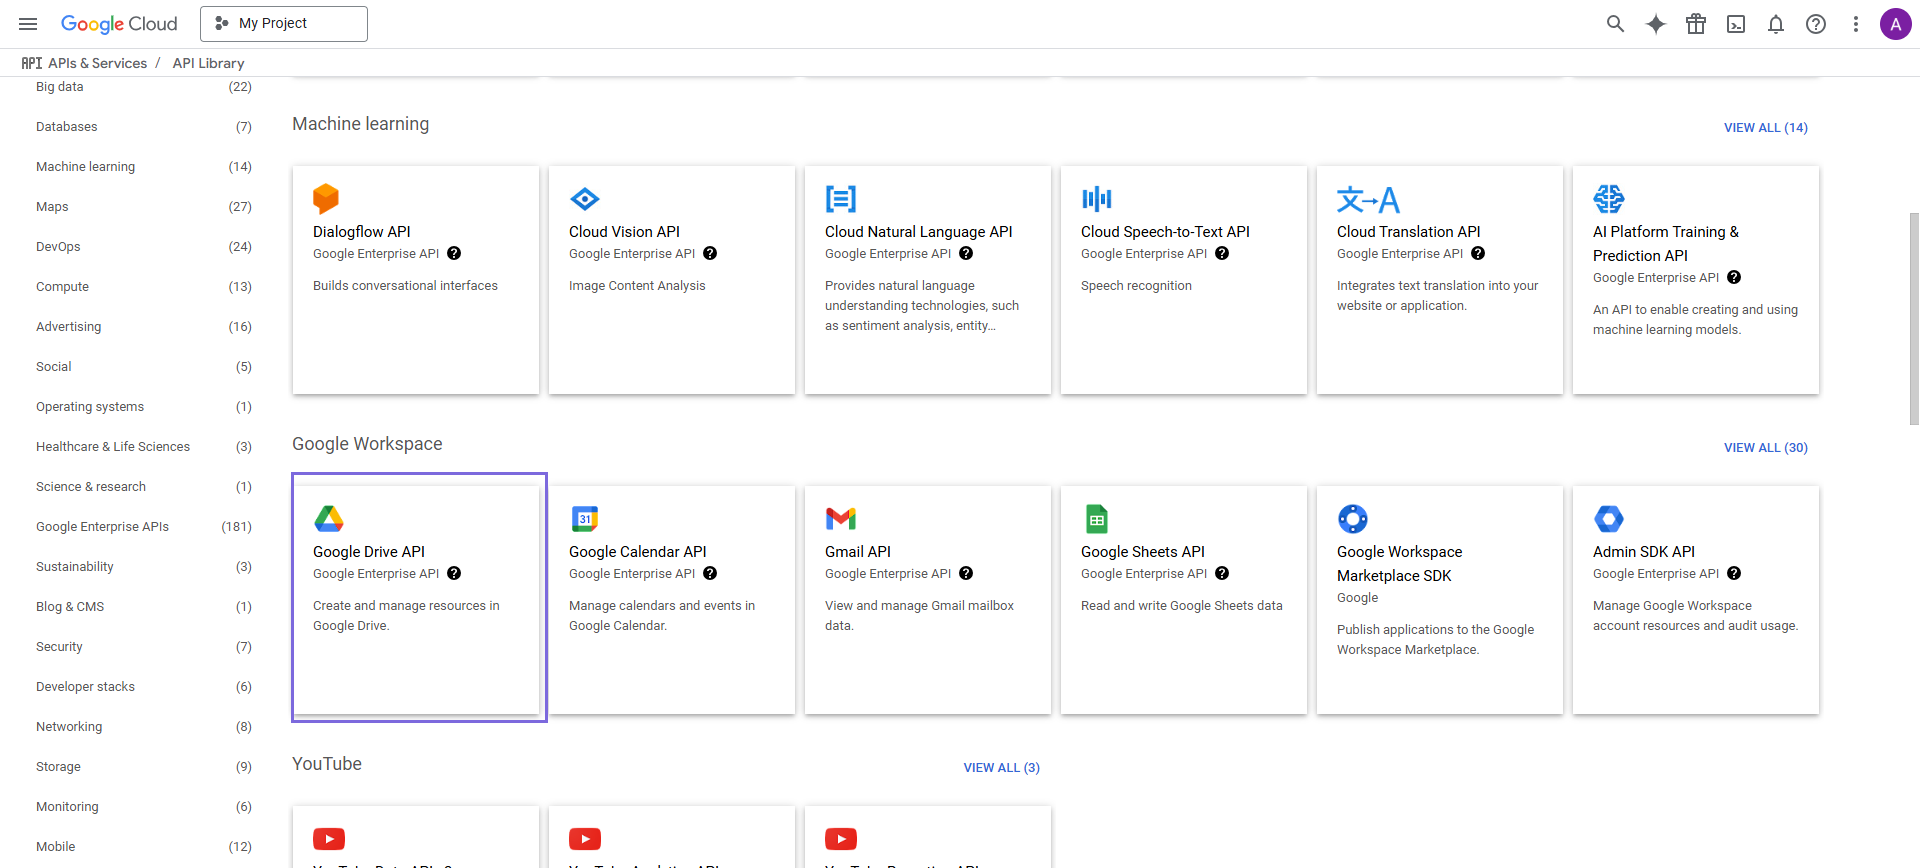
-
Click Enable.
-
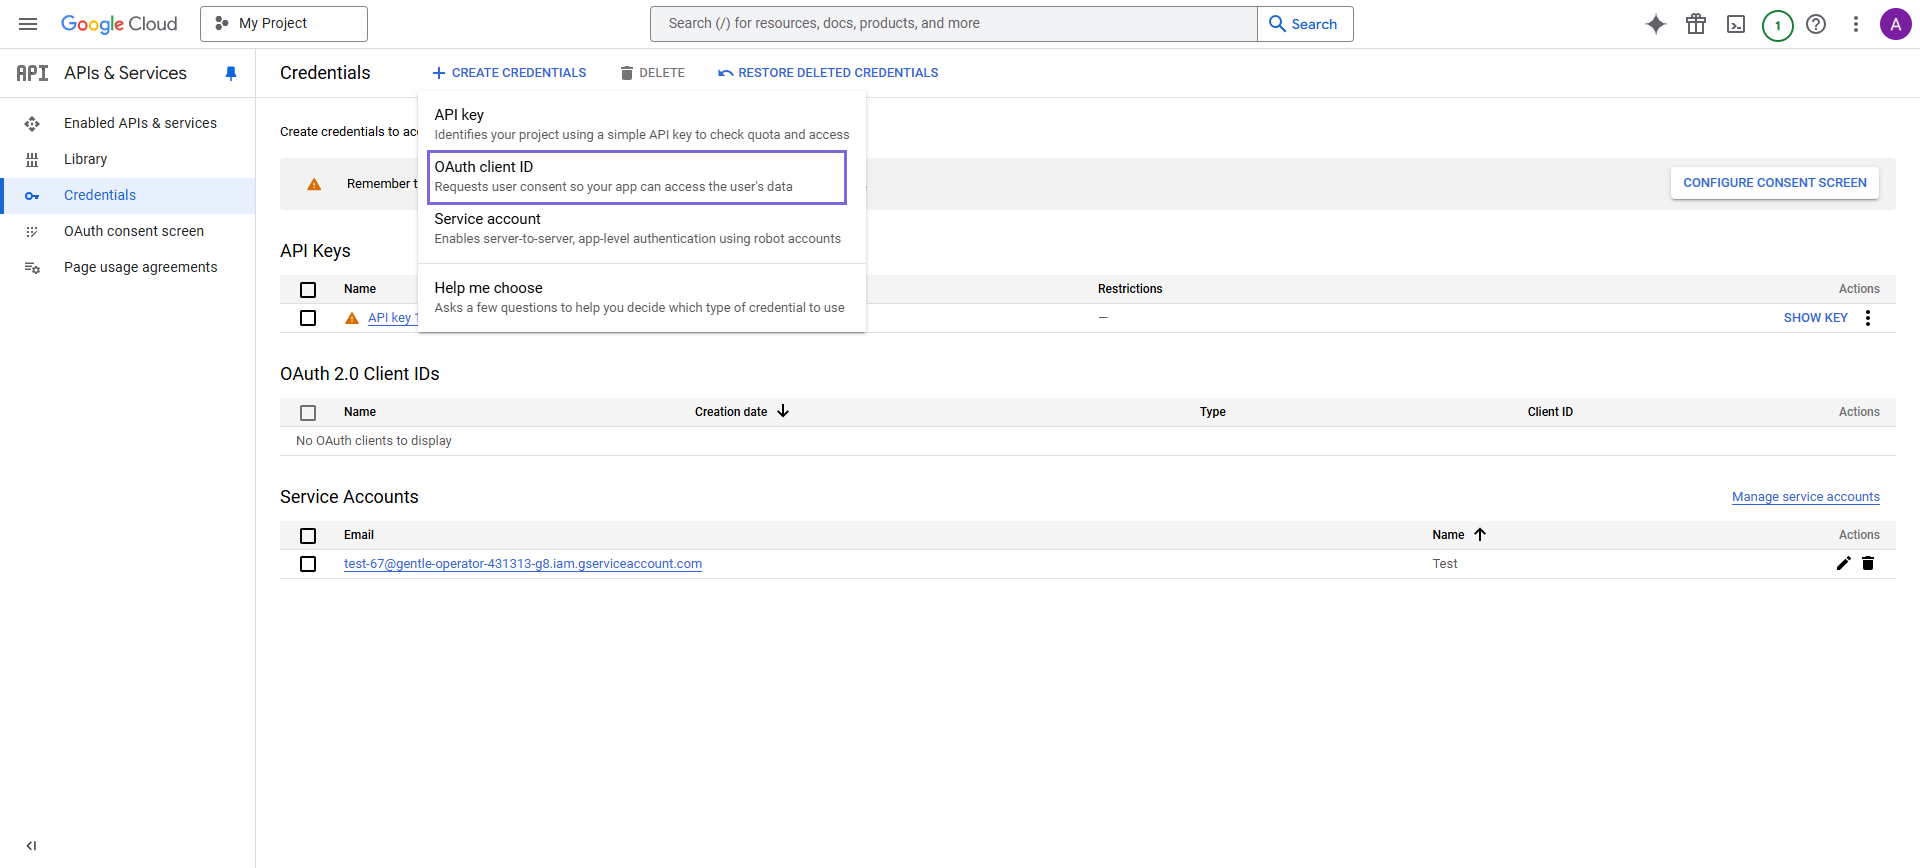
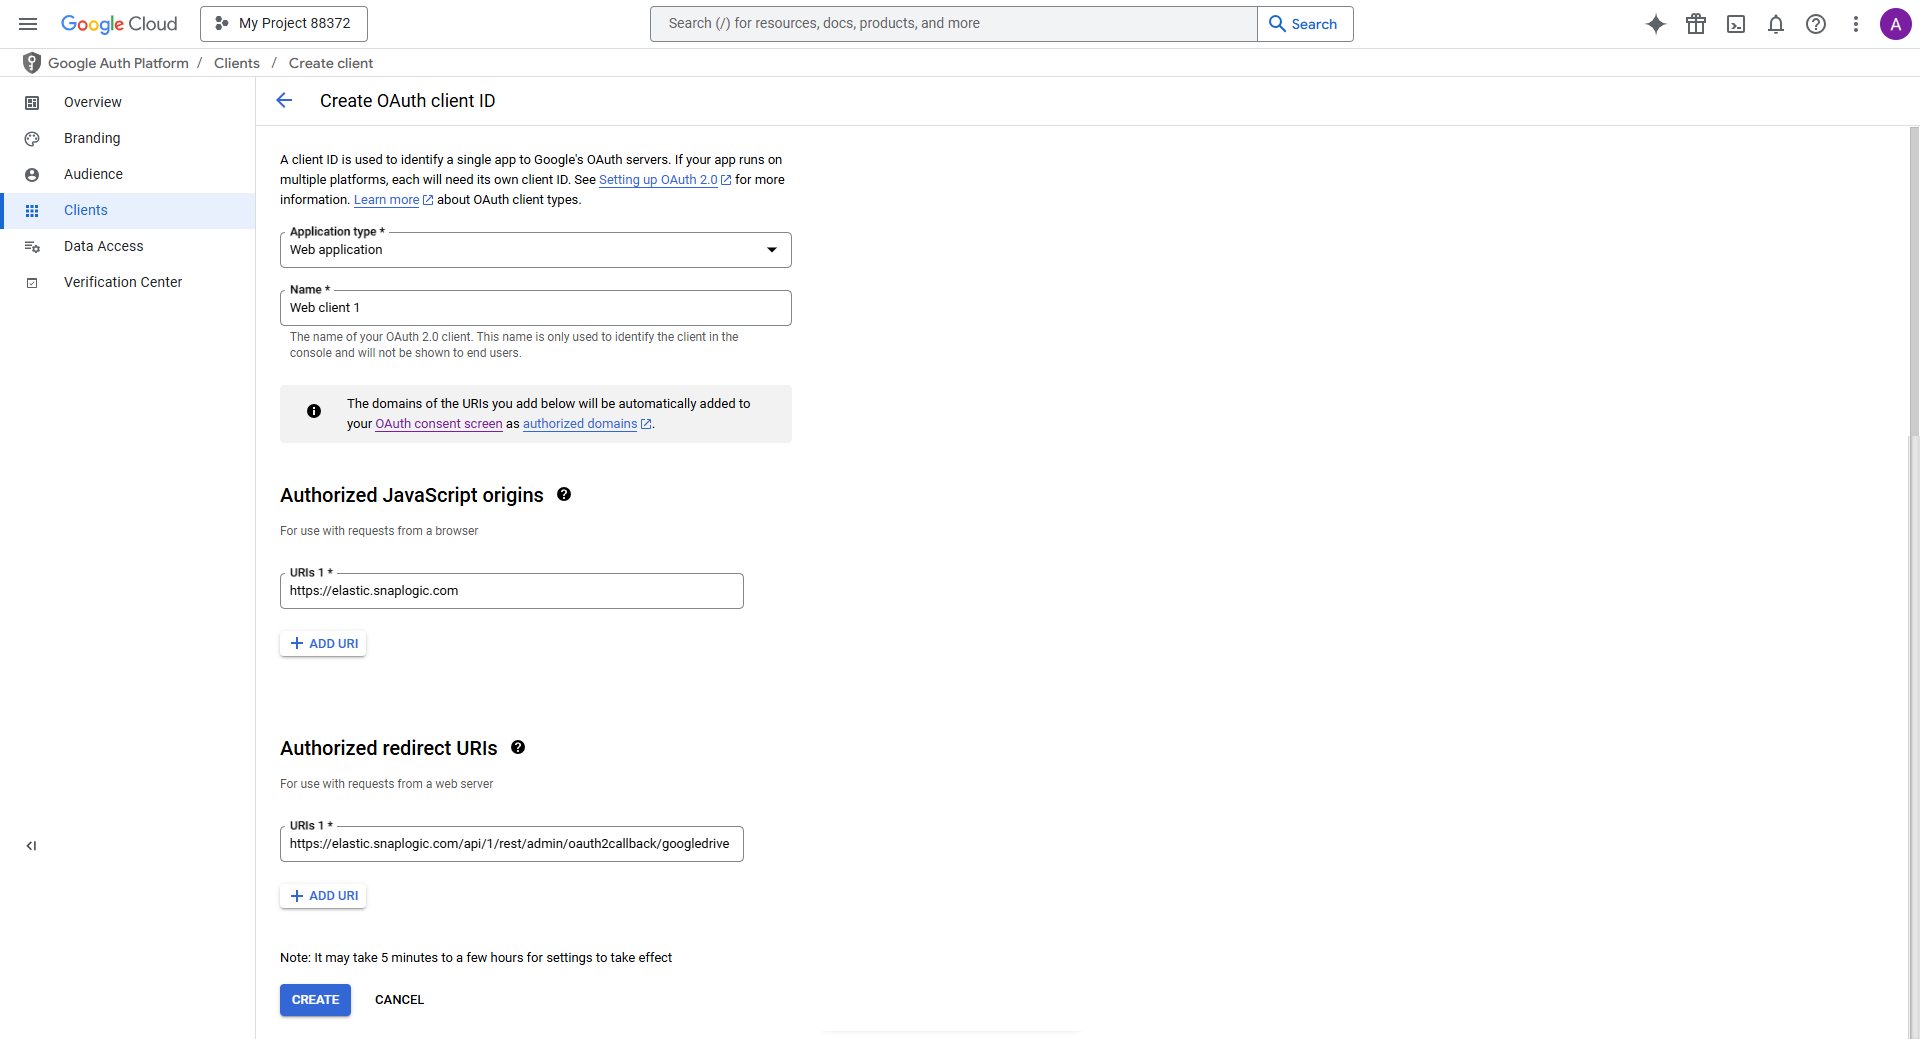
Create OAuth credentials
-
Click Create and note down your Client ID and Client
Secret.
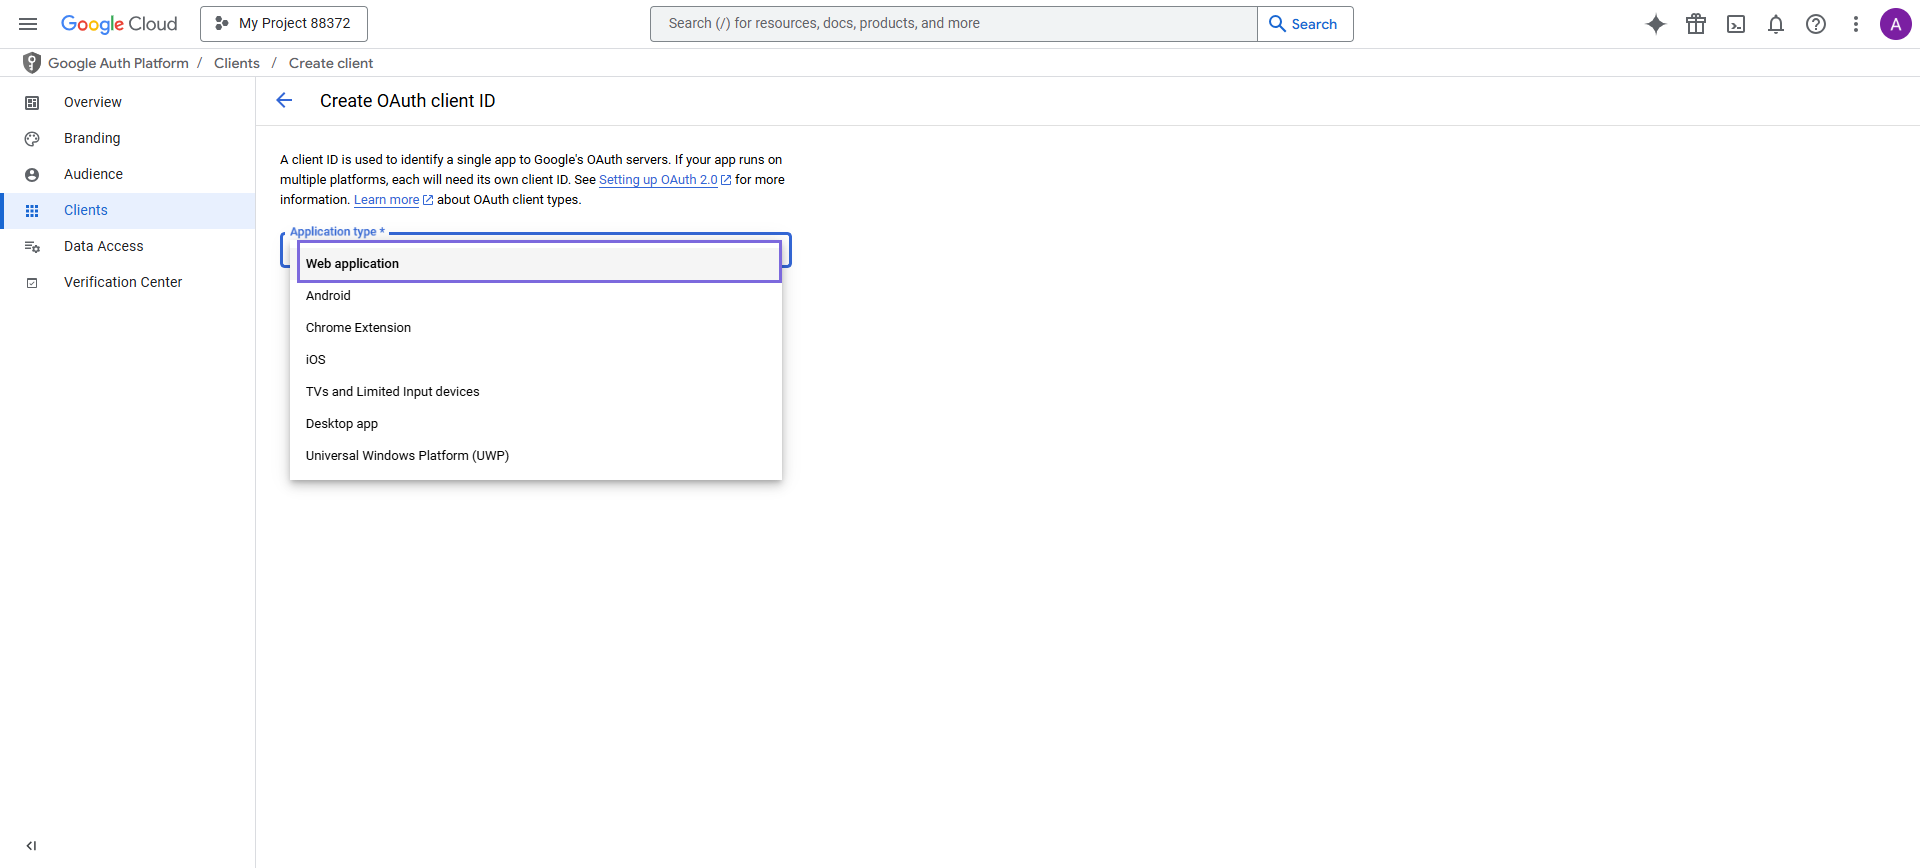
-
Click Create and note down your Client ID and Client
Secret.
-
Configure OAuth 2.0 Scopes
-
Click Update.

Authorization Endpoint Configuration Settings
Use the following configuration settings for successful OAuth2 authentication:
Parameter Value scopeRequired OAuth2 scopes. These must be defined in the OAuth2 Client in the Google Console (e.g., https://www.googleapis.com/auth/drive) Learn more. Refer to OAuth 2.0 Scopes for Google Drive API to find the necessary scope for each REST resource.access_typeoffline(Ensures refresh tokens are issued for long-term access.)redirect_urihttps://elastic.snaplogic.com/api/1/rest/admin/oauth2callback/googledrive or https://emea.snaplogic.com/api/1/rest/admin/oauth2callback/googledrive promptconsent(Forces user consent during authentication, ensuring fresh permissions are granted.)Important: The defined scopes must match those configured in the Google OAuth Client in the console. -
Click Update.