


Pass Execution Status Codes through Binary Header Properties of the CSV Formatter Snap
In this example, we shall send CSV data from ServiceNow into SnapLogic using a Triggered Task. We shall then see how you can use the CSV Formatter Snap in the triggered pipeline to manipulate the execution status (error) codes generated during pipeline execution.
Download this pipeline
For the example to work, the pipeline triggered by the Task should lead to an error. We shall route the error output to an error view. We shall then use the error view to manipulate the Status header of the error document. Once this is done, the parent Task sends the updated error output back to ServiceNow, and we should see the updated status code in the ServiceNow Administration interface.
- Create a pipeline that accepts CSV data, generates an error, and manipulates the error data to update the status code.
- Create a Triggered Task that can trigger the Pipeline created in Step 1.
- Configure ServiceNow to send and receive CSV data from the Triggered Task created in Step 2.
Let us look at each of these tasks in some detail:
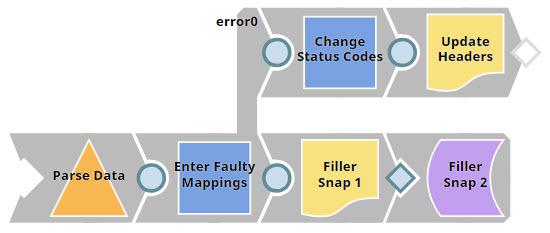
Create a pipeline to accept CSV and manipulate error document data
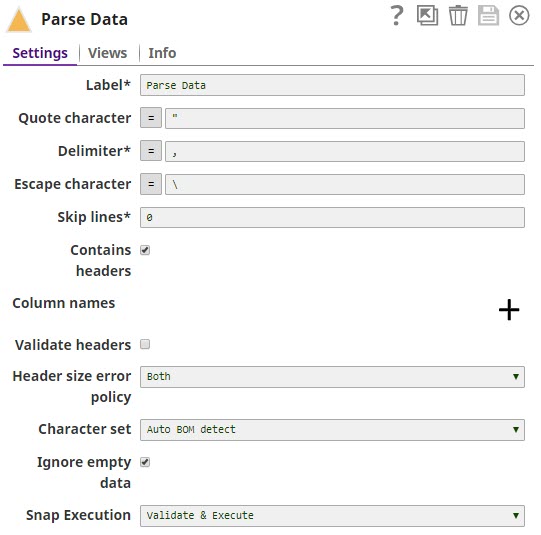
- Configure the
CSV Parser
Snap to parse
streaming data from the parent Triggered Task.
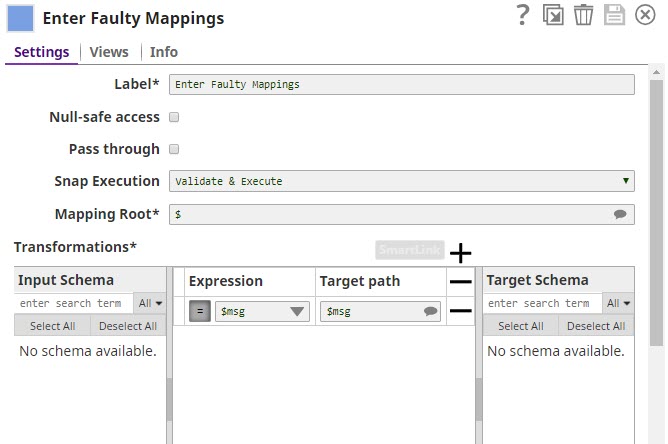
- The Mapper Snap creates problematic
mappings to trigger an error in the downstream Snap.
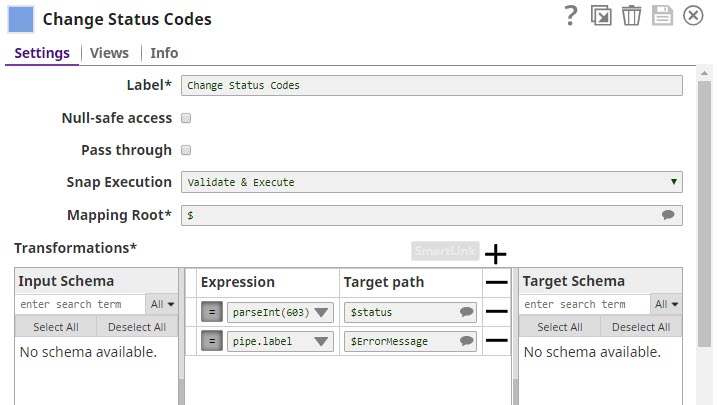
- Configure this Snap to manipulate (or change) the status code in the input document
containing the error view from the Enter Faulty Mappings Mapper Snap.In this example, we choose to update the status code to 603.
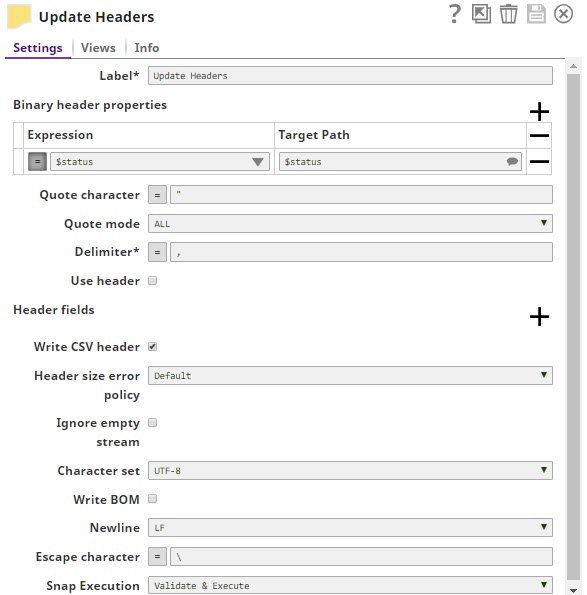
- Configure CSV
Formatter Snap to add the
updated status code into the binary header of the output CSV document to be sent to
ServiceNow.
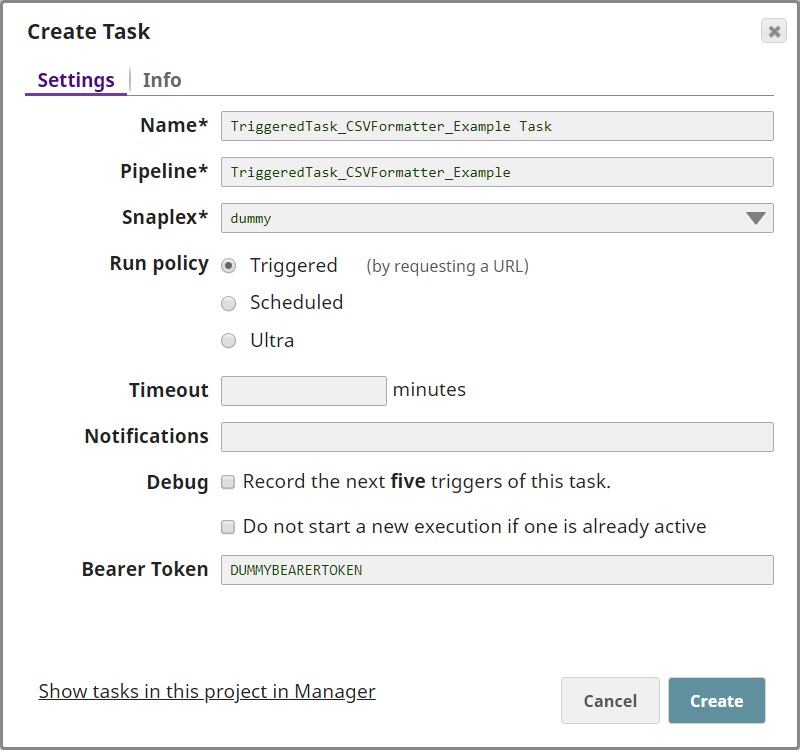
Create a Triggered Task that sends CSV data into the TriggeredTask_CSVFormatter_Example Pipeline
- Click the Create Task icon at the SnapLogic Designer toolbar. This displays the Create
Task popup. Configure the Task as shown below:
Your Task is now configured. You now need to configure your ServiceNow account to send CSV data to this Task.
Configure ServiceNow to send and receive CSV data from the Triggered Task
This step can only work if you have a ServiceNow account.
- Log into your ServiceNow account and open the pane on the left of the page.
- Search for the string outbound in the Filter field displayed in the
top-left section of the page. From the filtered list of options displayed, click REST
Messages under the System Web Services section.
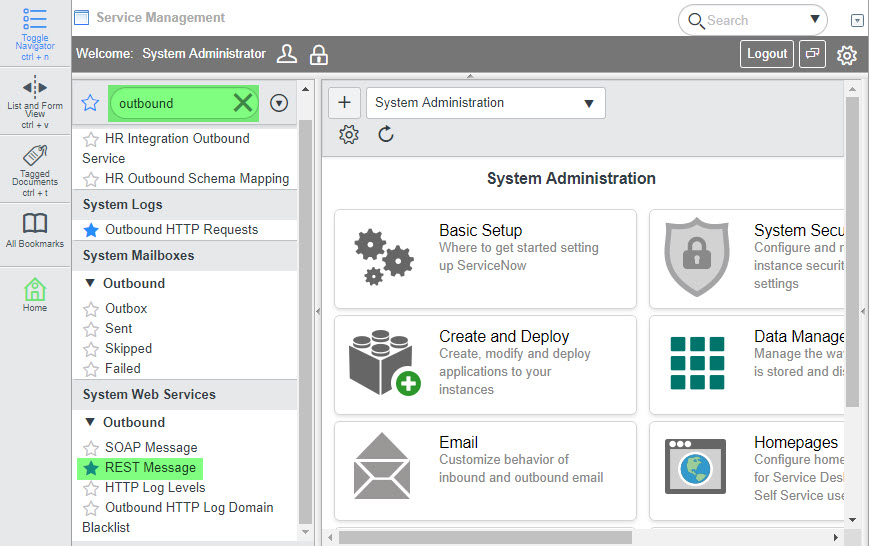
This deploys the REST Messages page.
- Click New to create a new REST message and configure the message as shown
below:
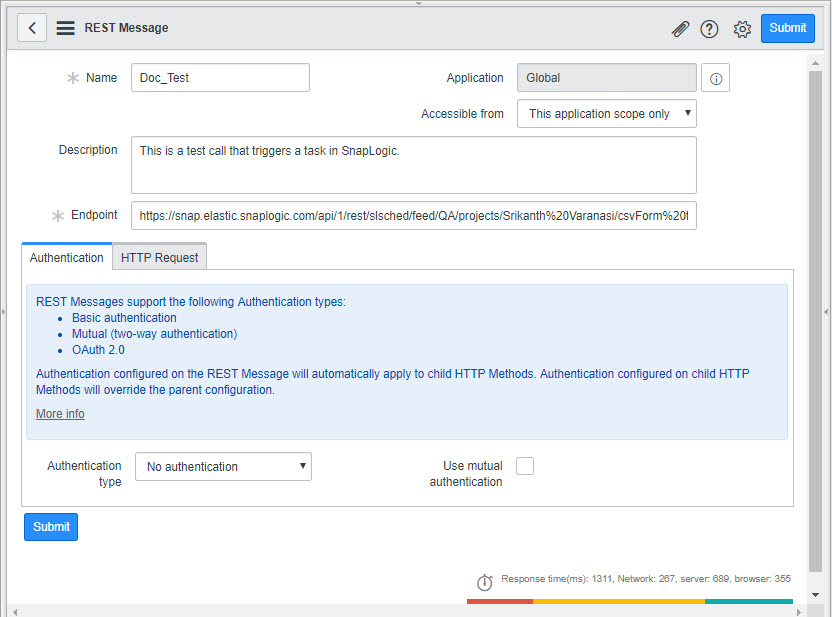
- Click Submit to save your changes. This creates the REST call. You must now
configure the call with the data you want to send. To do so, click the REST call. This
displays the details of the REST call.
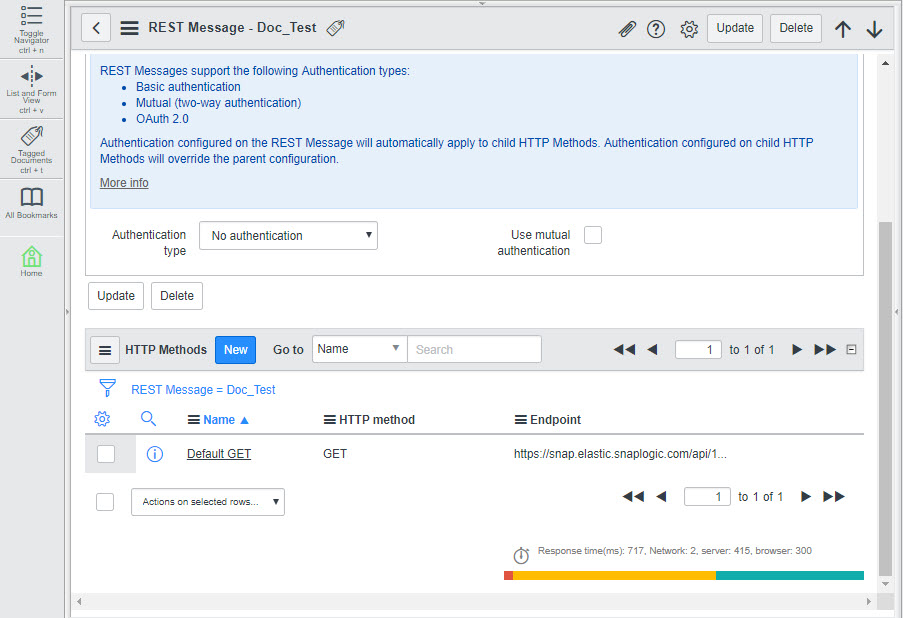
- Scroll down to the HTTP Methods section and click the Default Get method
created automatically for the call. This displays the call's details:
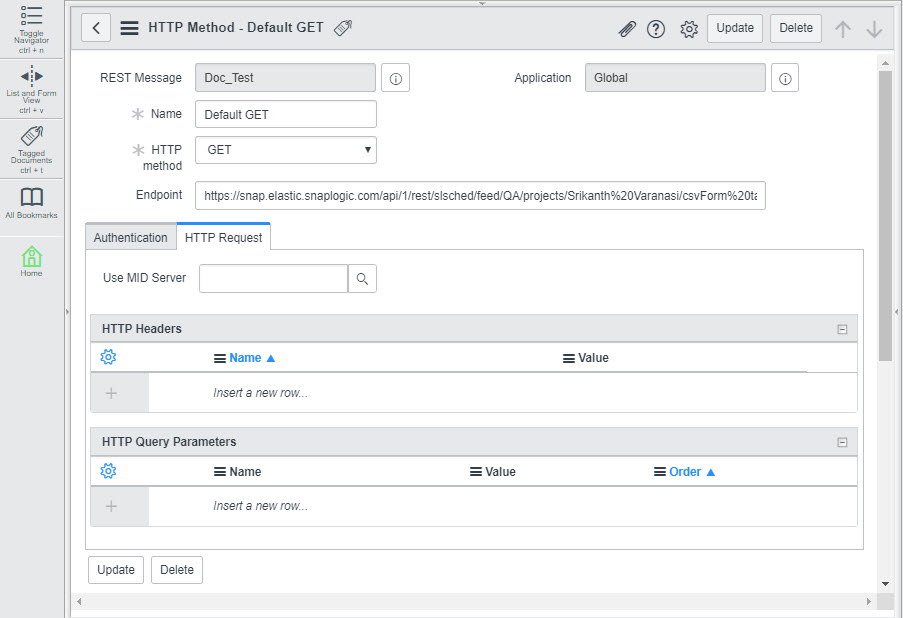
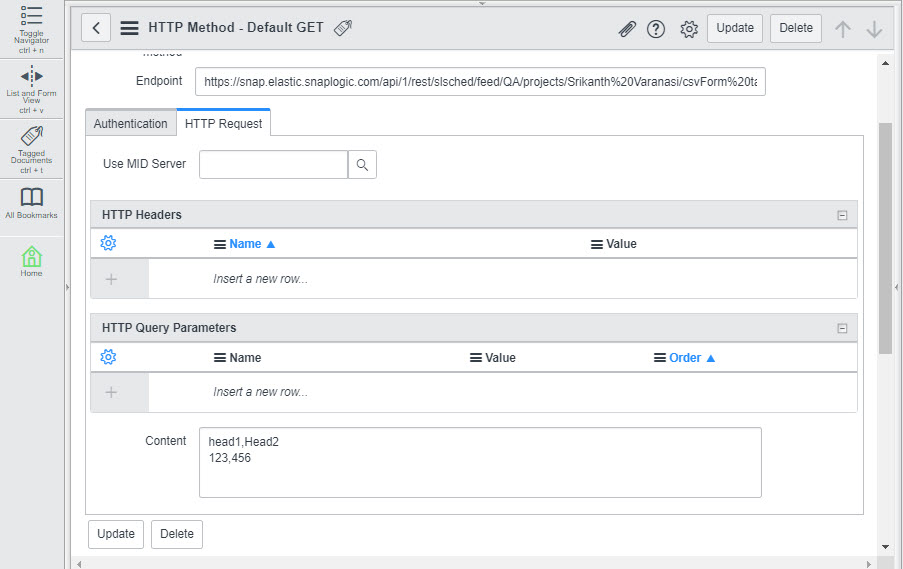
- You need to send a POST call to the Task so that you can provide the content that must be processed as a result of the call. To do so, click the HTTP Method field and, from the drop-down list displayed, select POST. Once you make this selection, the Content field appears at the bottom of the page.
- Enter the content you want to use for the call:
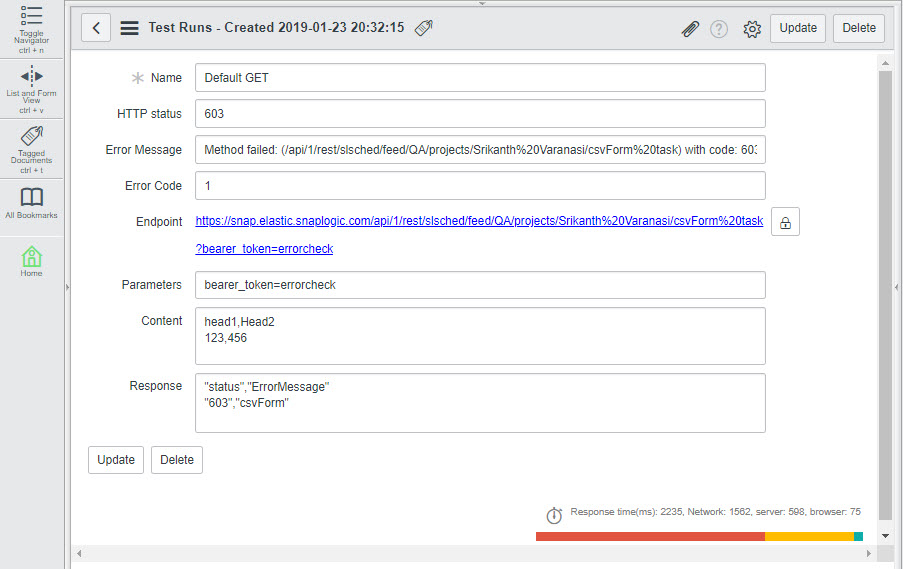
- Click Test. This triggers the SnapLogic URL endpoint (This is the Task we
created earlier in this example.) and displays the output of the Pipeline in the HTTP
Status field: 603, as configured using the Mapper Snap, above.
You can similarly use the CSV Formatter Snap to update binary header values associated with any input document.
- Download and import the SLP file into your Environment.
- Configure Snap accounts.
- Provide Pipeline parameters, if any.