


Authenticate to Confluent Cloud using OAuth/OIDC with Auth0 as Identity Provider
Overview
Confluent Cloud supports OAuth 2.0 / OpenID Connect (OIDC) to enable secure, token-based authentication for workloads—ideal for applications and services. Learn more. To authenticate to Confluent Cloud using OAuth/OIDC with Auth0 as your Identity Provider (IdP), follow the procedure described below.
-
Configure Auth0 as an OIDC Provider.
-
Create an Application in Auth0:
- Log in to your Auth0 dashboard
- Navigate to Applications and click Create Application.
- Specify a Name for the application.
- Select Machine to Machine (M2M) Applications.
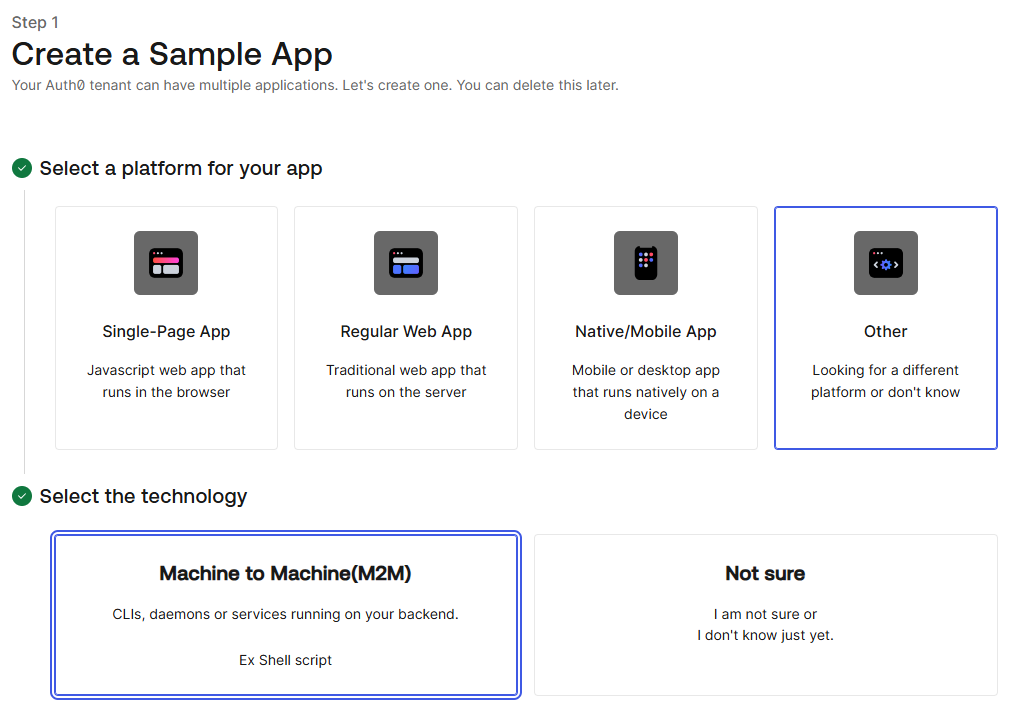
- Add the required Permissions, and click Authorize.

-
In the application settings, note the Client ID and Client
Secret.

-
Click Settings to define a default audience in the API
Authorizations Settings section. Set this to https://dev-bkbwr0ycpbpxxiv5.us.auth0.com/api/v2/. You can
get this URI from the API tab in the application.

Note:The Identifier will serve as the Audience in your token requests.
-
Create an Application in Auth0:
-
Add Auth0 as an Identity Provider in Confluent Cloud
- Log into Confluent Cloud Console.
- Navigate to
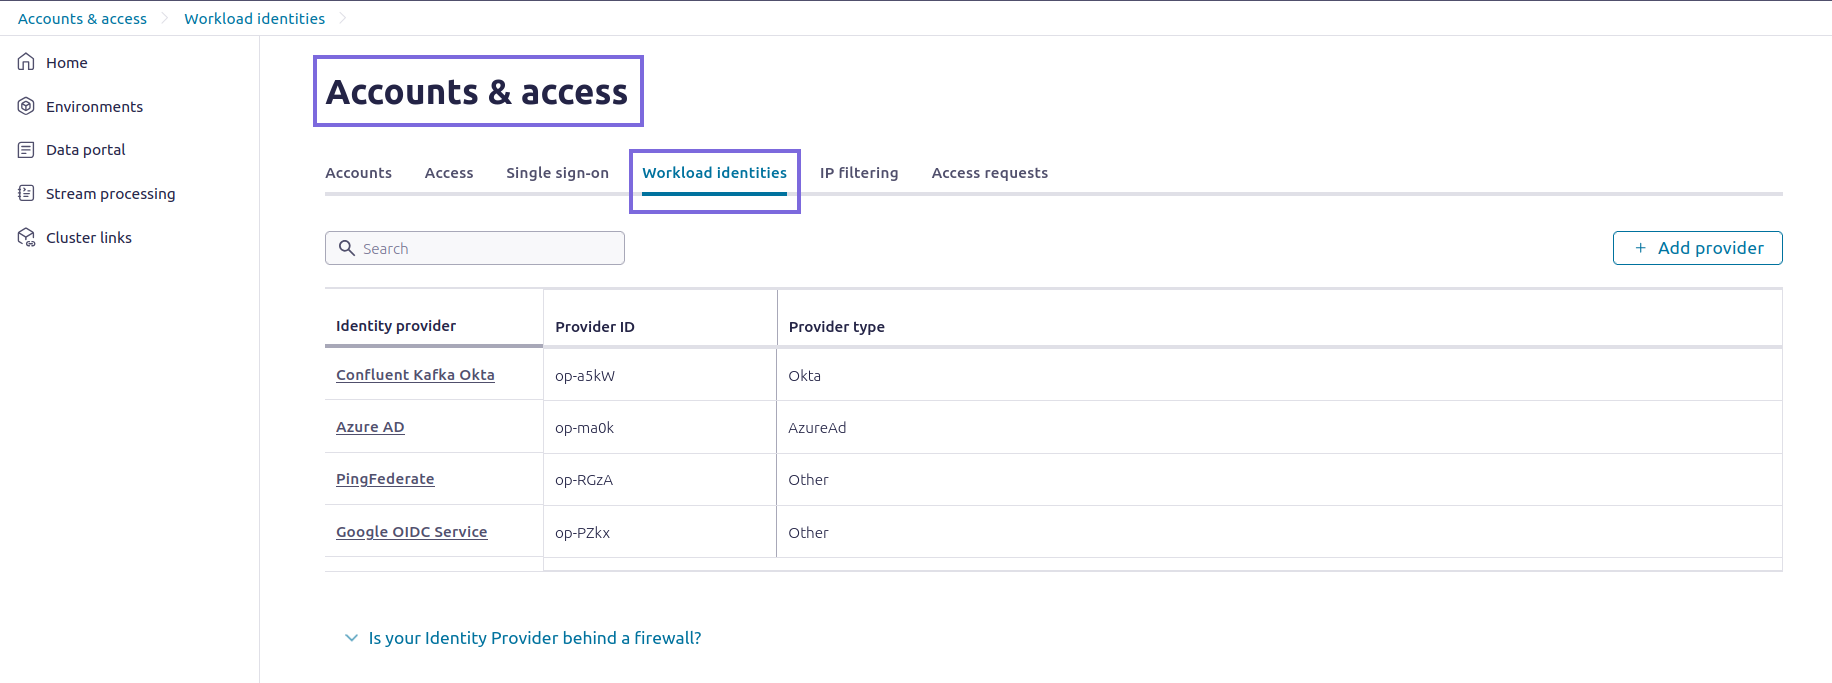
- Click Add identity providers.
- Select OAuth/OIDC and click Next.

- Select Other OIDC identity provider.

- Provide a meaningful Name and Description.
- Enter the OIDC Discovery URL obtained from Auth0.
- Click Import from OIDC Discovery URL to auto-fill the JWKS
URI and Issuer URI. The OIDC Discovery URL typically
follows the format:
<https://<your-domain>>.auth0.com/.well-known/openid-configuration.
- Click Validate and save to add the identity provider.

-
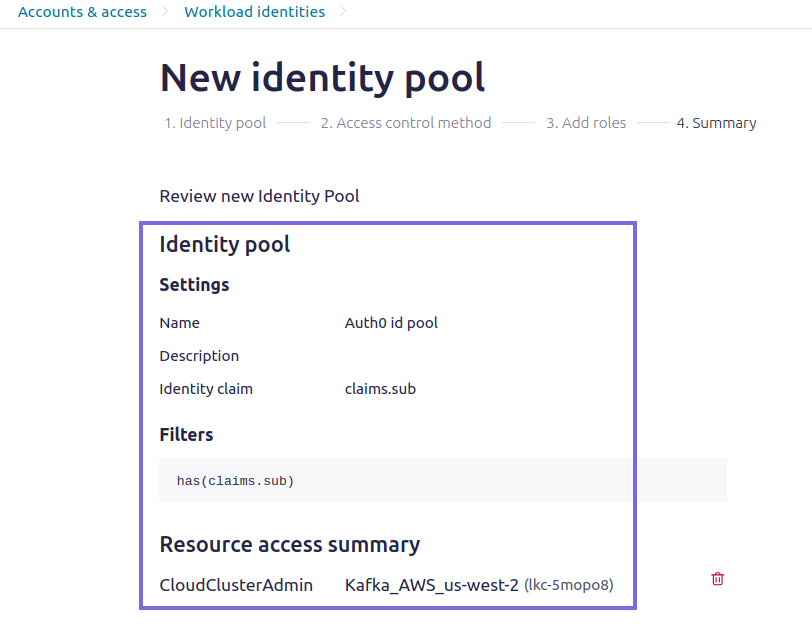
Create an Identity Pool in Confluent Cloud
-
Click Add new permissions.

-
Assign appropriate RBAC roles to the identity pool to control
access.

-
Click Save to create the identity pool.
-
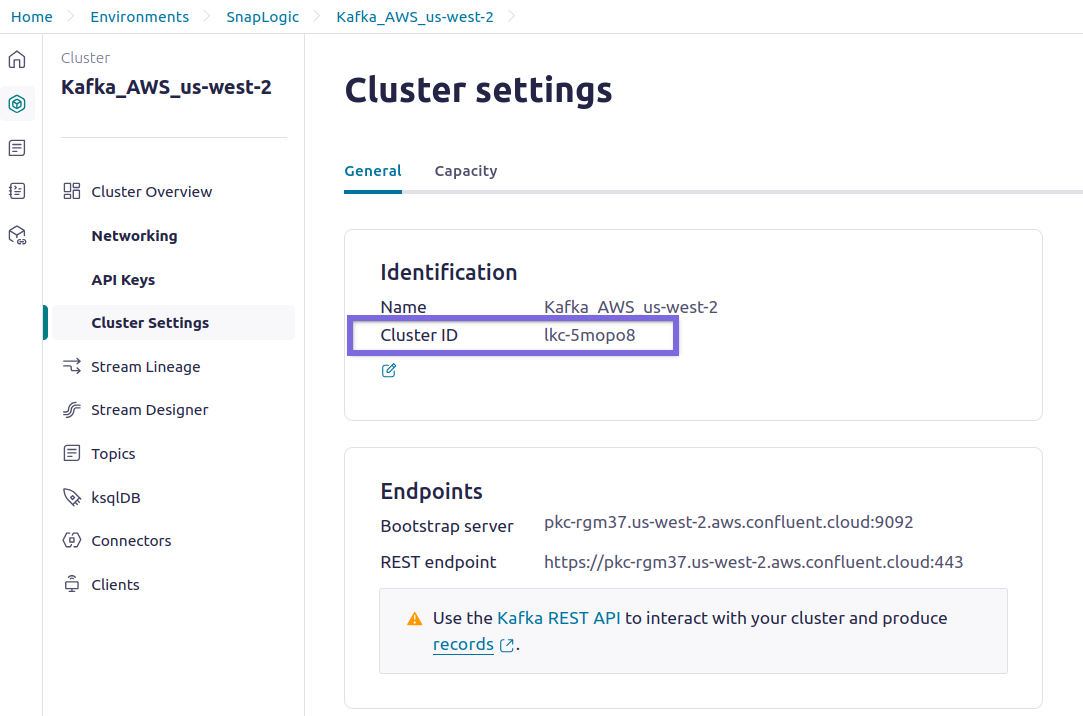
Record Cluster and Pool ID's. These will be defined in the Kafka Snap
via SASL extension properties.

-
Click Add new permissions.
Failure: JWT_PROCESSING_FAILED Error
This can be caused by various issues, such as a mismatch between the Issuer URI entered in Confluent Cloud and the URI in the JWT token. Another potential reason that can cause this error is the expiry of the JWKS keys.
Ensure that the Issuer URI and URI in the JWT token both match exactly. Refresh the keys in Confluent Cloud.
- Configure the following settings with the values obtained from the configuration
in the Confluent Cloud console:
<your-bootstrap-server>: Confluent Cloud Kafka bootstrap server URL.<your-domain>: Auth0 domain.<your-client-id>and<your-client-secret>: Obtained from Auth0 application settings.<your-cluster-id>: Confluent Cloud cluster ID.<your-identity-pool-id>: The ID of the identity pool created in Confluent Cloud.


- Validate the account. The account should be validated successfully.
