


Track project assets in a Git repository
How to track SnapLogic assets with a Git repository.
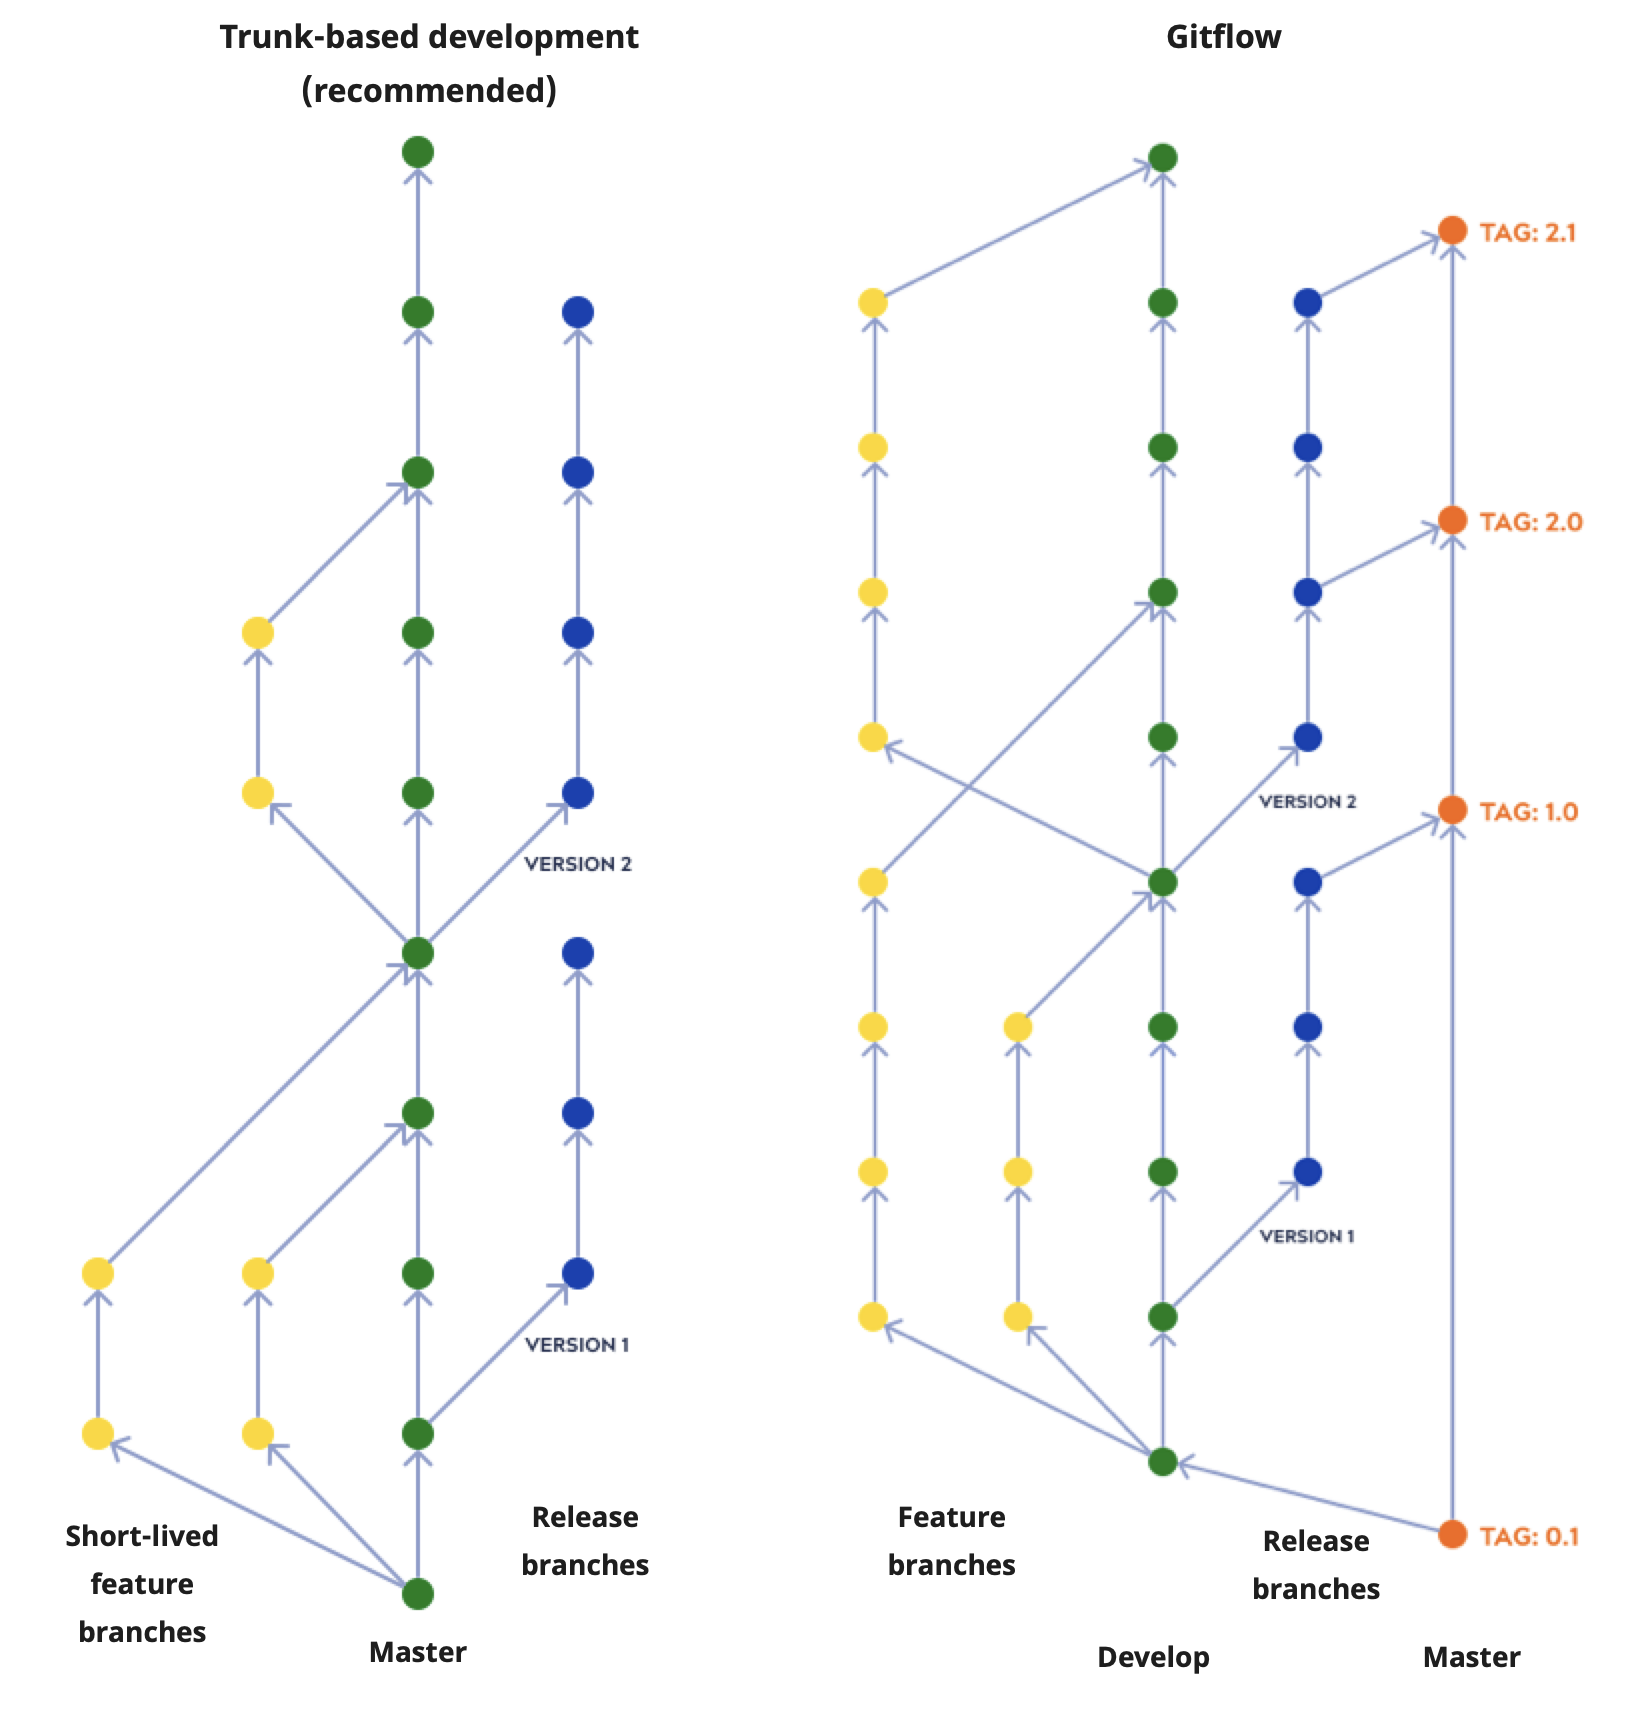
Gitflow and trunk-based development are two common ways of managing concurrent development and asset versioning. The following image, from a Toptal blog by Konrad Gadzinowski (accessed January 2024), illustrates the difference between the two approaches. Although the Git Integration supports both, we recommend trunk-based development for SnapLogic assets. In the simpler trunk-based model, you create all branches from one master.
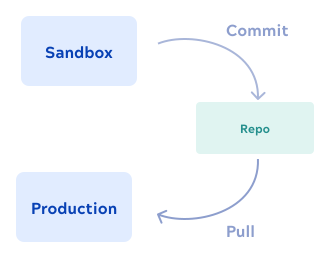
You can associate a Git repository with a single project or with all projects in a project space. In your sandbox SnapLogic Environment, track work with a branch of the respository. When ready, merge to the main branch. In the production SnapLogic Environment, pull the main branch to get the reviewed and approved projects.
To set up this workflow for a single SnapLogic developer, use the steps below. For multiple developers working on the same project, use steps 1 - 3 and skip to concurrent development for the remaining steps.
- Create a repository in your Git environment.
- To optionally use a secrets manager, set up credentials in the vault. Use your environment name in the keys to separate development from production accounts.
- In the sandbox SnapLogic environment, set up your endpoint accounts:
- Using the Manager
- If using a secrets manager, configure the accounts using an expression that includes the Environment name.
- In a project space, create one or more projects to associate with the Git repository.
- Use the SnapLogic Git Integration to create a repository branch and check it out for a Project Space or a project.
- Design and develop your pipelines and tasks.
- Commit the changes.
- Create a pull request for review.
- When finished with review, merge the pull request branch to the
mainbranch. - Associate a tag with the latest files in the
mainbranch. - In the production environment, perform a pull using the defined tag. Accounts with the same name across all Orgs are considered the same account.
To undo, perform a pull using a tag defined for an earlier version of the main
branch files.
To automate delivery, set up a CI/CD workflow in your Git provider that's automatically triggered on update of the main branch. The CI/CD workflow pulls the updated files into the production environment.