


Merge columns
The Merge columns transformation concatenates columns or fields of type
string. Merging columns can simplify complex data structures and result in more
efficient storage and queries. Merge any number of columns, select a separator, and name the new
concatenated column. After defining a merge, you can use it in another merge.
The Merge columns screen opens after Replace empty
values in the data pipeline wizard. Only columns of type string show in
the Merge columns data preview table. The data preview reflects all
transformations applied in the earlier screens. For example, columns removed in the Filter
columns screen aren't visible in the data preview table. To concatenate a filtered
column, you need to go back to the Filter columns screen and add it back. You
can have AutoSync remove the column after concatenation if you choose to filter the original
columns.
A space is the default delimiter. Available separator options include: comma and space, hyphen, custom, or none. To enter a custom separator, select Custom and enter the value directly in the field. A custom separator can be up to five characters, including spaces.
You can also edit an existing data pipeline with the Merge columns option in the Transformations tab.
Target column precision
When you merge two columns, the target column must be large enough to accommodate the merged data. Column precision determines the maximum length of string values. Some source columns don't have a precision setting, have a null value for precision, or when merged, would have a larger precision than the target.
For the columns selected for a merge transformation:
- When any of the source columns don't have a set precision, AutoSync sets the new column to the target's maximum precision.
- When all source columns have a set precision, AutoSync uses their value up to the target's maximum precision.
Configure a merge in the wizard
To merge columns in the data pipeline wizard:
- In the Merge columns screen, click the columns to concatenate. A new column overlays the table with a merge preview:
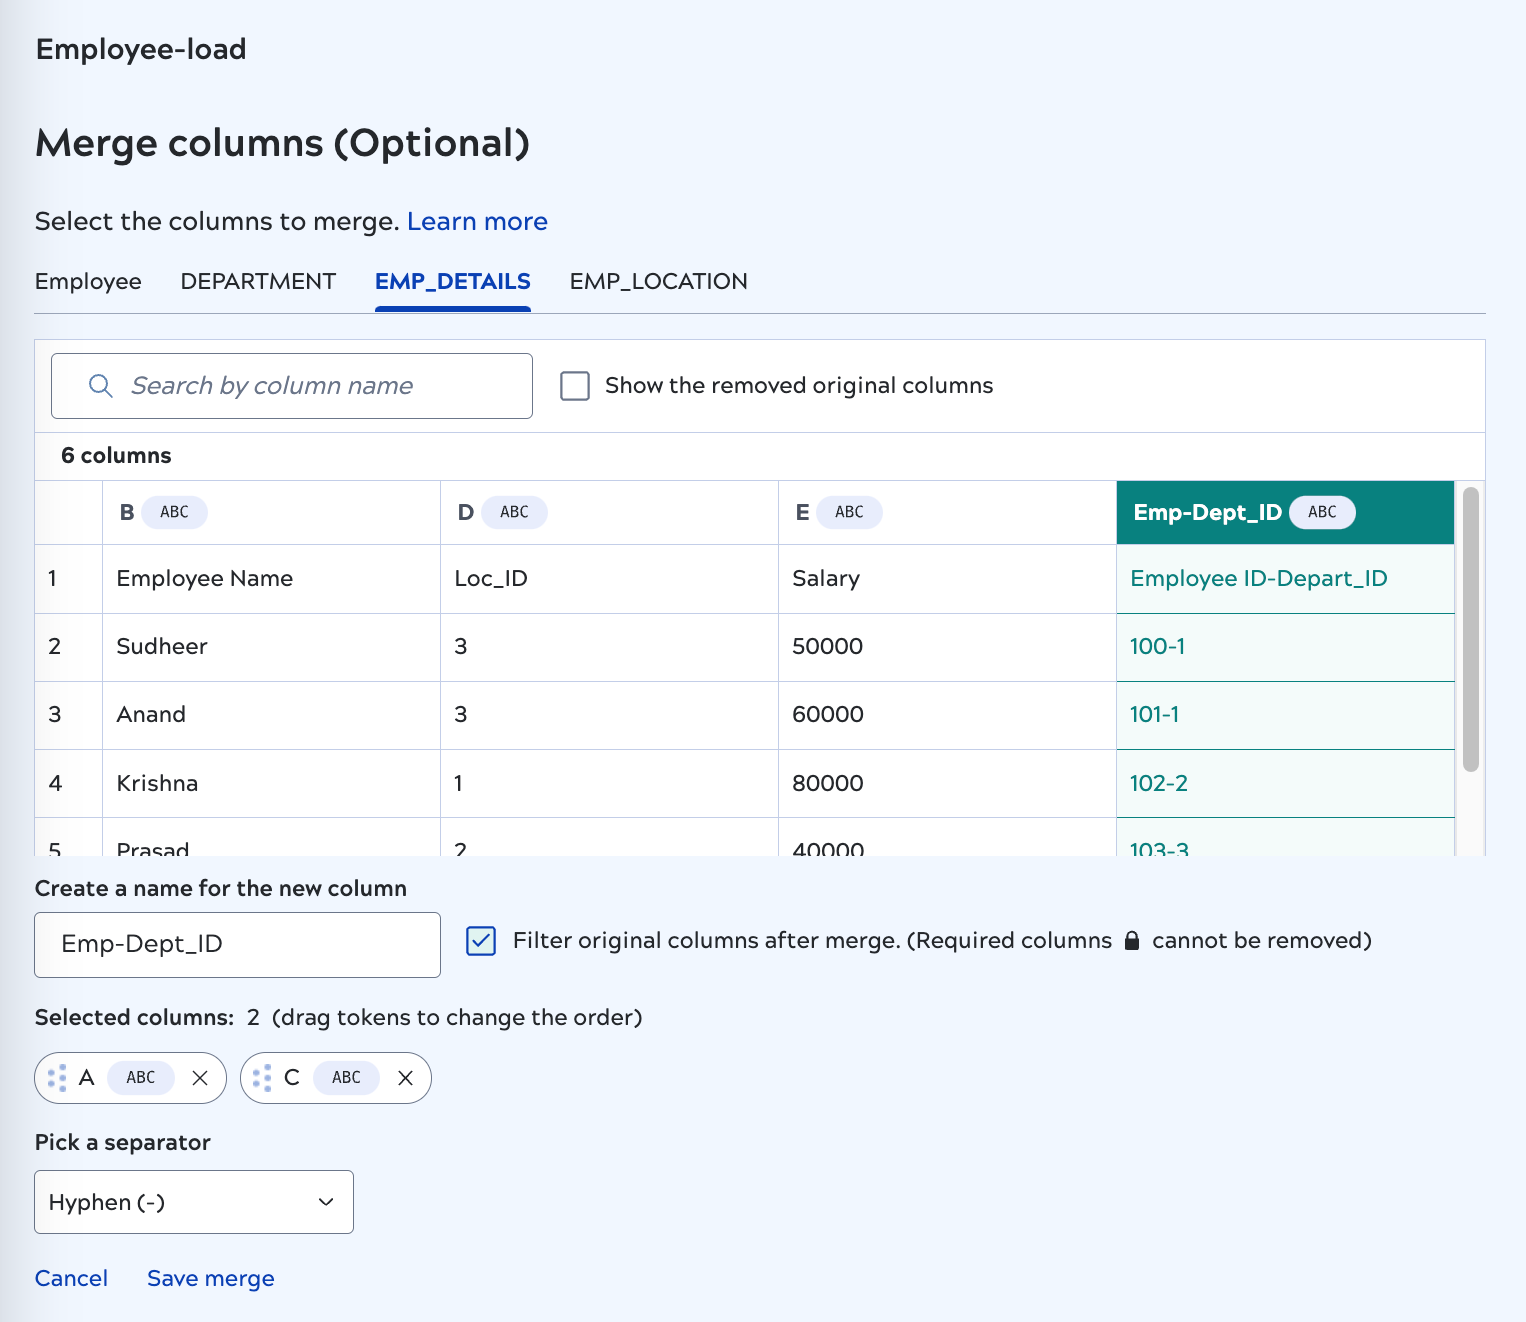
- Optionally, drag the column tokens to change their order.
- Enter a name that satisfies any target endpoint restrictions.
- Optionally, select Filter original columns after merge to avoid loading the original columns to the target.
- Pick a separator from the dropdown list.
- Click Save Merge. The preview shows the new column and a table below the
preview displays a summary of the merge:
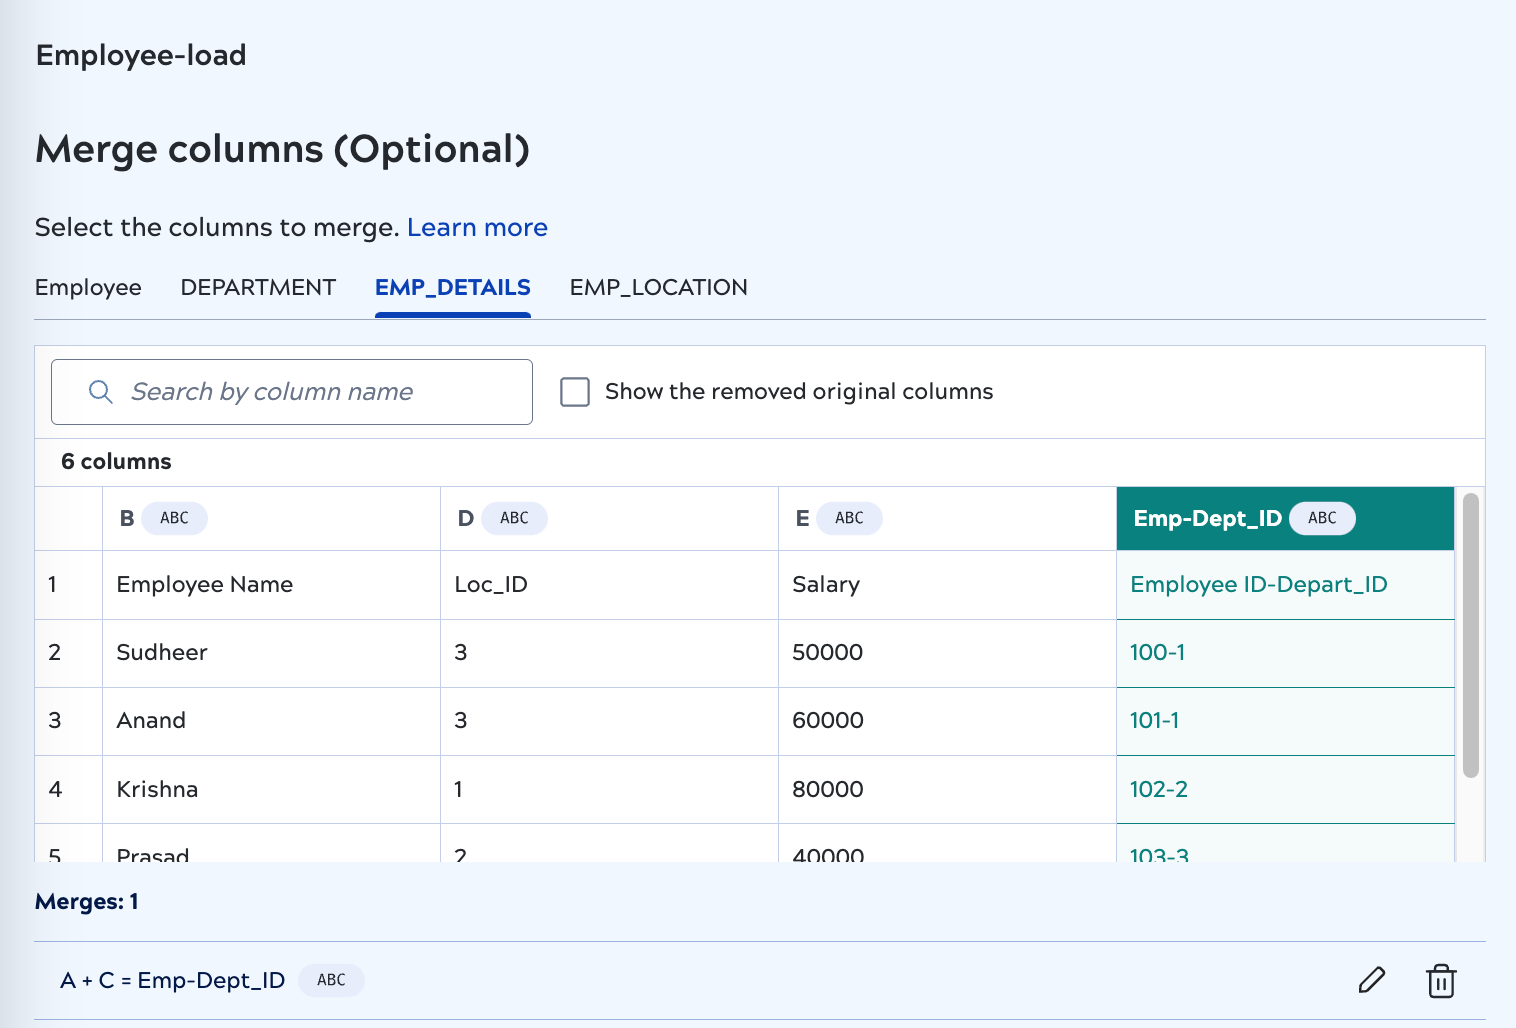
- When you finish defining merges, click Next.