


Create a connection
Create a Secure Connection
Create a connection using the wizard
This article describes how to create a connection via the connection wizard and assumes that you are familiar with Cloudplex Secure Connectivity and AWS PrivateLink.
- SnapLogic environment admin permissions
- Your SnapLogic environment has at least one Cloudplex with active nodes
- Network load balancers (NLB) must be deployed.
- The Cloudplex and service URL for your AWS PrivateLink must be in the same AWS region
- The Endpoint Service and its Network Load Balancer (NLB) must be enabled across all three Availability Zones (AZs) used by SnapLogic within a region.
- For high availability, all deployments must be configured to operate across three Availability Zones (AZs) within the selected region.
- For the VPC endpoint, you should associate a private DNS name that service consumers can use to access your service. Do not use the DNS name when configuring the secure connection in the wizard.
- Because the SnapLogic platform is the consumer, review AWS guidelines when making the endpoint service available to the Cloudplex Secure Connectivity feature.
- Add the appropriate ARN to your Allow principles whitelist for SnapLogic to establish the PrivateLink connection.
- Global Control Plane users -
arn:aws:iam::868327748124:root - EMEA Control Plane users -
arn:aws:iam::706565328972:root
- Global Control Plane users -
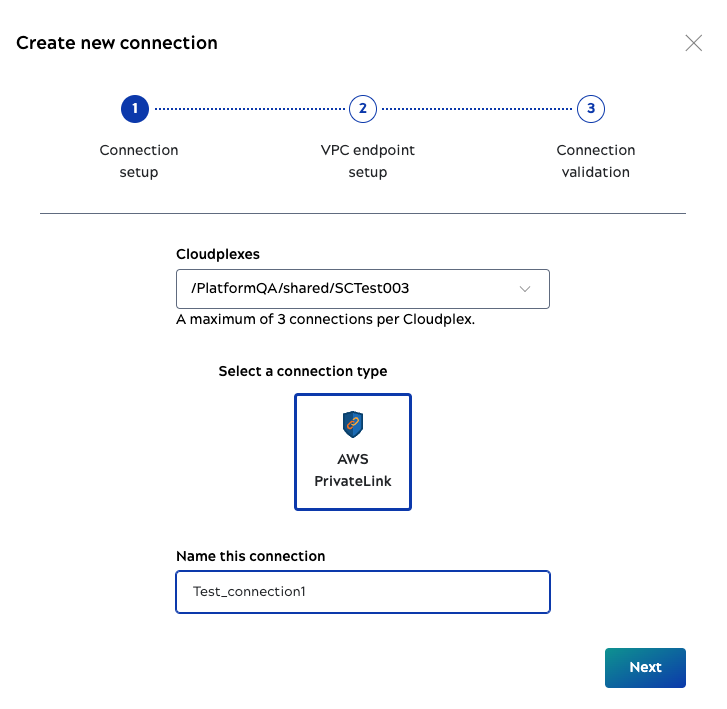
- In page 1 of the wizard, select the Cloudplex, name the connection, and click Next.
- In page 2 of the wizard, enter the AWS Private link service URL and click Submit.
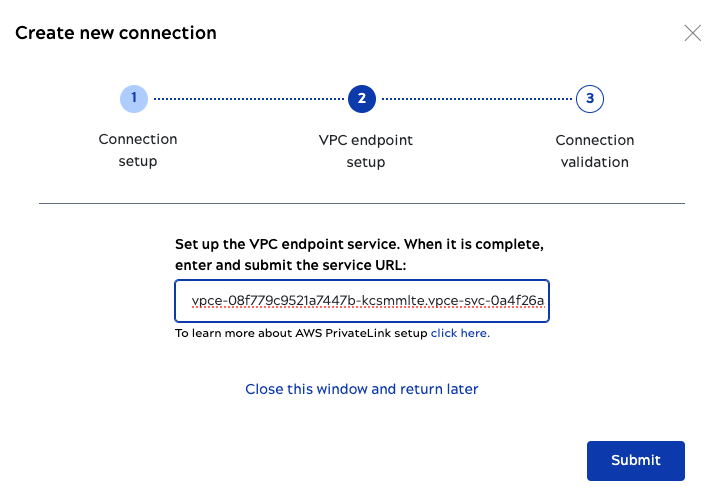
- If you receive approval within the expected time, then go to the next page of the wizard.
- If you do not have the service URL or if it is not set up yet, you can click Close this window and return later.
- In page 3 of the wizard, wait for SnapLogic to validate the connection, then click Done when the connection is valid.
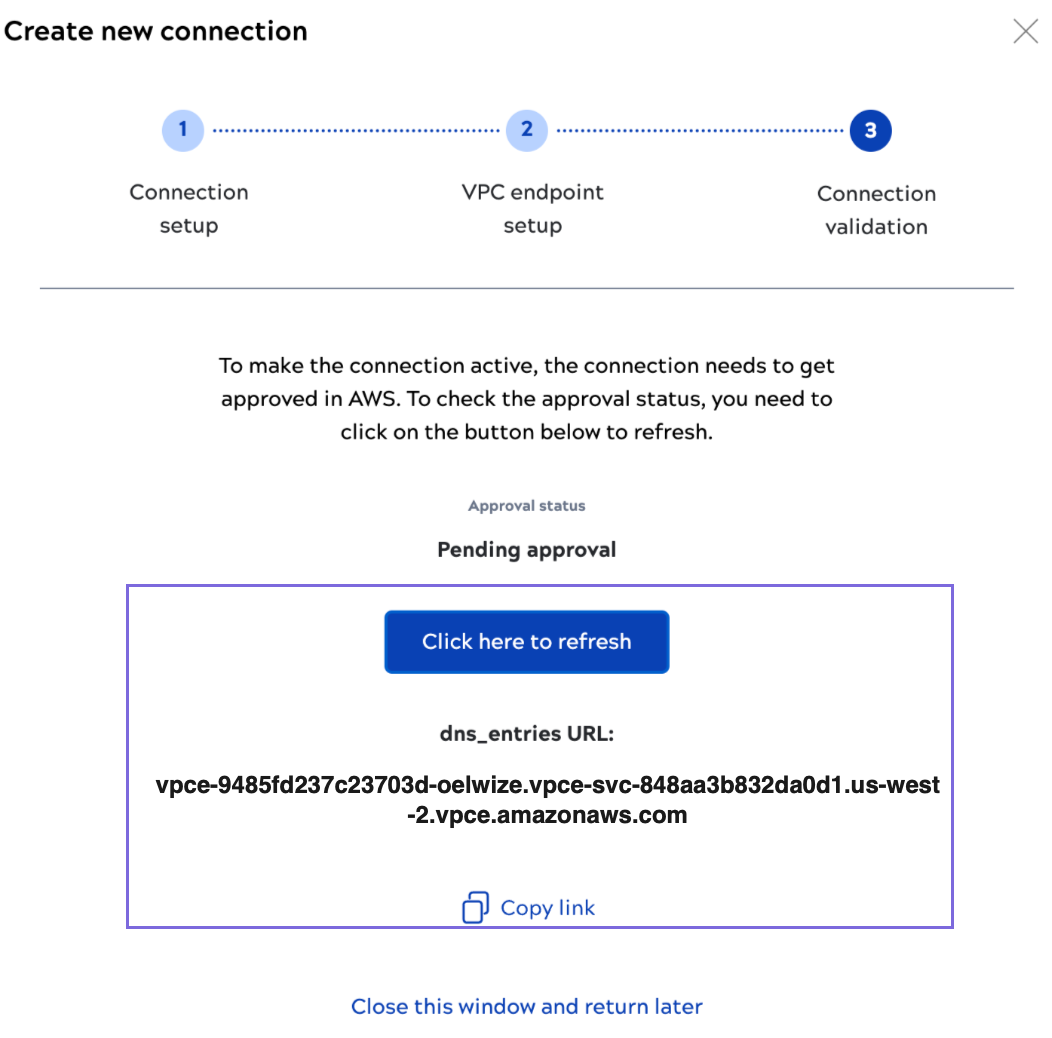
Note: When the URL submission is approved, the connection is validated by SnapLogic, which can take 10 minutes or longer.- If you know that your service URL submission is approved, but it's not reflected in the wizard, you can keep it open and click Refresh to check status.
- If you do not expect approval for days, you can exit and reopen the wizard when the service URL submission is approved.
-
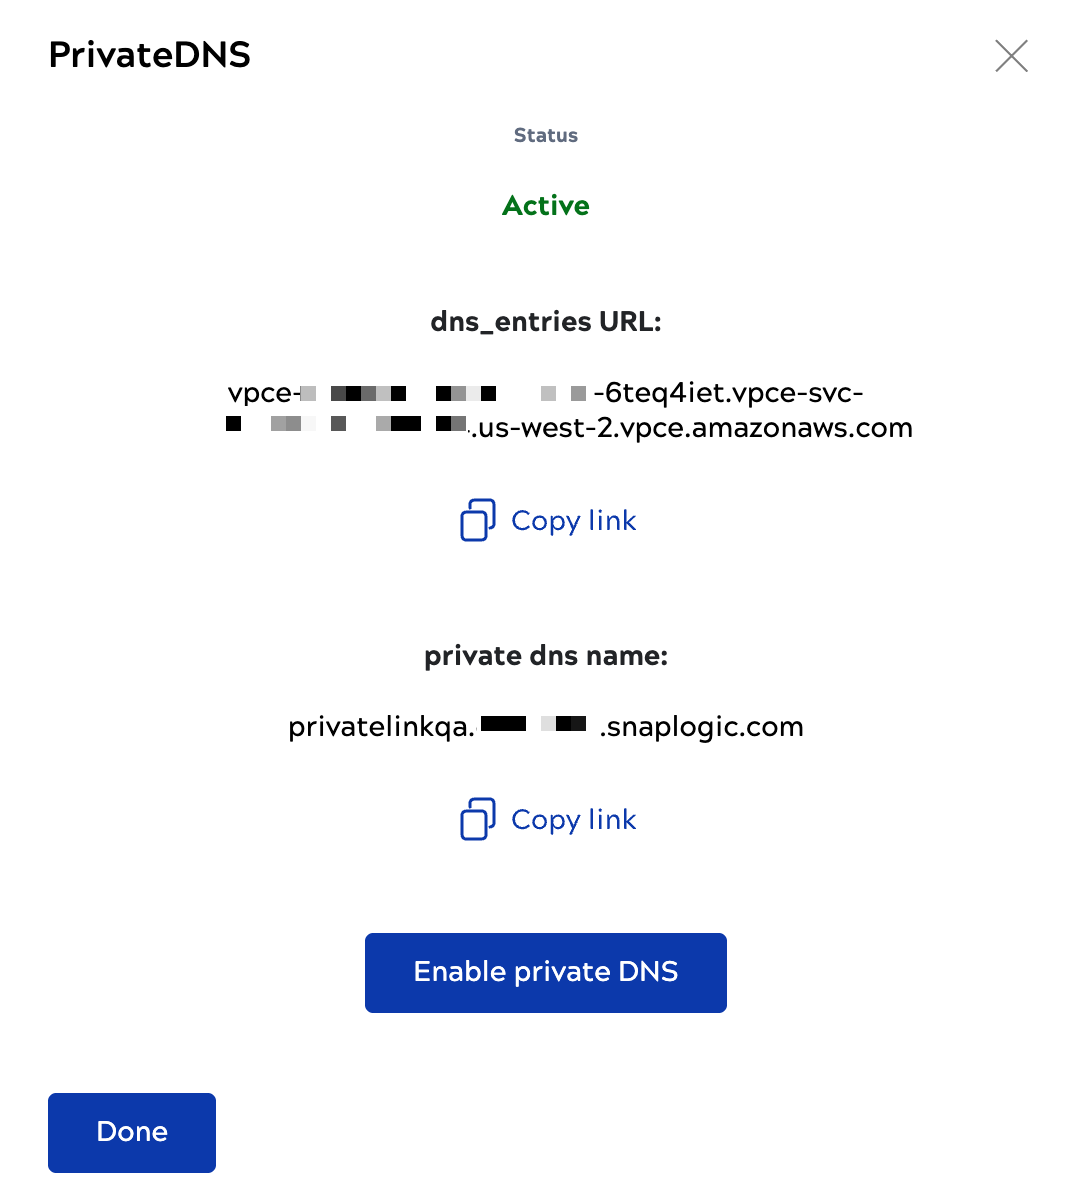
To verify that the connection works, copy the dns_entries URL as the hostname when running pipelines on the Cloudplex and view their statistics in Monitor.
Reasons for a failed connection:
- The Cloudplex URL and AWS PrivateLink service URL must be in the same AWS region
- The ARN information is not correct.