Create a Knowledge Base and an Agent in Amazon Bedrock
Overview
To use the Amazon Bedrock Snaps (Agent Retrieve, Agent Retrieve and Generate, and Invoke Agent) you must create a Knowledge Base and an Agent to access the resources in Amazon Bedrock. To configure these Snaps successfully, create a Knowledge base and agent as described in the procedure below.
Prerequisites
- An AWS account with IAM role and necessary permissions in Amazon Bedrock.
- Access to the foundation models (FM) that you want to use.
- Create an S3 bucket to upload the files you want to query.
Key steps
Create a Knowledge Base in Amazon Bedrock
- Log in to the Amazon Bedrock console.
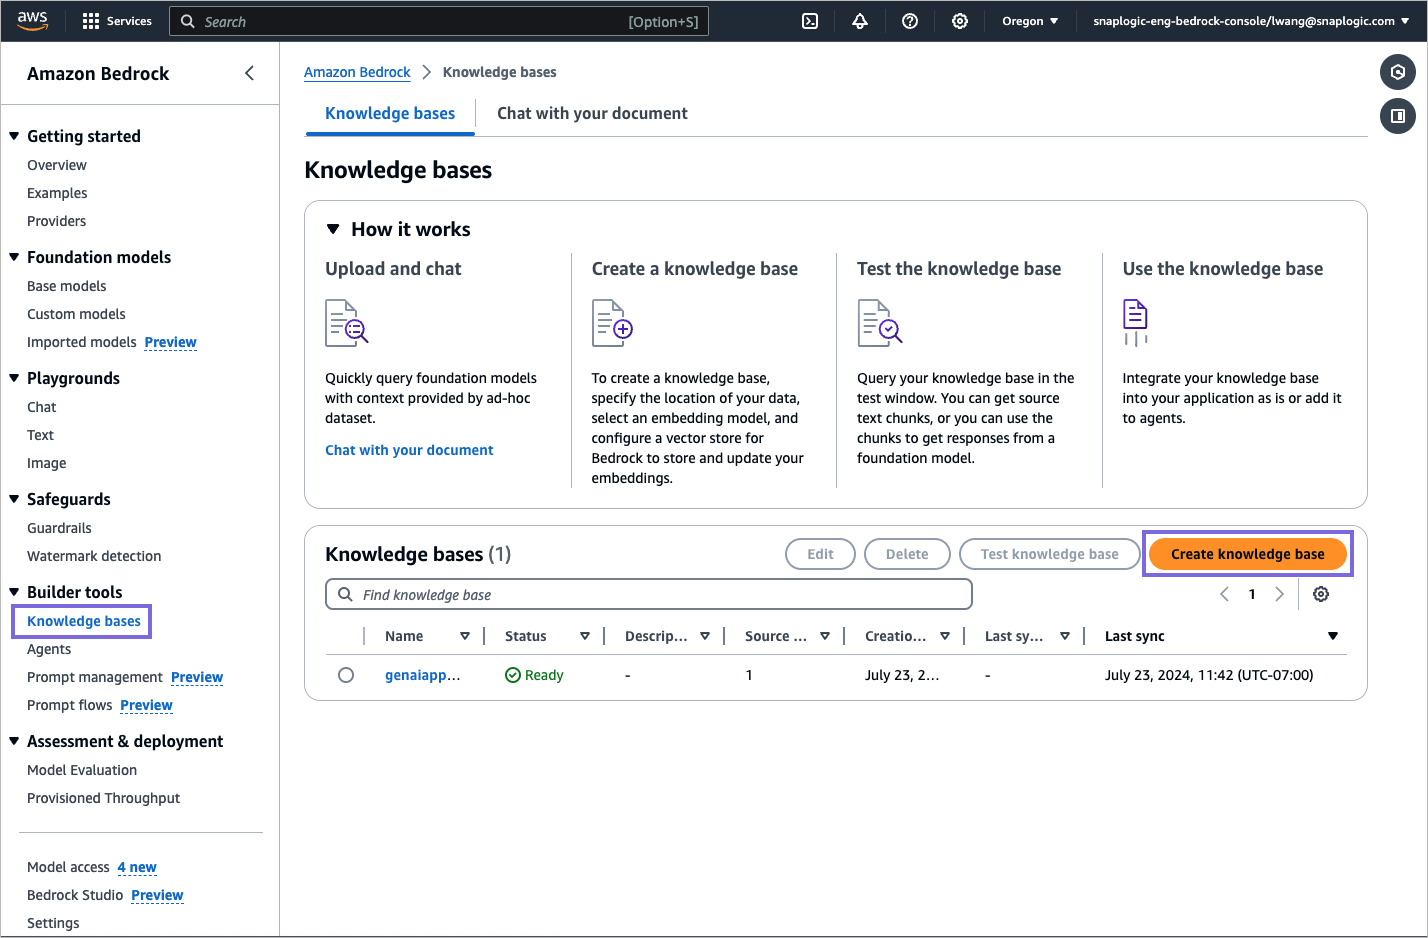
- From the left navigation pane, select Knowledge bases and click
Create knowledge base.
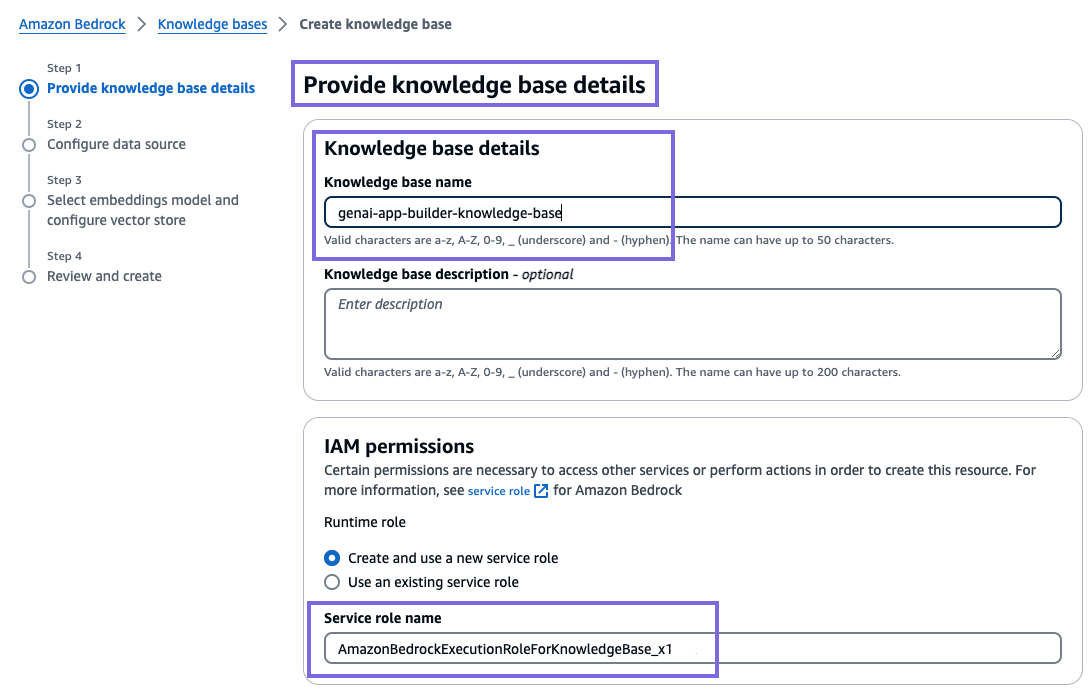
- On the Provide knowledge base details page, configure the
following:
- Specify a meaningful name for your Knowledge base.
- Choose the IAM role that provides Amazon Bedrock permission to access other AWS
services and click Next.
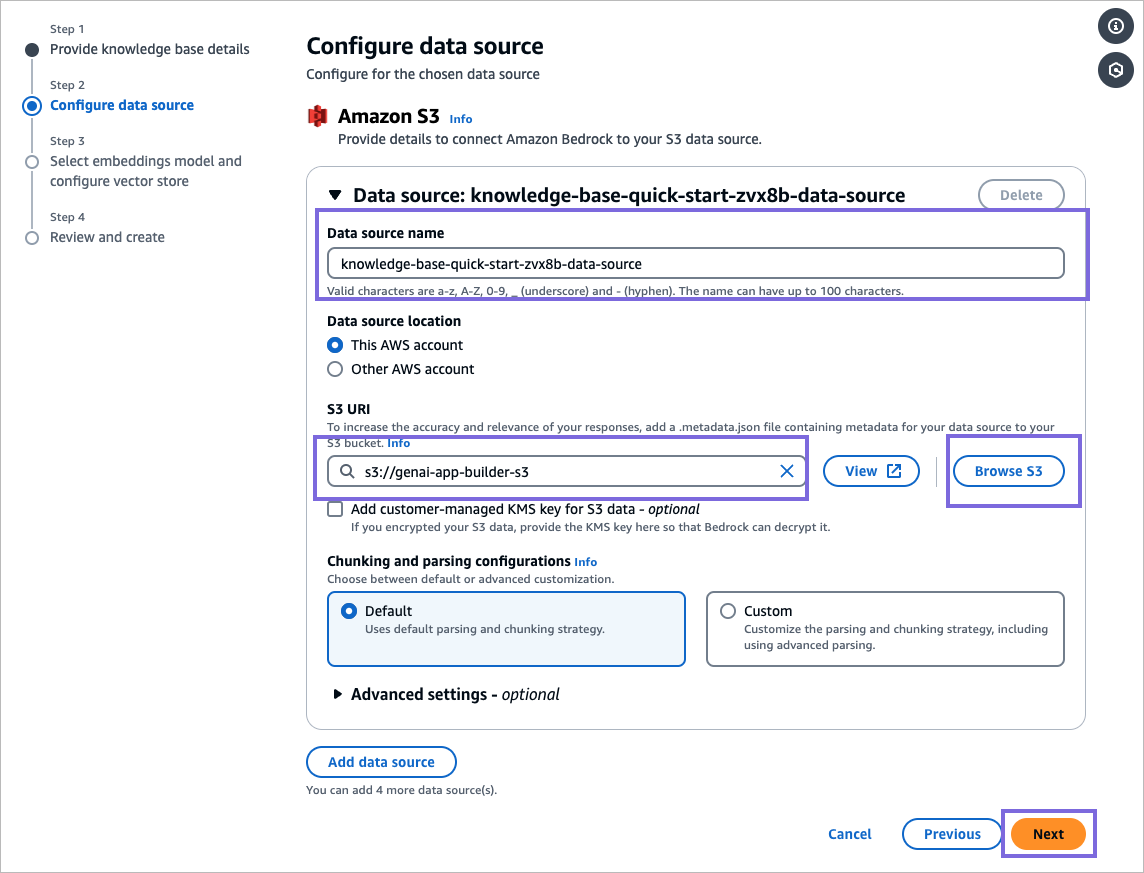
- On the Configure data source page, select Browse S3 and choose the S3 bucket as a data source and
click Next.
- Select an embeddings model and use the default
vector database (OpenSearch serverless) and click
Next.
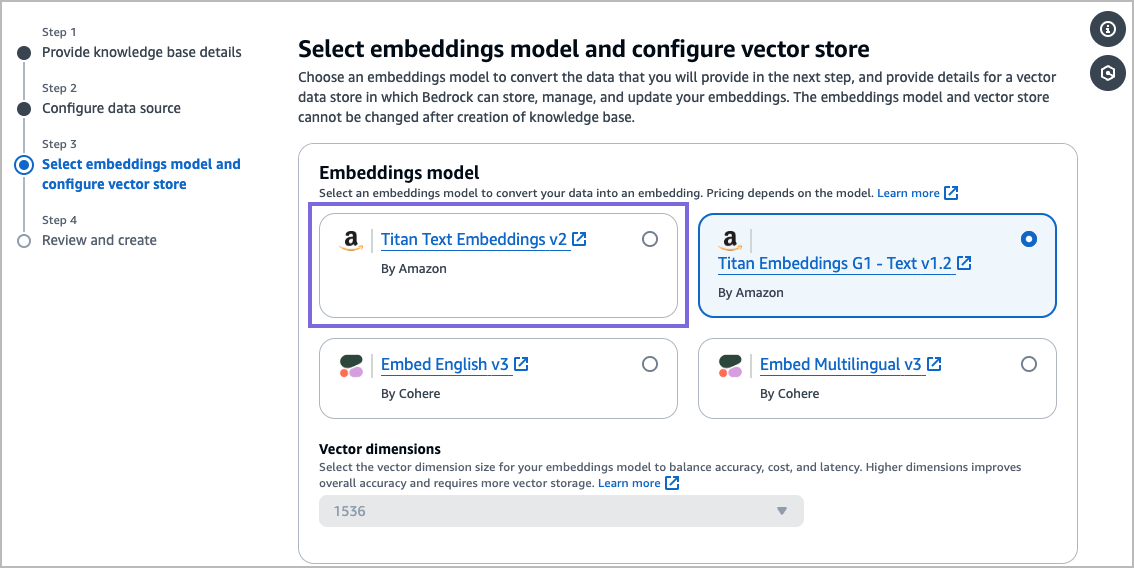
- Review the settings and select Create knowledge base.
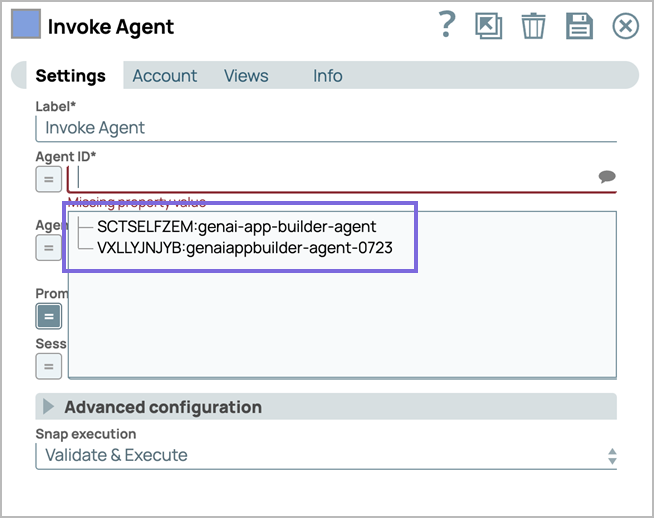
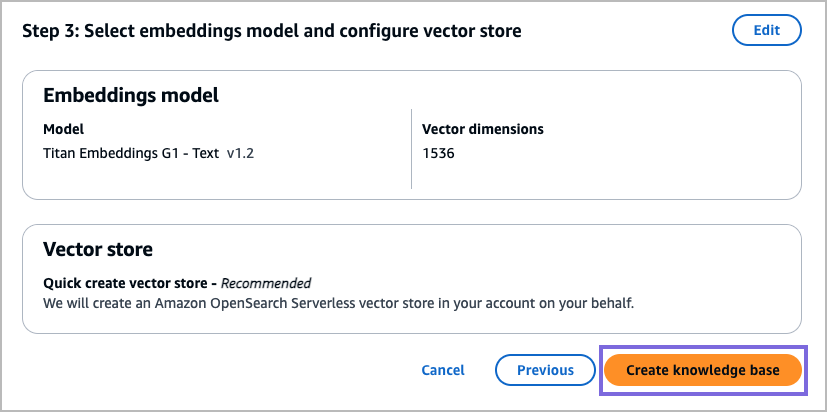 Note: After the Knowledge base is created in Amazon Bedrock, you can begin to use the Agent Retrieve and Agent Retrieve and Generate Snaps. After configuring your Amazon Bedrock Account, you can locate the newly created Knowledge base in the suggestible property of the field.
Create an Agent in Amazon Bedrock
- From the left navigation pane, select Agents and click
Create Agent.
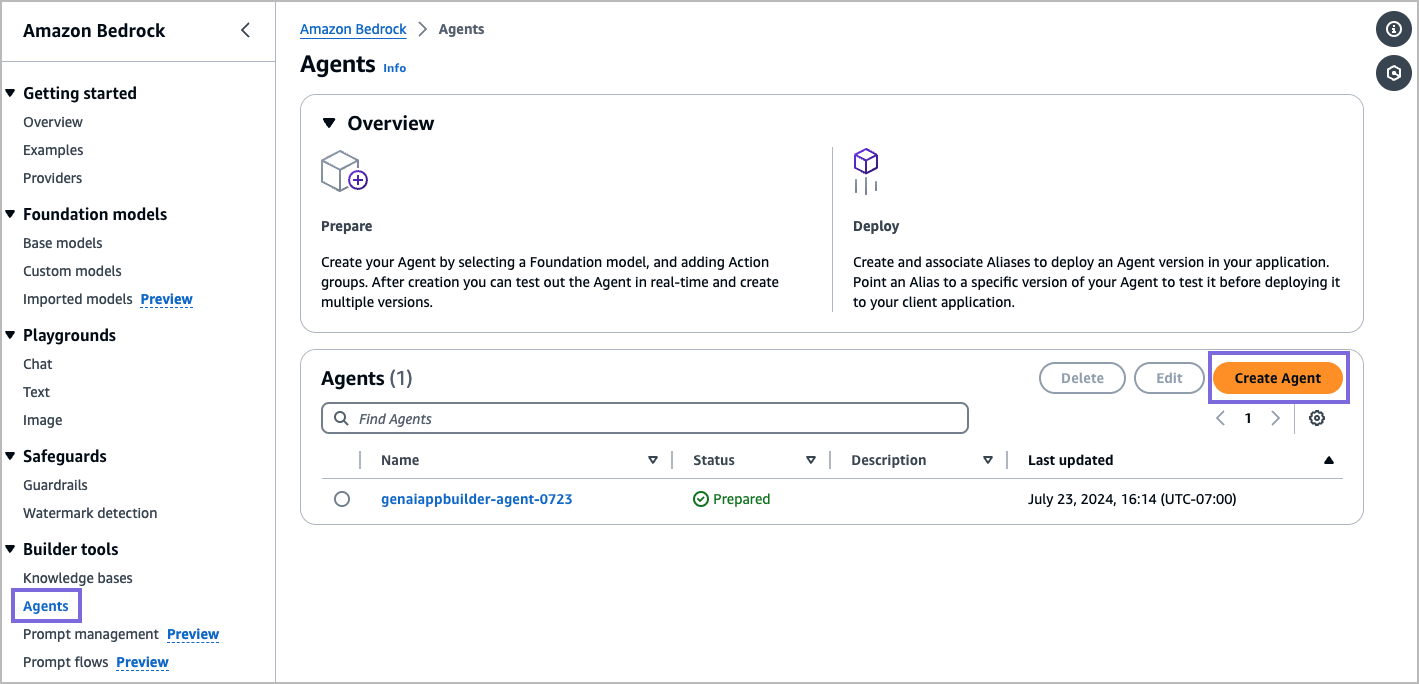
- Enter a name for the agent and click Create.
- In the Select model section, we recommend you to use
Claude 3 Sonnet and add instructions for the Agent. For
example, "You are an assistant that will answer questions from the knowledge
base and/or the chat history. Note that some questions may require both, so please
answer as much as you can without making up information".
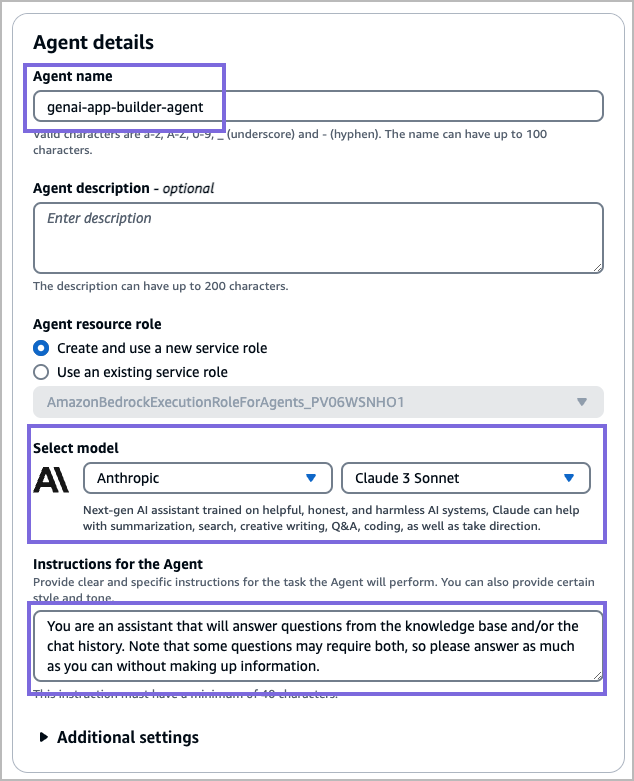
- After a model has been selected, scroll to the top of the page and click
Save
 Note: If you do not save, it might result in an error when adding a knowledge base.
Associate the Agent with the Knowledge Base
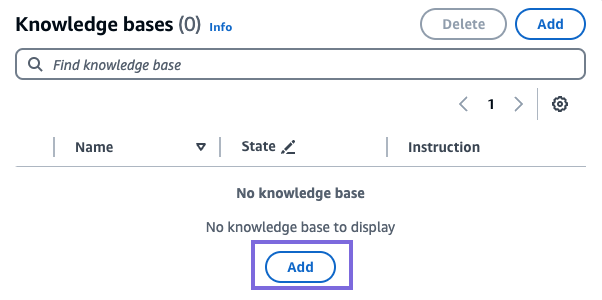
- In the Knowledge bases section, select
Add.
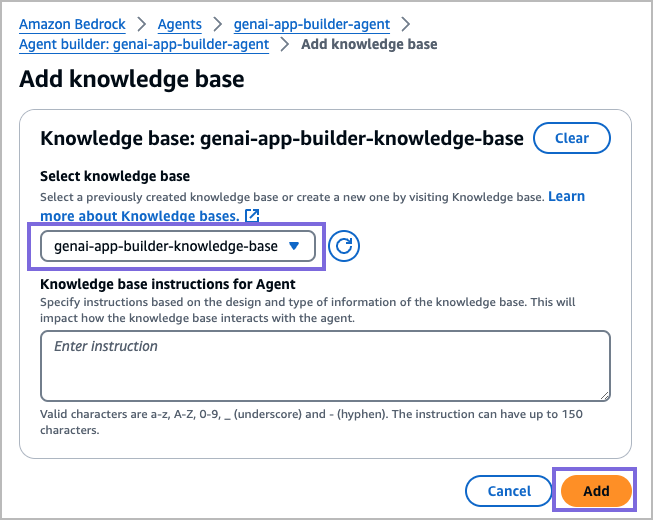
- Choose the newly created knowledge base, and click Add.
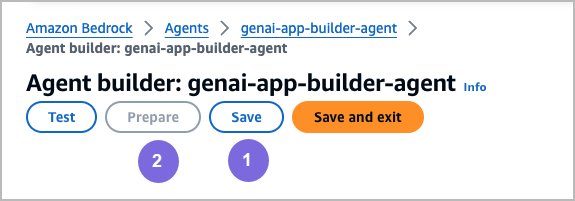
- Click Save and then click Prepare.
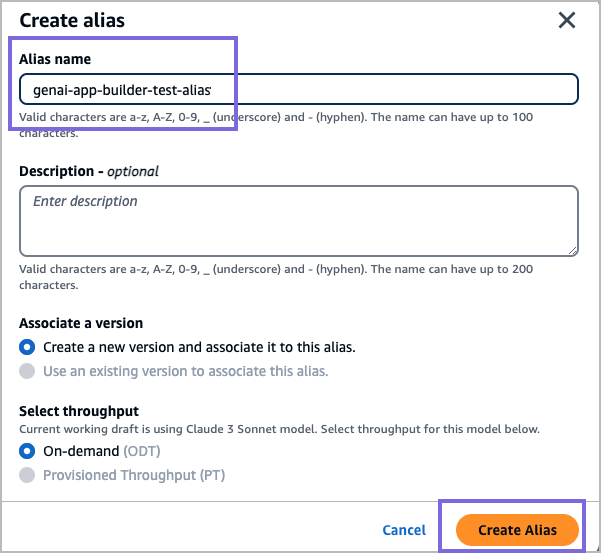
- Optional. Create an Agent Alias. This is an optional step because Amazon Bedrock
creates a test alias for you. An alias is required to use an Invoke Agent Snap. Aliases
can be used to associate different versions of the agent, so users can evaluate
different models or configurations.

Note: After you have associated the Agent with the Knowledge base, you
can begin to use the Invoke Agent Snap. Once you have configured your Amazon Bedrock
Account, you can locate the newly created Agent ID and Agent alias ID in the suggestible
property of the respective fields.
Configure the Knowledge Base and Agent in the Agent Retrieve and Agent Retrieve and Generate Snaps
- Drag the Agent Retrieve or Agent Retrieve and Generate Snap.
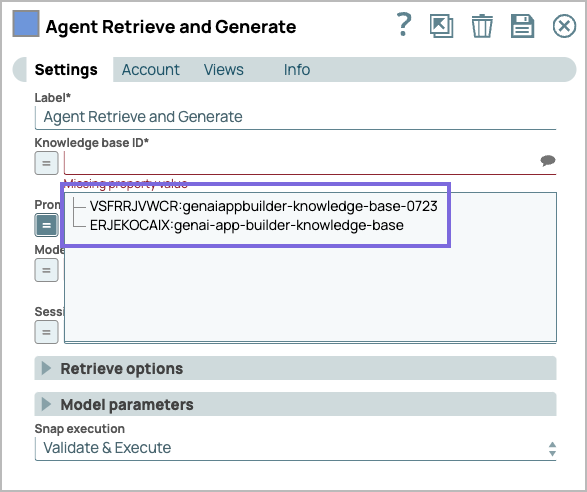
- Click the Suggestion icon of the Knowledge base ID field.
The newly created Knowledge base is displayed.
- Drag the Invoke Agent Snap.
- Click the Suggestions icon of the Agent ID and Agent
Alias ID. The newly created Agent aliases are displayed.
