You can use SnapLogic Designer to create an account easily and efficiently, enabling seamless integration with various applications and services for data integration and workflow automation.
- Write permissions for the SnapLogic Project in which to create the Account.
- All of the values necessary to access the endpoint, such as hostname or server path, username, and credentials.
-
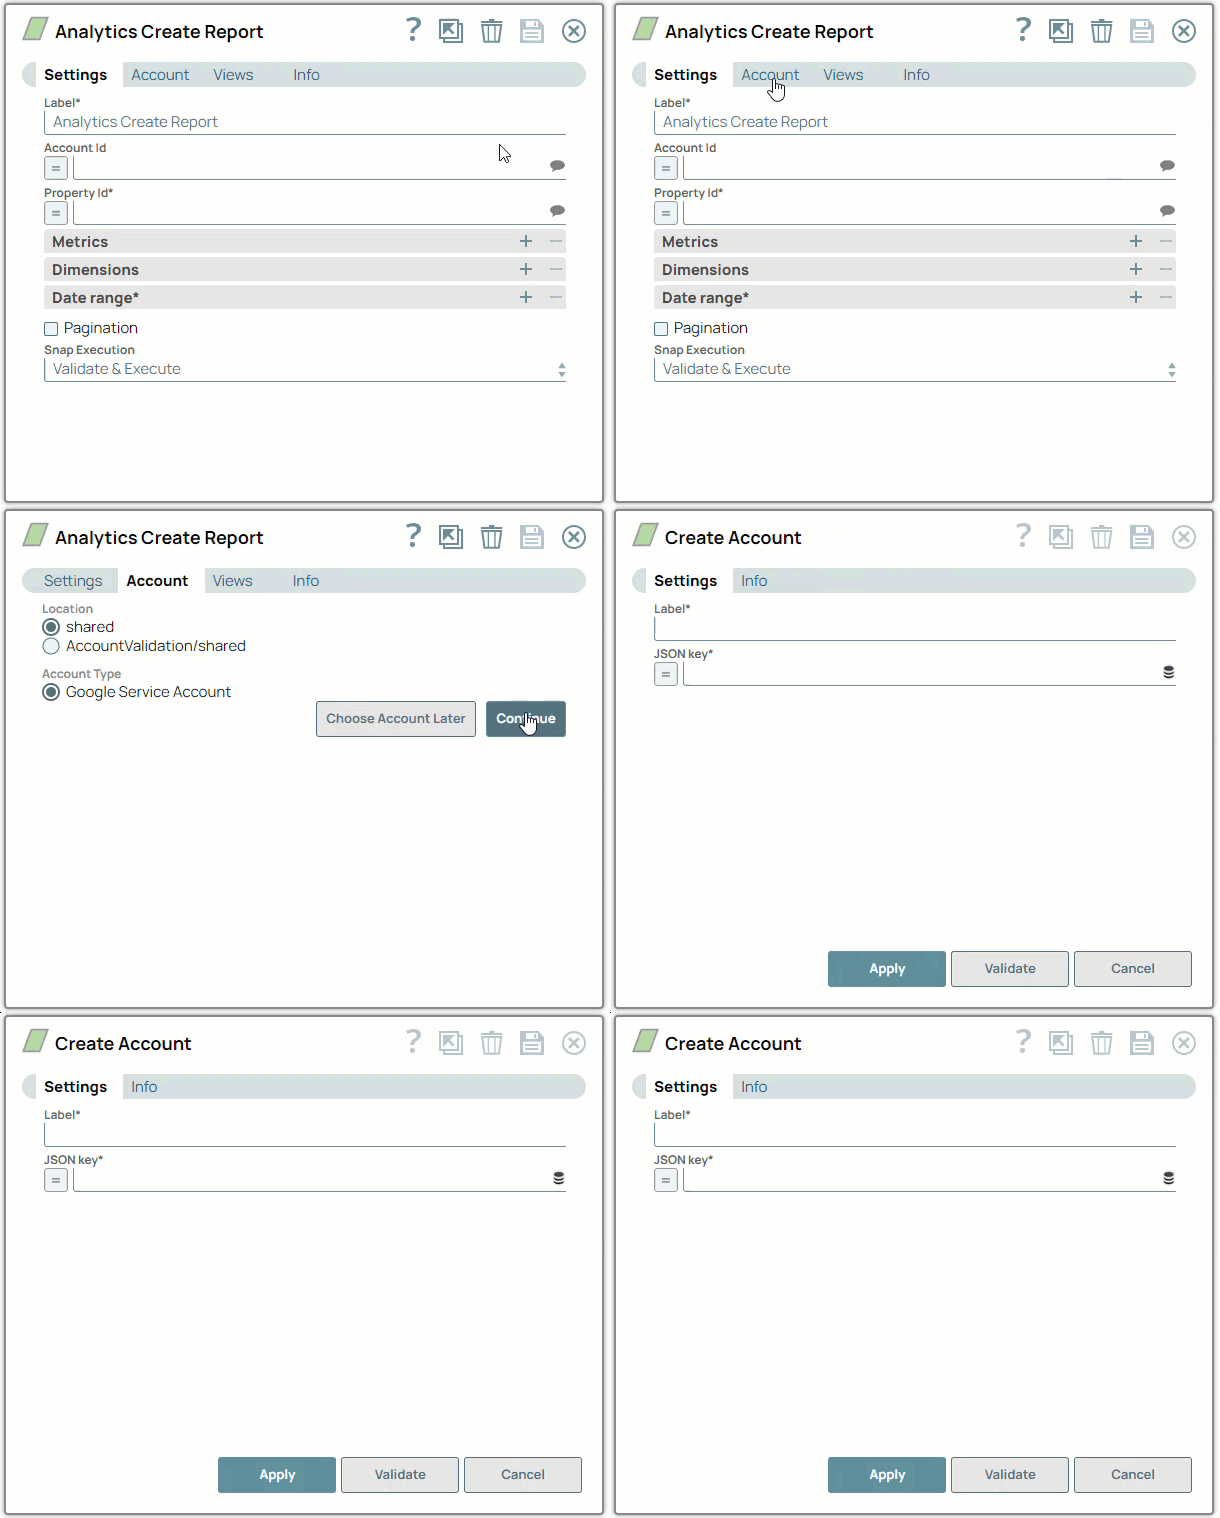
Drag a Snap to the Canvas or select an existing Snap.
-
In the Account tab, click Add Account below the Account Reference field.
-
Select the Location where you want to create the account.
-
Select the Account Type, and click Continue.
-
If the data source has more than one Account Type available, select one.
The following example shows the account types for a Google Analytics 4 - Create Report Snap.
The Create Account dialog window appears.
-
In the Create Account dialog, specify the required settings to connect to the data source.
For detailed guidance on how to provide the information required for each account type, refer to the Account under the specific Snap Pack.
-
If the Account Type supports validation, click Validate to verify if the connection succeeds.
-
Click Apply.
Note:
Enter additional information on this account in the Notes field of the Info tab.
This will help you–and other users–understand the purpose of the account, especially if there are multiple accounts of the same type.


