Create a project from a repository
If you have an existing Git repository that contains SnapLogic assets, you can create a new SnapLogic project from a Git checkout.
Important: You can track a maximum of 1000 assets per project. If a
check-in would exceed 1000 assets in the repository or if you try to check out a project
with more than 1000 assets, an error is thrown.
Important: For security, task bearer tokens are not stored in Git. When you check out (including a hard reset), SnapLogic recreates the bearer token for each task.
-
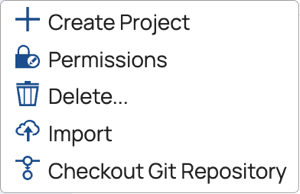
In the navigation tree, locate the project space, and click the down arrow to open the project space menu:

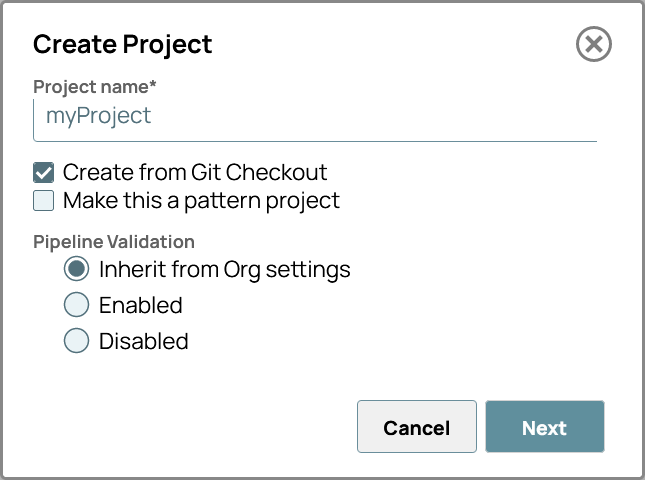
- In the Create Project dialog, enter a name for the new project and select Create from Git Checkout.
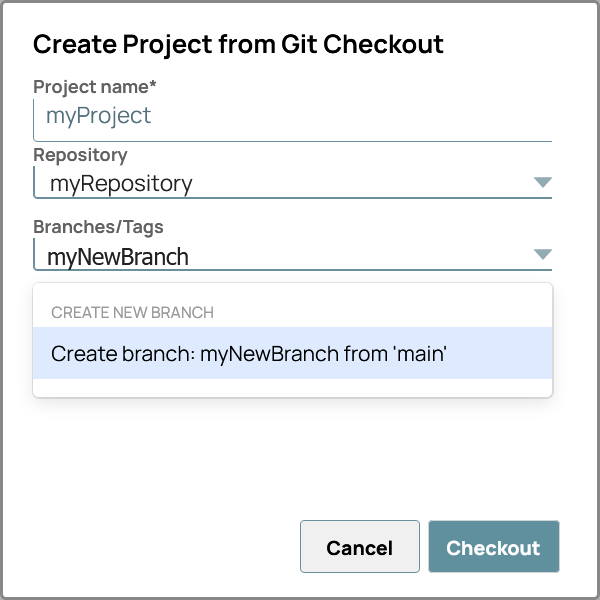
- In the Create Project from Git Checkout dialog, select the repository and branch/tag to use with the new project.
After you select the repository, its default branch displays in the Branches/Tags field. You can select another branch from the dropdown.

Tip: To create a new branch for the project, overwrite the name of the existing branch in the Branches/Tags field with the new branch name, then choose Create branch from the dropdown. The new branch is created from the existing branch that you previously selected.