


Groundplex: Download installation files
- Environment (Org) admin permissions
-
In the Groundplex screen, fill in the
Settings tab and click Save. The
Groundplex created is added to the Snaplex list. The Downloads tab
displays after the Snaplex is created.
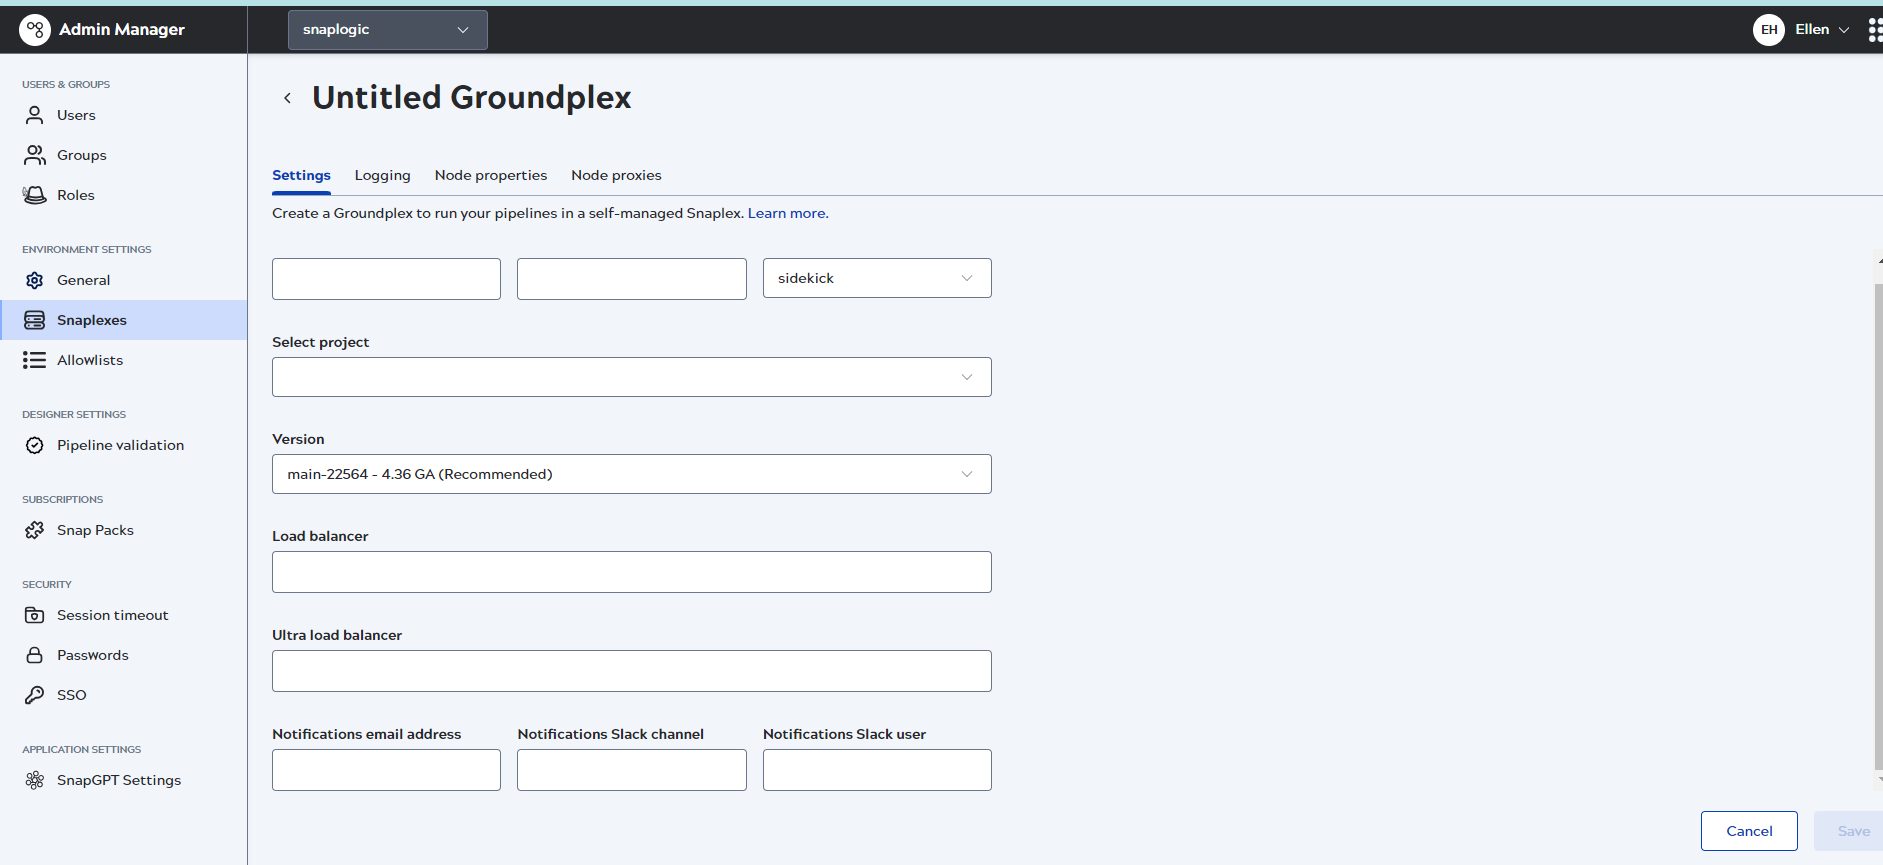
Field/Field set Description Name Specify a unique name for the Groundplex.
The name must not exceed 100 characters and can include characters and numbers.
We recommend you use a descriptive, memorable name for your Snaplex using alphabets followed by numbers.
Default value: None.
Example: Test123
Environment Specify the value to configure the Snaplex nodes.
Default value: None.
Example: Test-10k
Important: You must stop the Snaplex nodes before updating the environment value. You cannot update the environment value if nodes are running in the Snaplex. Download the configuration file for each node and restart the nodes for the environment value to take effect.Location Select the location where the Snaplex must be created.
Sidekick: Creates a SnapLogic Snaplex (Groundplex).
Default value: sidekickSelect project Select your target Project or shared folder from the dropdown. Version Select the Snaplex version.
By default, all new Snaplexes are configured to work with the latest version of the Snaplex.
Default value: None.
Load balancer Specify the URL for the load balancer for Triggered Task execution requests. The load balancer URL has to be fully qualified, including the protocol. The load balancer URLs in the Snaplex settings, are used for the Snaplex Trigger URL.
Default value: None.
Example: https://snaplexlb.mydomain.com
Ultra Load balancer Specify the URL of the FeedMaster load balancer for Ultra Task execution requests. This property is available only to Environments that have subscribed to Ultra Tasks.
Default value: None.
Example: https://ultralb.mydomain.com
Notifications email address List the email addresses to notify if one of the Snaplex nodes does not respond for 15 minutes.
Default value: N/A
Example: [email protected]
Notifications Slack channel Specify the name of Slack channels (separated by commas) to notify if one of the Snaplex nodes does not respond in 15 minutes.
Default value: None.
Example: DevOps
Notifications Slack user Enter the Slack recipients (separated by commas) to notify if one of the Snaplex nodes does not respond for 15 minutes.
Default value: N/A
Example: testuser
-
In the Downloads tab,
download (
 ) or
copy (
) or
copy ( ) the package for your operating system for the following files:
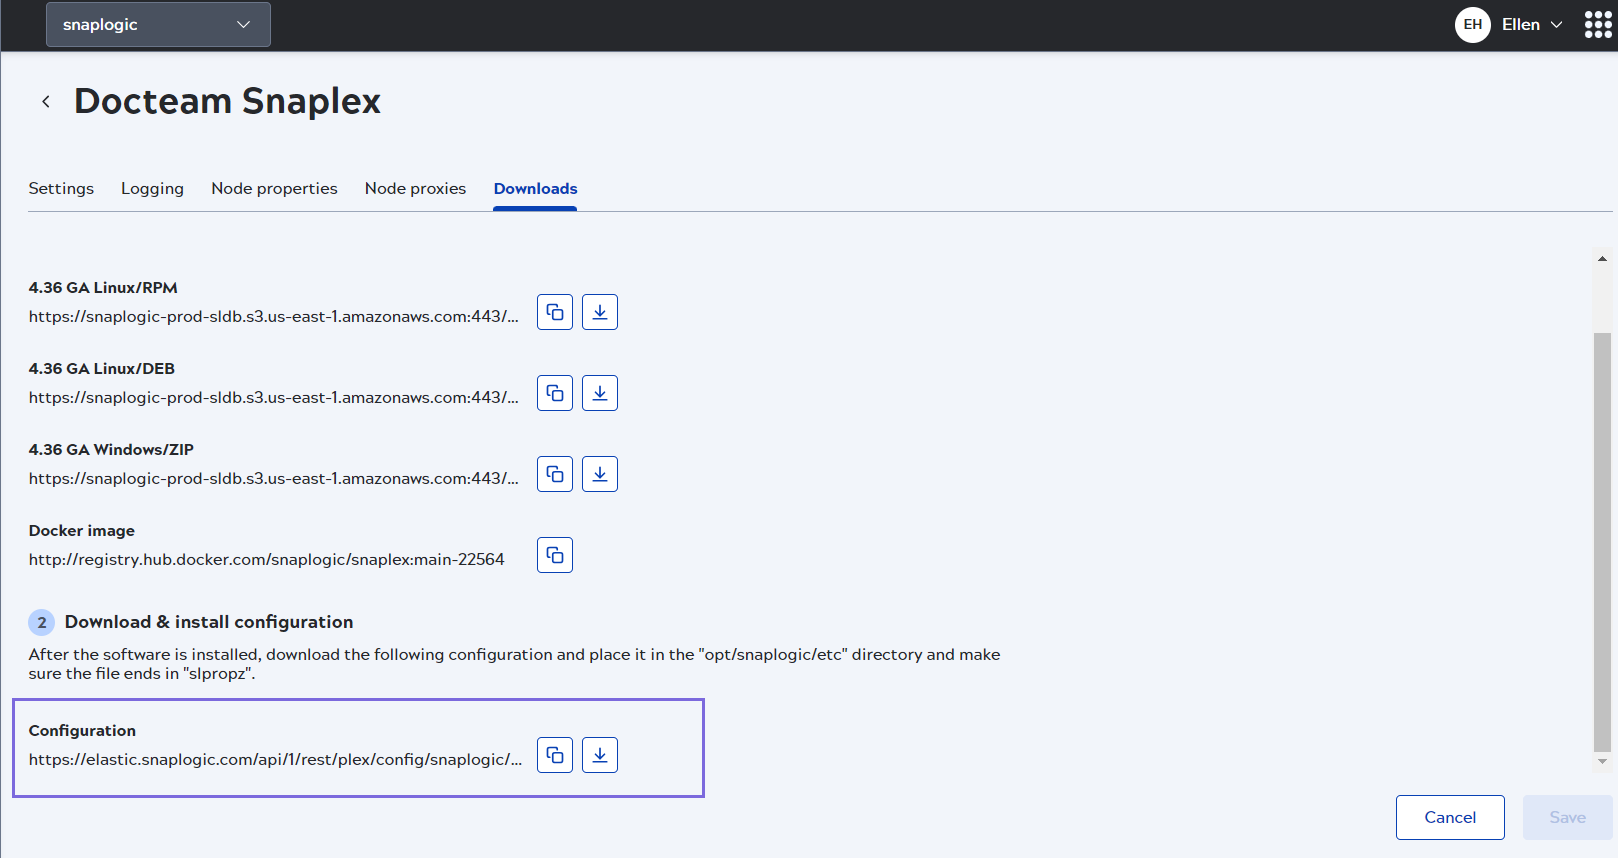
- Linux/DEB: Software image for Debian-based Linux OS for the listed release
- Windows/ZIP: Software image for Windows OS.
- Linux/RPM: Software image for Red Hat-based Linux OS.
- Docker Image: Software image (not downloadable) for Docker deployments.
- Configuration: The configuration file (.slpropz) for a Snaplex.