


Create an Identity Provider application integration
Your IdP might call this integration an app integration, an application, or an enterprise application. To create it, you will need the SnapLogic environment URLs listed on the Admin Manager Configure SSO page.
If you have multiple SnapLogic environments:
- Choose one of them to provide the metadata for the IdP application integration. It doesn't matter which environment you choose, however, any user who wants to use SSO to sign in must be a member of this environment.
- Log into the other environments and copy the Reply URL (Assertion Consumer Service URL) into a text file. You will need these URLs when configuring the application integration in the IdP.
With these steps complete, you can proceed with the integration:
-
From the Admin Manager Configure SSO page, provide SnapLogic's service
provider information to your IdP in one of the following ways:
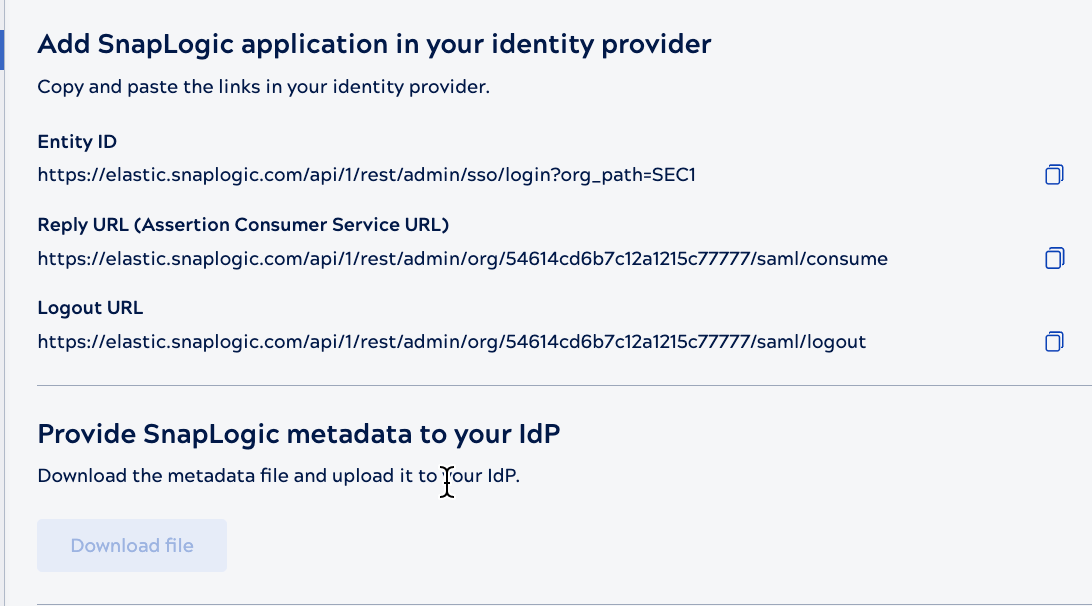
- If your IdP accepts a metadata file, download the SnapLogic service provider (SP) metadata XML file from the Provide SnapLogic metadata to your IdP section and upload it to your IdP.
- Otherwise, copy the Entity ID, Reply URL, and Logout URL and paste them into the appropriate fields in your IdP. IdP field names may differ — for example, in Okta, the Single sign-on URL field contains the Assertion Consumer Service (ACS) URL, which Admin Manager calls Reply URL.