


Configure the JRE Version
Updating and configuring the Java version on your Groundplex nodes
The Java Runtime Environment (JRE) is a critical component for running Groundplex nodes in SnapLogic. Ensuring that your nodes are using a compatible and secure version of Java is essential for maintaining optimal performance and security. You can use these steps to update the Java version on your Groundplex nodes.
Linux Groundplex installers (RPM and DEB) come bundled with an OpenJDK-based JRE. The May 2026 release adds JRE 17 alongside JRE 11. Windows Groundplex installers are built to support JRE 17 but do not bundle a JRE — Java 17 must be installed separately on the host before starting the Snaplex. Learn more.
In general, you may need to update the JRE to apply security patches, gain new functionality, or ensure compatibility with your environment.
SnapLogic installers come with openjdk-11.0.24_8-jre. In the February 2025 release and after, all Java versions earlier than openjdk-11.0.8-jre are no longer supported.
JRE version update process
To update the JRE version on your Groundplex node:
- Start the upgrade process on your development and testing Orgs.
- Verify the functioning of your pipelines in the development Orgs and then update the JRE version on the production Orgs.
- Switch the nodes you want to upgrade to Maintenance mode. This ensures that running pipelines complete their execution before the upgrade begins.
- When upgrading multiple nodes, we recommend that you upgrade one node at a time.
- New pipelines are not sent to a JCC node in Maintenance mode.
Update JRE version on Linux
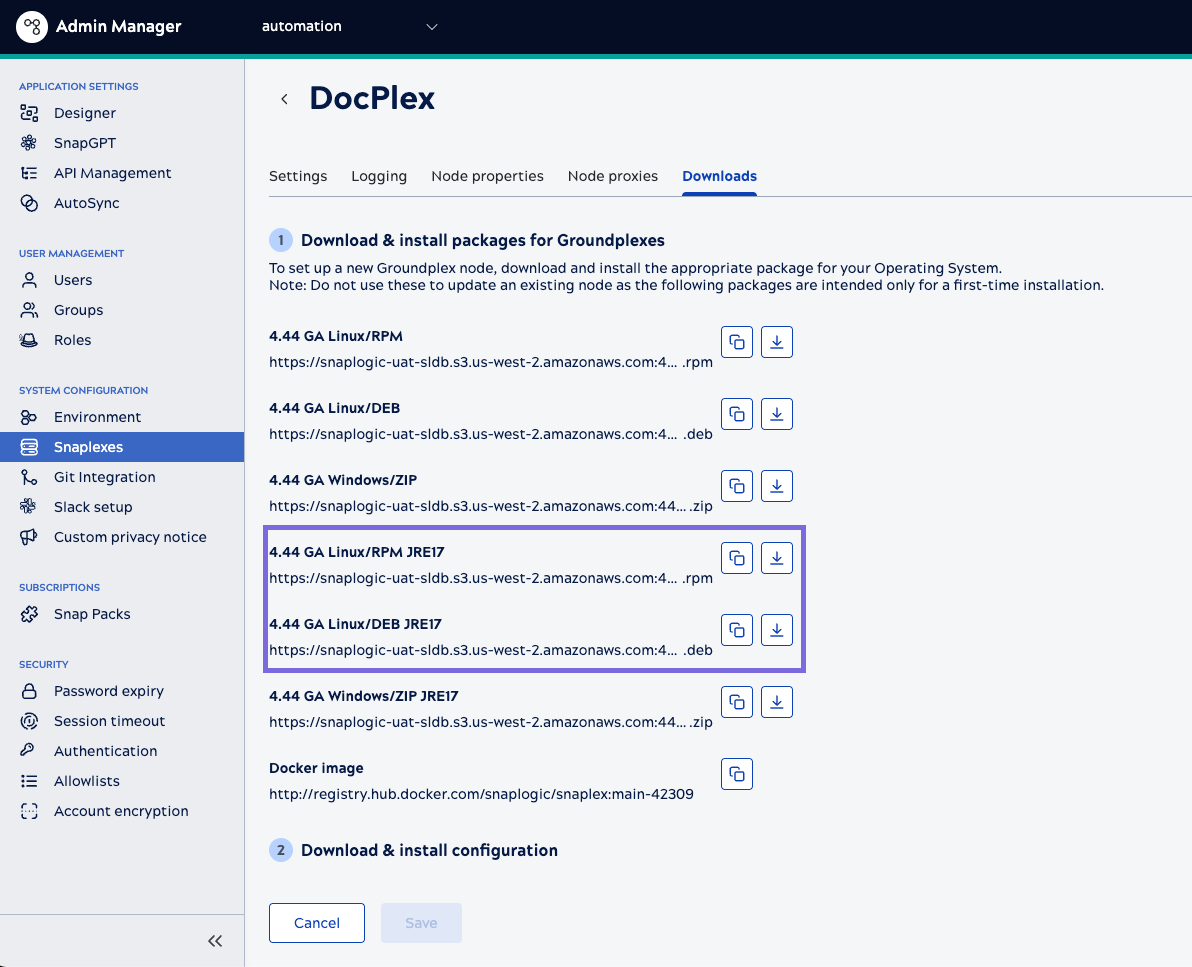
This process updates to JRE 17 by installing a new SnapLogic RPM/DEB on Linux.
In the following image, the Linux installers bundled with JRE 17 are highlighted.
- On the Linux terminal, stop the existing JCC node by running the following command:
$ sudo /opt/snaplogic/bin/jcc.sh stop - Download and install the new Snaplex installer with JRE 17. Choose the appropriate installer based on your system and run the corresponding commands:
Installer Command RPM systems $ rpm -U --force <your snaplex file>.rpmDEB systems $ dpkg -i <your snaplex file>.debDocker Stop the existing container and start a new container using the latest image. -
Start the JCC node by running the following command:
$ sudo /opt/snaplogic/bin/jcc.sh start. - The Snaplex will start with JRE 17 bundled along with the SnapLogic installer.
- To update to a JRE 17 installed at another location, create a file
/etc/sysconfig/jccwithSL_JAVA_HOMEpointing to the desired JRE 17 location. Run the following command to create the file and grant read permissions to all users:sudo mkdir -p /etc/sysconfig; sudo sh -c "echo 'export SL_JAVA_HOME=/opt/snaplogic/pkgs/jdk-17-jre/' >> /etc/sysconfig/jcc"Note: ChangeSL_JAVA_HOMEin the above command to point to the custom JRE 17 location as needed.
Update JRE version on Windows
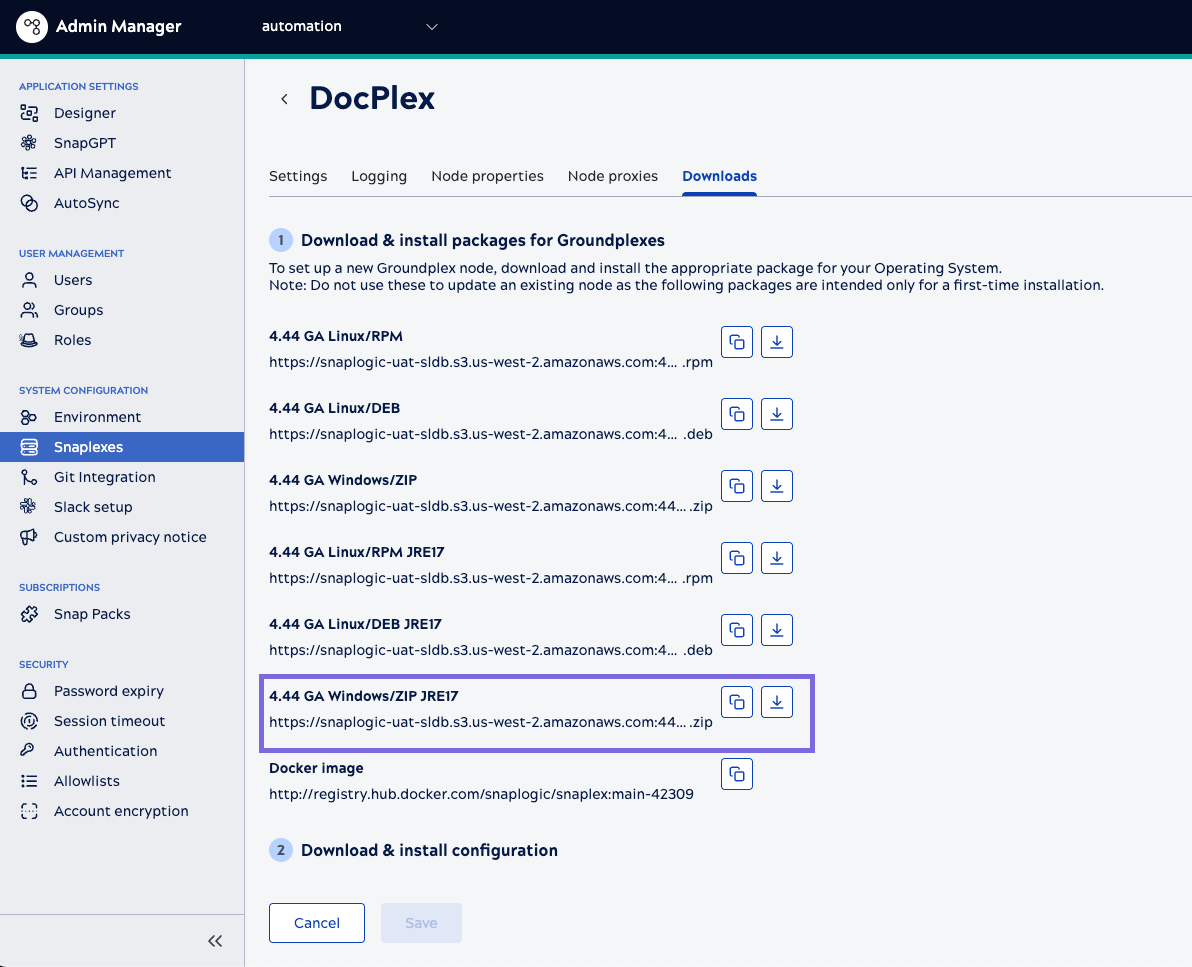
In the following image, the Windows installers that support JRE 17 are highlighted. Unlike the Linux RPM/DEB installers, the Windows installer does not bundle a JRE. Java 17 must be installed separately on the host before starting the Snaplex.
To update to JRE 17 on Windows:
- In the Windows command prompt, stop the JCC node by running the following command:
c:\opt\snaplogic\bin\jcc.bat stopNote: This step is required only when an existing Snaplex installation is present on the node - Download the new installer Zip and extract the contents to the following location:
c:\opt\snaplogic - Download and install the Adoptium's OpenJDK-based Java 17 installer.
- Update the
c:\opt\snaplogic\bin\jcc.batfile and update theJAVA_HOMEto point to the location of the Java 17 installation. - Start the JCC nodes:
- If you are running the Snaplex as a service, run the following commands:
jcc.bat remove_servicejcc.bat install_service - Run the following command:
c:\opt\snaplogic\bin\jcc.bat start
- If you are running the Snaplex as a service, run the following commands:
- After you configure Java, go to the SnapLogic Monitor and verify if the Additional details tab displays the Java version as 17 or higher.