


Compose the pipeline
Pipelines are composed of individual Snaps. Each Snap performs a discrete piece of work. Data flows as input to a Snap, the Snap processes it and outputs the results to the next Snap.
This example uses the following Snaps to split the data from a CSV file into two files:
To compose the pipeline:
- Click Designer to open the design canvas.
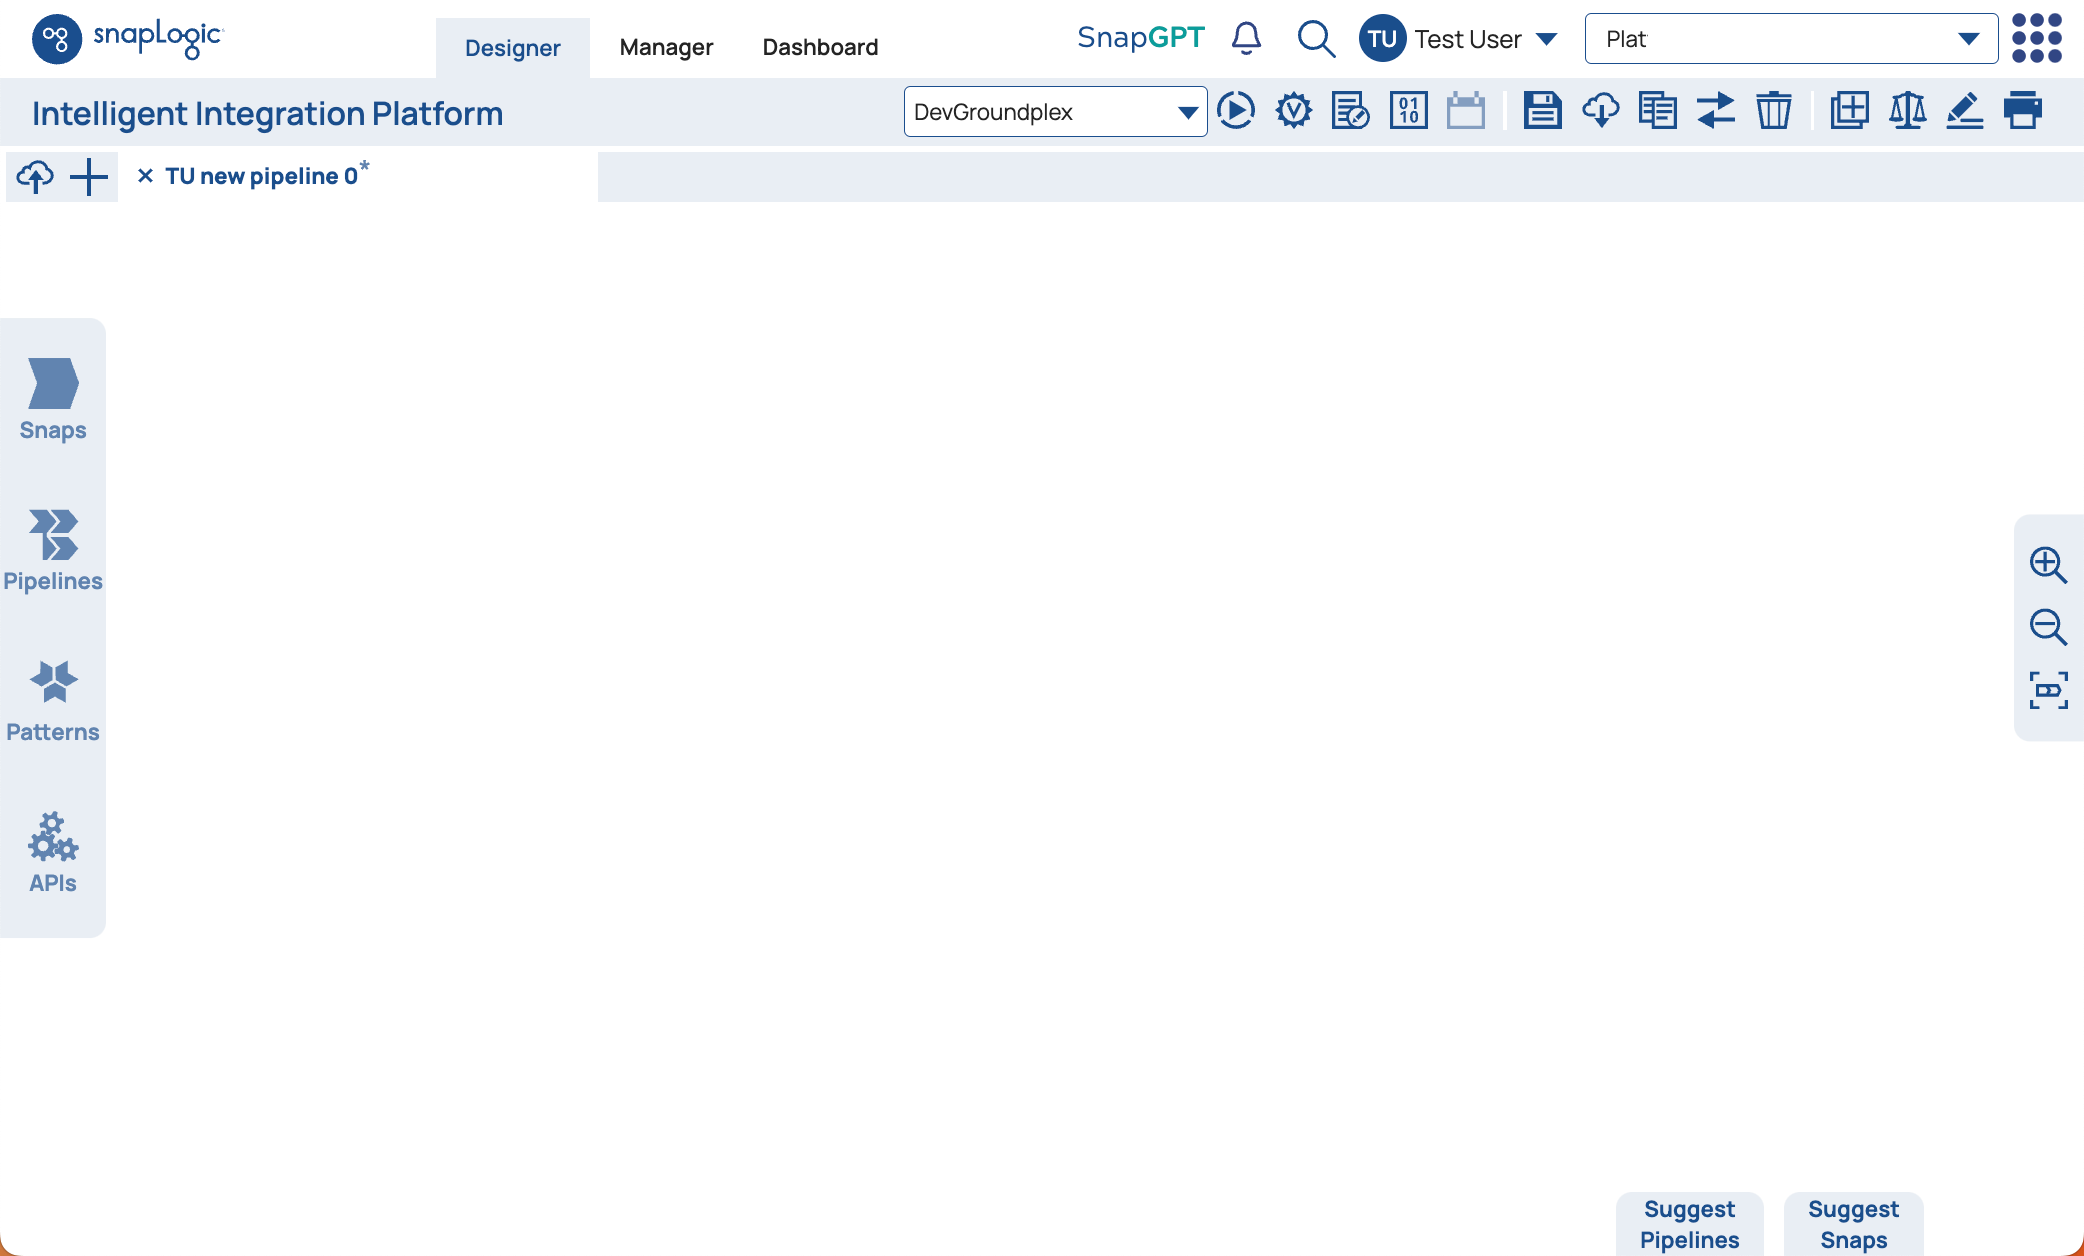
The appearance of the left side of the screen depends on your profile settings. The screenshot above shows the Asset Palette, an opt-in feature under Designer Settings. The remaining steps assume use of the Asset Palette.
- Click
 to create a new pipeline.
 - Add and configure a File Reader Snap:
- In the Asset Palette click Snaps.
- In the Search box, start entering File and drag the File Reader Snap from the results list to the canvas.
- Click the Snap to open it.
- In the Settings tab, click the database icon on the right side of the File field.
- From the Project menu, select shared.
- In the filter field, enter directory and click the file when it displays. The path to the file includes the environment (also known as Org) name and the shared folder.
- Save and close the Snap.
- If the Iris Integration Assistant is enabled in your
App settings, you can see the recommended downstream and upstream Snap suggestions in the
context menu of the Snap. Right-click the
File Reader
Snap and select .
In the Downstream Snap suggestions pop-up, search for the CSV Parser Snap and connect it to File Reader Snap.
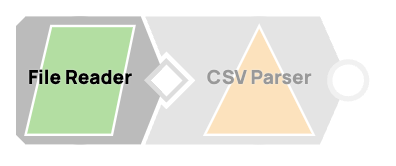
The CSV Parser Snap takes the file input from the File Reader Snap and outputs a document in JSON format. Our example requires no further configuration. - Use a Filter Snap to remove all members of the Operations department from the results:
- Search for the Filter Snap and select it from the Flow category. Drag it to the right of the CSV Parser Snap.
- Validate the pipeline.
- Open the Snap settings.
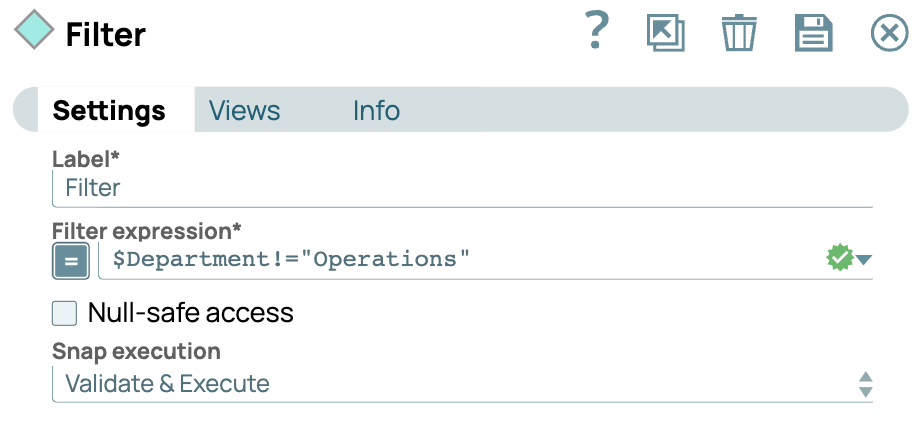
- From the dropdown menu on the Filter Expression field, select the Input schema Department field.
- Enter !="Operations". The expression icon on the left with a
dark background shows that this is an expression. The green checkmark in the following
screenshot shows that it's valid. If you don't see a green checkmark, delete the
expression and try again.
Note: It's a good practice to save and validate your pipeline after adding a few Snaps. How you do this depends on whether validation and data preview is enabled in the environment. Assuming that it is, on the pipeline toolbar, click Save. Designer validates the Snaps, which turn green. Click the document icon on the right side of the Filter Snap to preview the output. Note that the records no longer include employees from Operations. - Configure a Router Snap to send employee records to different files based on their location.
Records in the CSV file have three values for location, HQ, CO, and Field. To separate the employees
in the field from those at headquarters or in the Colorado office:
- Search for Router and select the Router Snap from the Flow category.
- Click the Snap to open its settings. The Routes section includes two fields, one for each output view.
- Open the dropdown menu for the first expression and select Location
from the Input Schema. Tip: For clarity, you can rename the views in the Views tab.
- Enter =="Field". This routes records for employees in the field to the output0 view.
- For the second expression, select Location again and enter
!="Field". This routes employees in the other locations to the
output1 view. Tip: As you enter the expression, a preview pops up to show which records match.
- Save and close the Snap.
- Transform the output from the Router Snap into CSV format:
- Search for CSV Formatter Snap and drag two of them onto the canvas, connect one to output0 and one to output1.
- Leave them with their default configuration.
- Configure File Writer Snaps to write the data to two files:
- Search for File Writer, drag one and connect it to one of the CSV Formatter Snaps.
- Drag a second File Writer Snap to the other CSV Formatter Snap.
- Click the top File Writer Snap to open its settings.
- In the File Name field, enter Field-personnel.csv.
- Save and close the Snap.
- Open the bottom File Writer Snap and enter HQ-CO-personnel.csv as the file name.
- Save and close the Snap.
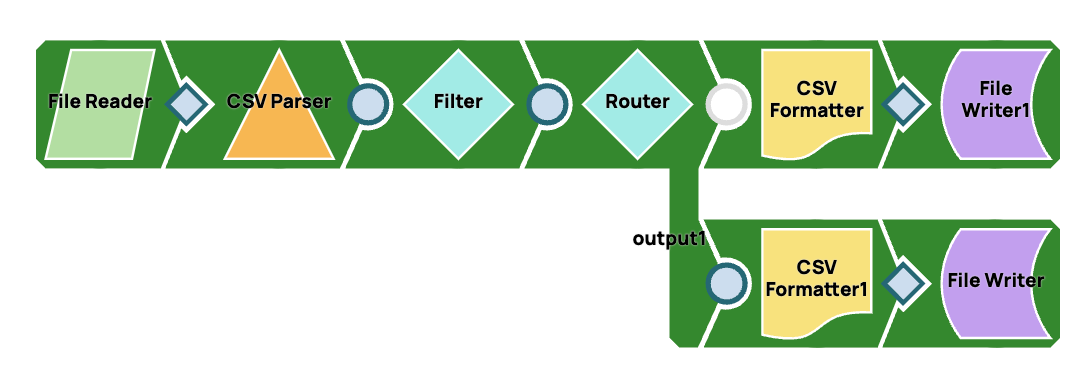
- Save and run the pipeline. As each Snap executes, it turns green:
Because we didn't specify a different location, the pipeline writes the files to your
default project. You can find the project name by clicking the Edit Pipeline
Properties button ![]() in the
Designer toolbar.
in the
Designer toolbar.
View the output files
To view the output files:
- Click the Manager tab to open Manager.
- In the left navigation pane, select your project.
- In the main pane, click Files to view your files.
Congratulations, you've completed a transformational pipeline.