


Configure the settings for Snowflake S3 Dynamic Account
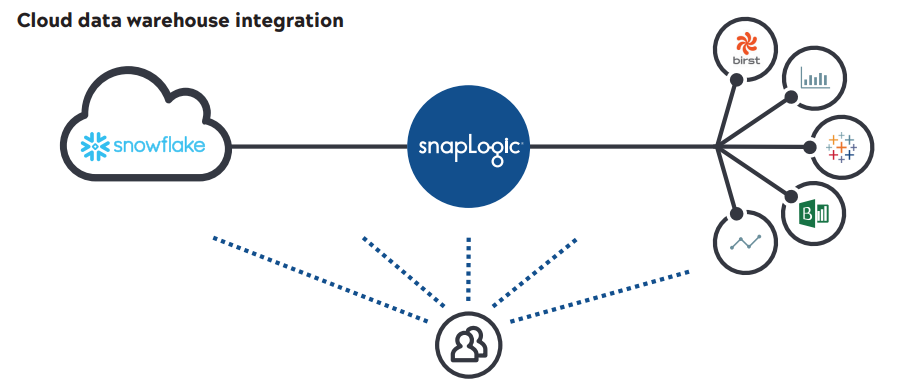
Overview
Prerequisites
Key Steps in Configuring the Snowflake S3 Dynamic Account

- Configure the Snowflake database details
- Configure the Amazon S3 Storage details
- Configure the Advanced properties
- Configure the pipeline parameters for the Snowflake pipeline
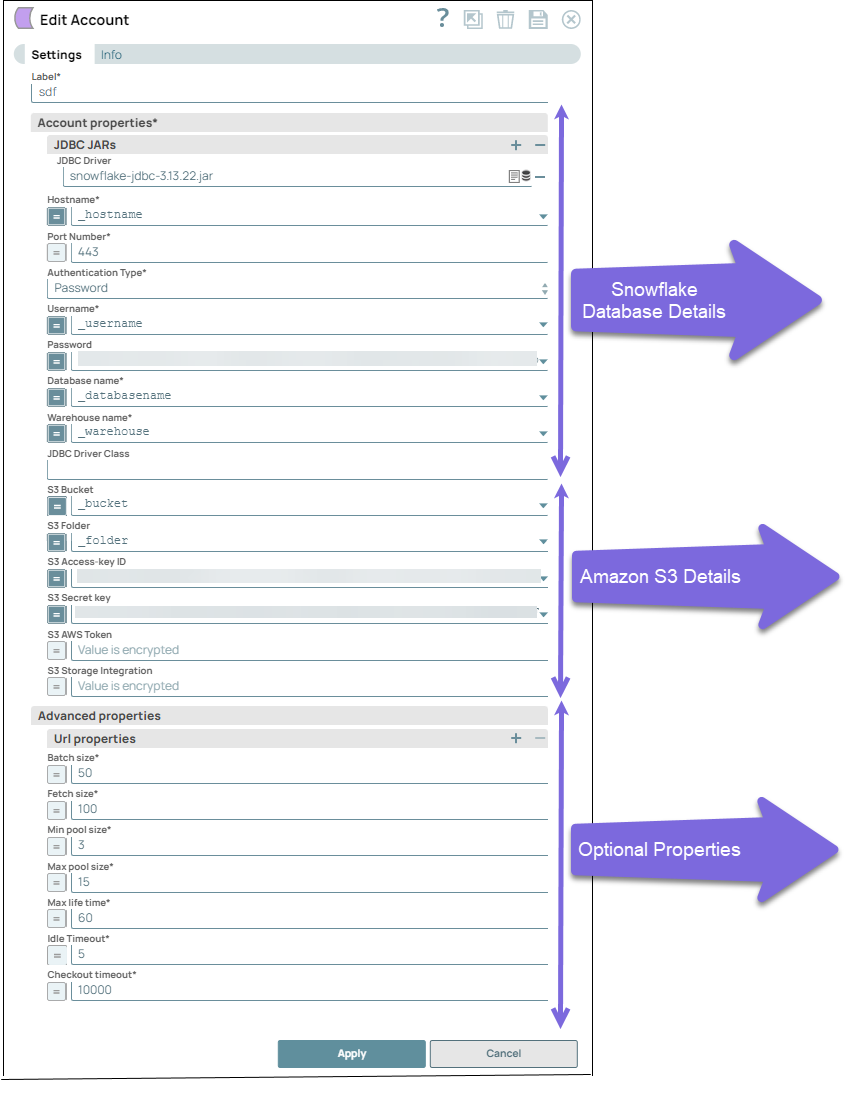
Step 1: Configure the Snowflake database details
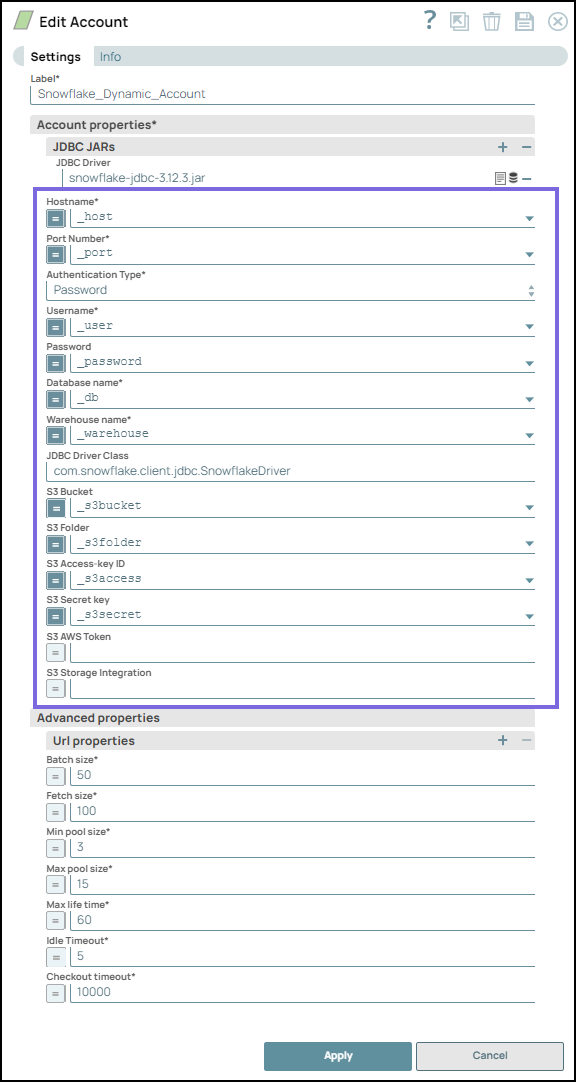
To establish a connection to the Snowflake database, configure the following details:
- JDBC JAR: By default, the Snowflake Snap Pack comes bundled with the JDBC JAR V3.13.28 file, ensuring successful authentication even if you do not provide a specific JDBC driver. If you prefer to use a custom JAR file version, you can manually upload it by accessing the database icon under Account properties.
- Database details: Specify the Hostname, Port Number, Authentication Type, Password, Database Name, Warehouse name, and JDBC Driver class. For more information, refer to Snowflake S3 Dynamic Account.
Step 2: Configure the Amazon S3 Storage details
- S3 Bucket: The Amazon S3 bucket where Snowflake creates the required data files. This bucket must reside in the same region as the cluster. Learn more: Creating an S3 Stage | Snowflake Documentation
- S3 Access Key ID: The Access Key ID serves as authentication for requests made to Amazon S3. Learn more: AWS Access Key ID.
- S3 AWS Token: AWS generates a temporary security token that includes the user's permissions and the token's expiration time. These temporary security tokens have a limited lifespan and preserve the security of S3 resources, and prevent unauthorized access. You can add details of the lifespan under the Advanced properties section.
- S3 Storage Integration: Specify the S3 Storage Integration for Snowflake to be used for staging data instead of using the AWS Access-key ID and the S3 Secret key. This value is necessary for validating data after a bulk load or bulk insert operation. Learn more: Managing access keys for IAM users - AWS Identity and Access Management
- Access to Snowflake in Amazon S3 Storage Account: Verify that the Snowflake user has appropriate access to the Amazon S3 Storage account. An AWS administrator of your organization must provide all the Snowflake access to your Amazon S3 storage account. Learn more: Virtual Private Cloud Ids for Snowflake Account.
- Access to Cloud Storage: Snowflake offers the following two methods for
configuring Identity and Access Management (IAM) for reading data from and
writing data to an S3 bucket.
-
Configure Cloud Storage Integration in Snowflake: Set up the cloud storage integration within Snowflake to establish a connection between Snowflake and the S3 bucket.
- Configure an AWS IAM User: It involves the following:
Note: You must ensure that the S3 bucket's security and access management policies permit access to Snowflake. -
Configure Cloud Storage Integration in the Snowflake platform
To use the storage integrations for Snowflake, an administrator must provide all the necessary IAM user permissions in the AWS account. Learn more: Option 1: Configuring a Snowflake Storage Integration to Access Amazon S3 | Snowflake Documentation
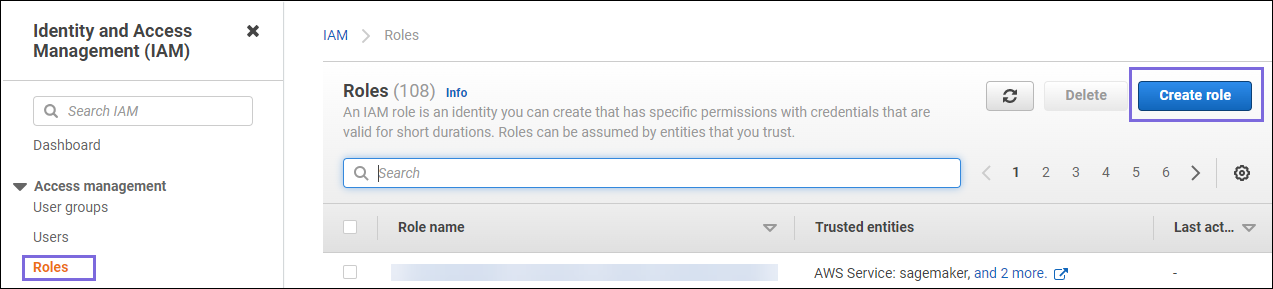
Create an AWS IAM User (Role)
- Log in to the AWS console. Open the IAM console, navigate to and ,and click Create role.
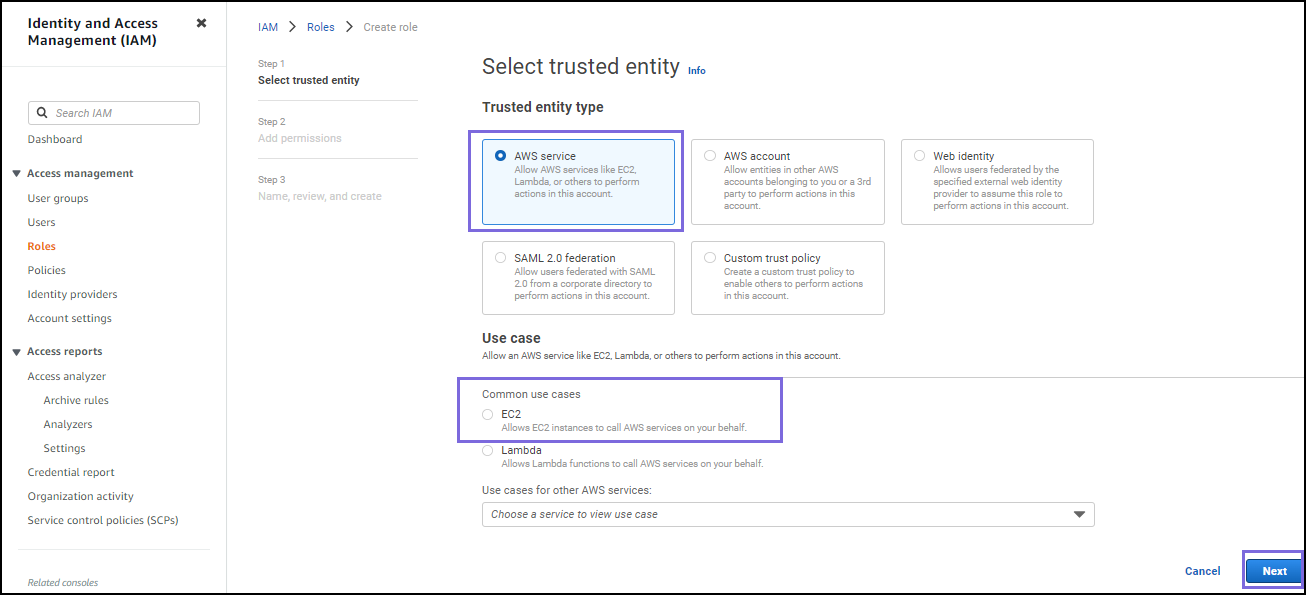
- Select the AWS service as the Trusted
entity type, and EC2 as the
Use case, and click
Next.
- In the Add permissions policies page, select all or required policies that allow your instances access to the resources and then choose Next.
- Add tags for resources because this is optional. Then choose Next. Specify a Role name and description in Name review and create page.
- Review the details and click Create role.
Assign permissions to the IAM user to access the S3 bucket
s3:GetBucketLocations3:GetObjects3:GetObjectVersions3:ListBucket
Learn more: Configure Secure Access to Cloud Storage.
Create an IAM Policy
Configure access permissions for Snowflake in your AWS Management Console so that you can use an S3 bucket to load and unload data. To create an IAM policy:
- Log in to the AWS Management Console and select Identity & Access Management (IAM).
- In your AWS console, click Policies and select the policy attached to the role from the list in the table.
- Click the JSON tab, specify the policy details in the JSON editor, and click Review Policy.
- Review the policy summary, add a name and, optionally, a description for this policy, and select Create policy.
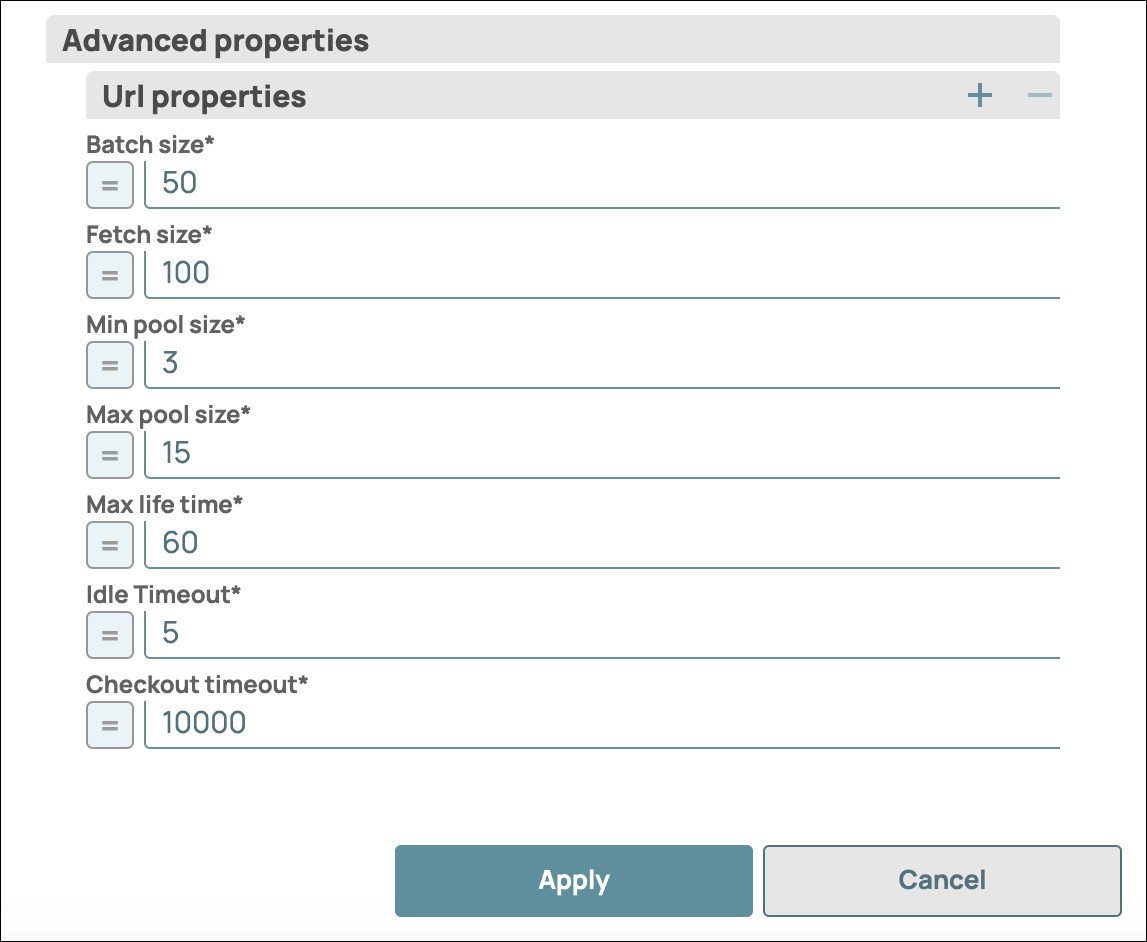
Step 3: Configure the Advanced properties
- Specify URL properties: Add any needed optional URL properties.
- Specify values for additional properties such as Batch size, Fetch size, Minimum
and Maximum pool size. Refer to the Snowflake S3 Dynamic Account for
additional information.
Step 4: Configure the pipeline parameters for the Snowflake pipeline
Based on the above configurations, configure the pipeline parameters for the Snowflake pipeline.
- Click the Edit Pipeline Properties icon in the SnapLogic Designer toolbar.
- In the Edit Pipeline dialog box, define the Key-Value
Parameters as shown below:
- Enable the expression for all the dynamic fields and select the parameters for
each dynamic field as applicable:
- Click Apply.