


Work with Fields
Flattening a Nested Structure
Flatten the hierarchy using controls on the Manage fields tab. Fields at the root level cannot be flattened.
To flatten a field:
- In the Flatten fields tree, select the checkbox next to the field or click + to select all fields. Non-nested field names are grayed out and you cannot select them.
- Click Update.
Removing a Field
Remove a field using controls on the Manage fields tab:
- At the bottom of the Manage fields tab, click the Select
fields arrow to open the list of fields:

- Click X Remove icon to remove a field. The icon changes from shaded to white.
- Click Update.
AutoPrep removes the table column for that field from the Preview data pane.
Changing a Field Name
Change the name of a field in the Preview data pane. Valid field names can include alphabetic and numeric characters, underscores, spaces, and the @ character. Field names are case-sensitive. For example, you can have a field named Age and one named age. However, AutoPrep will inform you if you rename a field using a name that exists, but has a different casing.
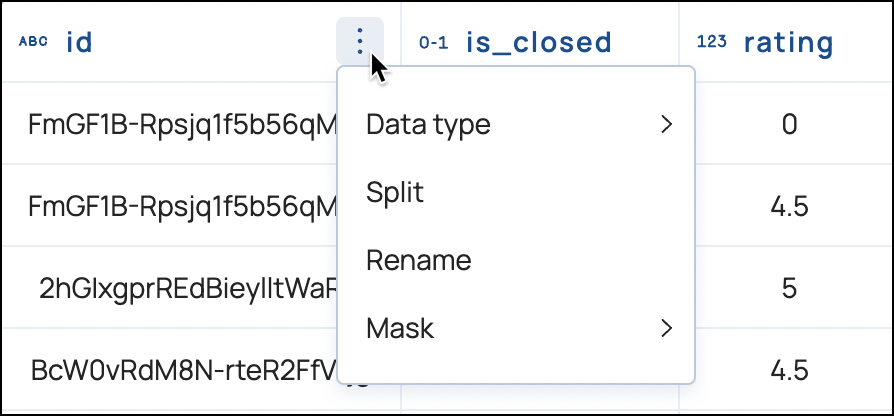
- In the field header, hover over the right side of the column header and click the three dots to open the options menu:
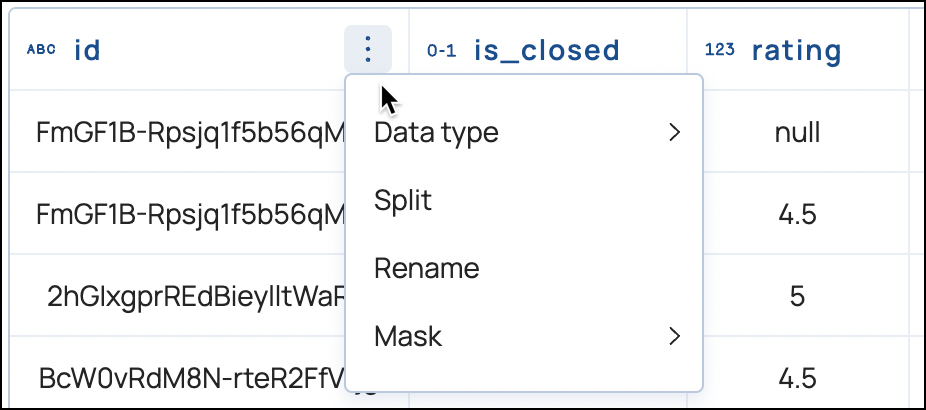
- Select Rename.
- Enter the new name.
- Click Apply.
The renamed column displays as the last column to the right in the Preview data pane.
Changing the Data Type
Change the data type of a field in the Preview data pane or from the Manage fields tab. You can only change the data type of a nested field from the Manage fields tab. When you change a field’s data type, AutpPrep parses the records in the preview data and transforms values to the selected type.
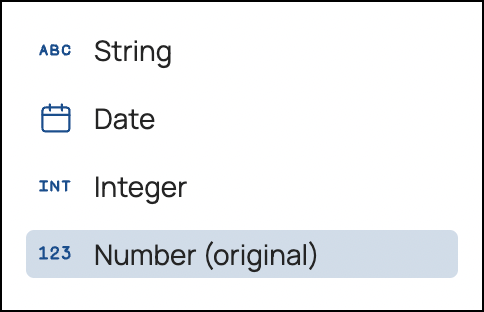
- In the field header, hover over the right side of the column header and click the three dots to open the options menu:
- Click Data type.
- Select from the available types.
AutoPrep transforms the values in the preview to the new type. Values that cannot be transformed to the selected type display as NaN.
- Click the Select fields arrow to open the list of fields:
- Click the data type decorator:

- From the menu, select a new data type:
- Change the data types for other fields as required and click Update.
The updated data types display next to the field names in the Preview data pane. Values that cannot be transformed to the selected type display as NaaN.
Changing Formats
You can format country codes with a two- or three-letter abbreviation or use the full country name. Format country codes from the Preview data pane:
- In the header of a string field that contains country codes, hover over the right side and click the three dots to open the options menu.
- Click Format.
- Select a country code format from the list. The right side displays an example
in each format:

- In the header of a field that contains currency values, hover over the right side and click the three dots to open the options menu.
- Click Format.
- Select whether to use a dot or a comma.
- In the header of a date field, hover over the right side and click the
three dots to open the options menu:
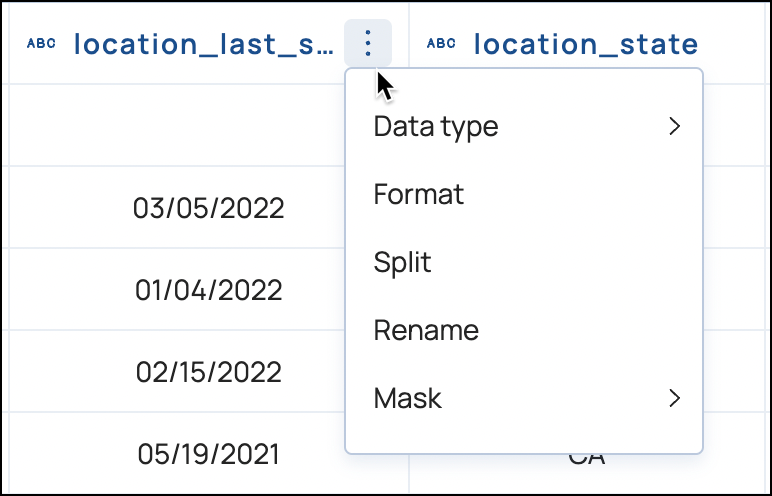
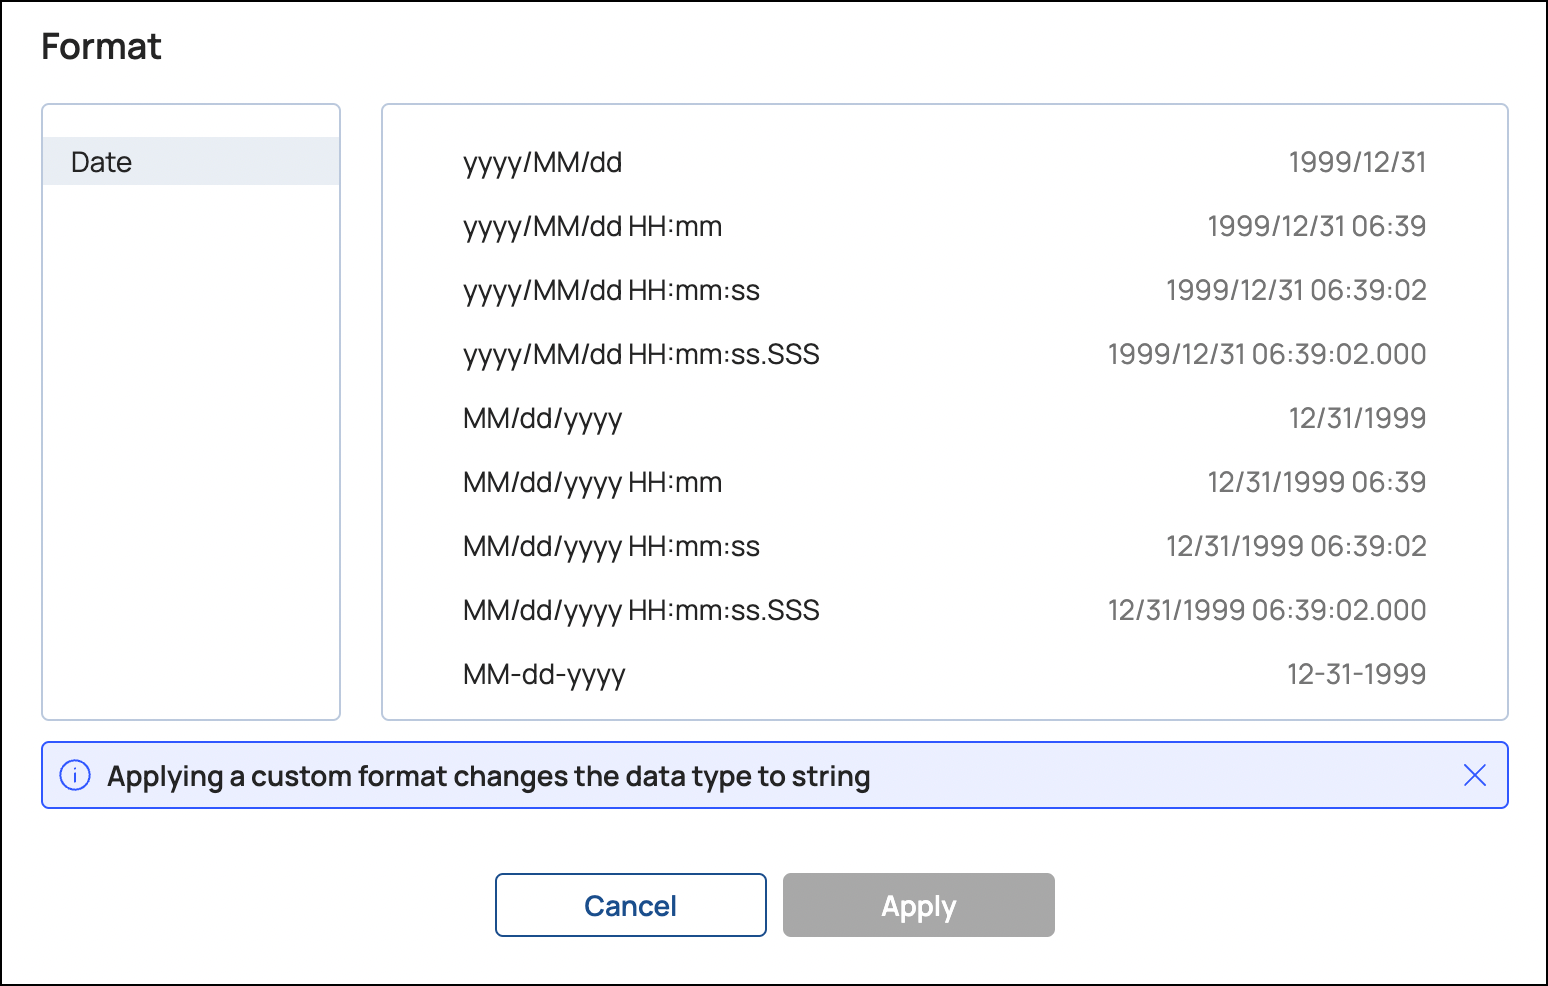
- Click Format.
- Select a format from the list:
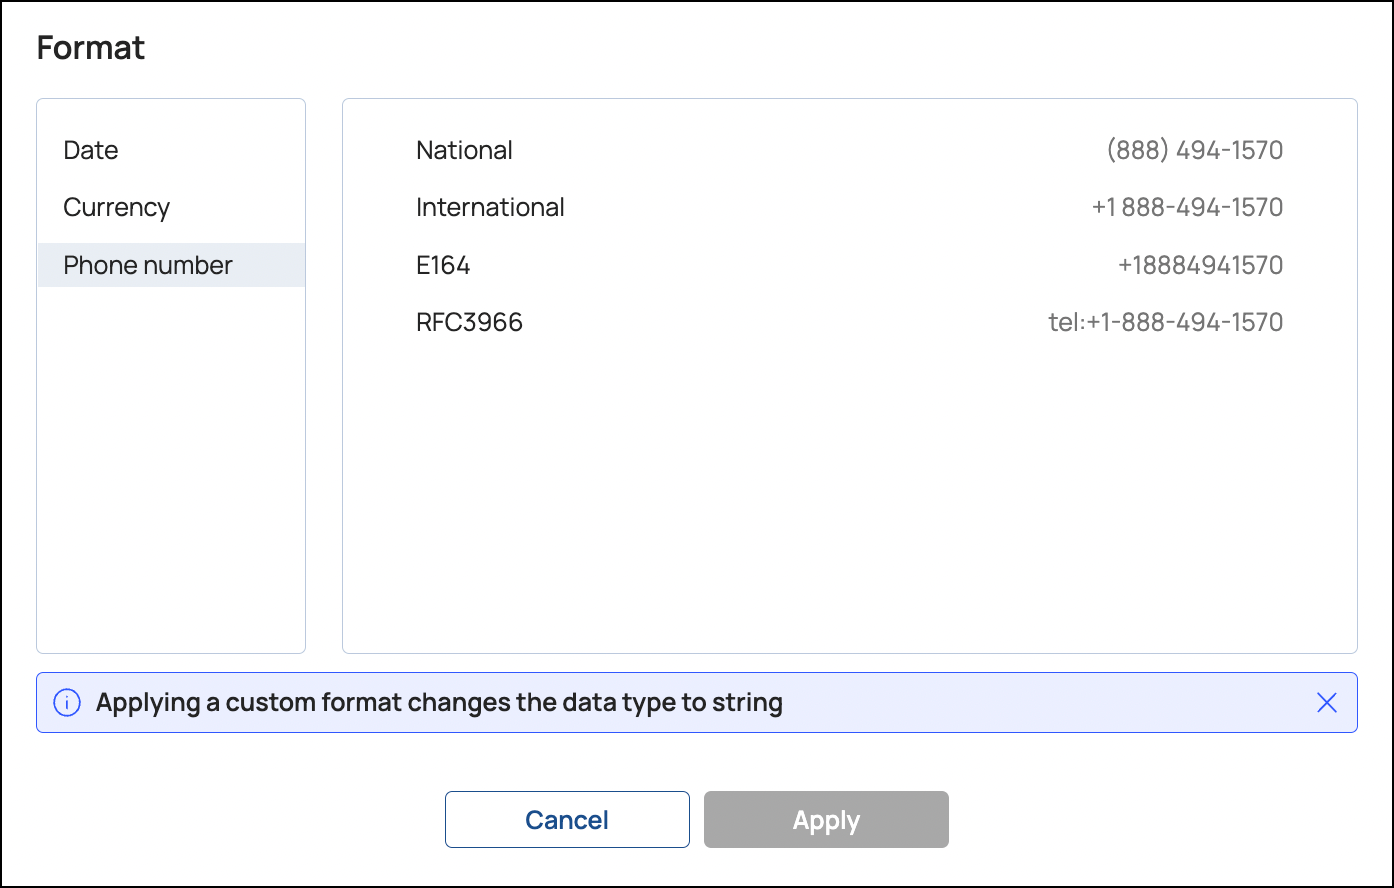
You can format fields containing phone numbers to use national, international, E164, or RFC3966 formats. Format phone numbers from the Preview data pane:
- In the header of a field that contains phone numbers, hover over the right side and click the three dots to open the options menu.
- Click Format.
- Select Phone number.
- Select a format. The right side of the pane shows examples of each option:
Splitting a Field into Multiple Columns
- Space
- Comma
- Tab
- Colon
- Custom
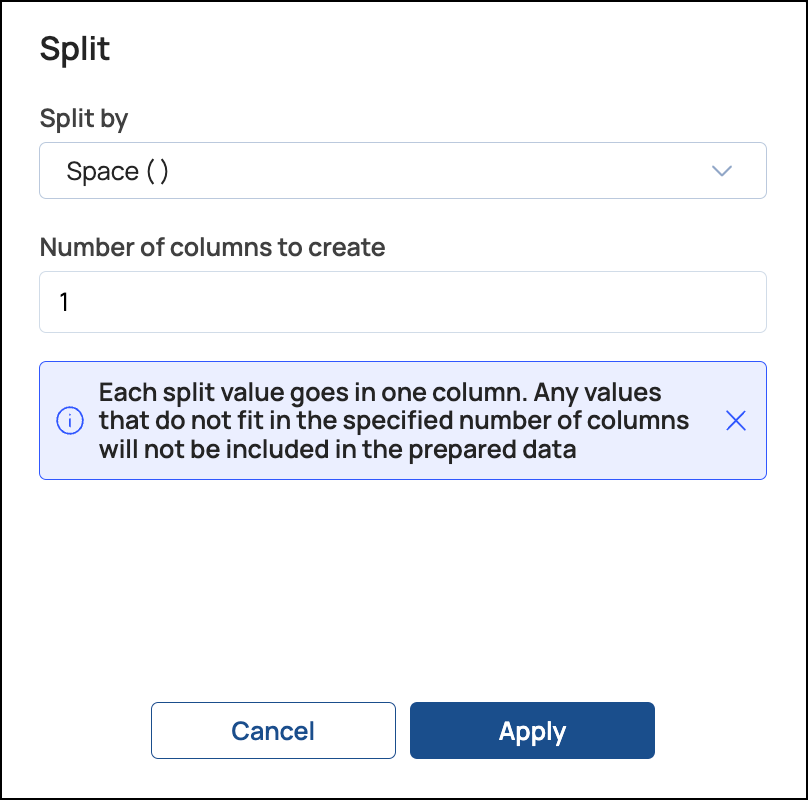
When splitting a field, you specify the number of columns for the split values.
AutoPrep creates the specified number of new columns, and adds _N to the
field name. For example, if you specify 3 columns for a field named
groceries, AutoPrep creates groceries_0,
groceries_1, groceries_2. Any values left over
after AutoPrep splits a row are discarded.
To split a field from the Preview data pane:
- In the field header, hover over the right side of the column and click the three
dots to open the options menu:
- Select Split.
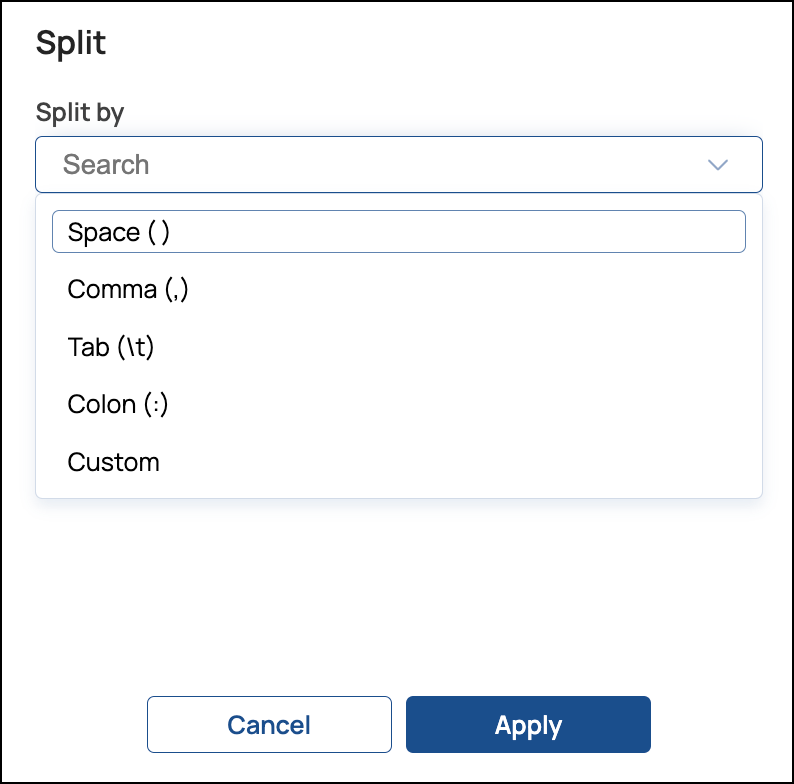
- To choose a delimiter other than the default, click the arrow to open the list
and select one:
- Enter the number of columns for the split values:
- Click Apply.