


Run Migration Pipelines
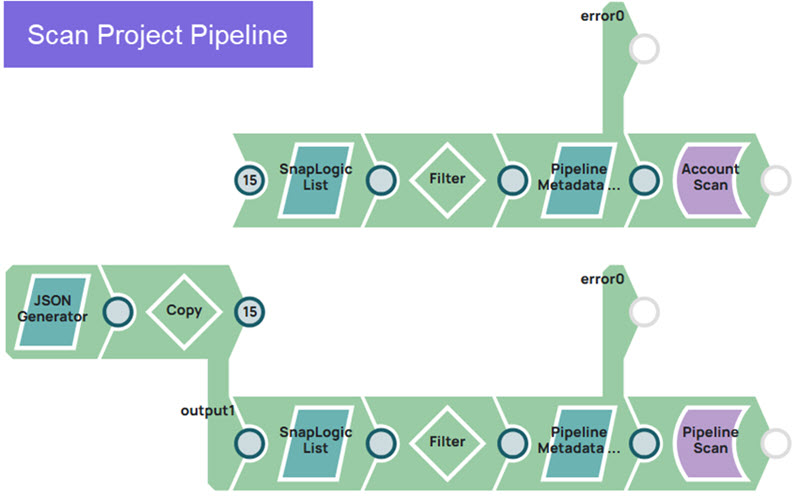
Scan Pipeline
This pipeline scans the metadata information and identifies the REST pipelines/accounts and writes their path to the output.
Step 1 — Use the Scan pipeline to identify the REST pipeline and account paths by scanning the specified Project path.
Input
In the JSON Generator Snap, provide the Project path where the REST pipelines and accounts are located.
Pass the path value in the Pipeline parameters.
Output
The pipeline scans the project path, gets the paths of the REST pipelines and accounts, and writes them to a file in SLDB.
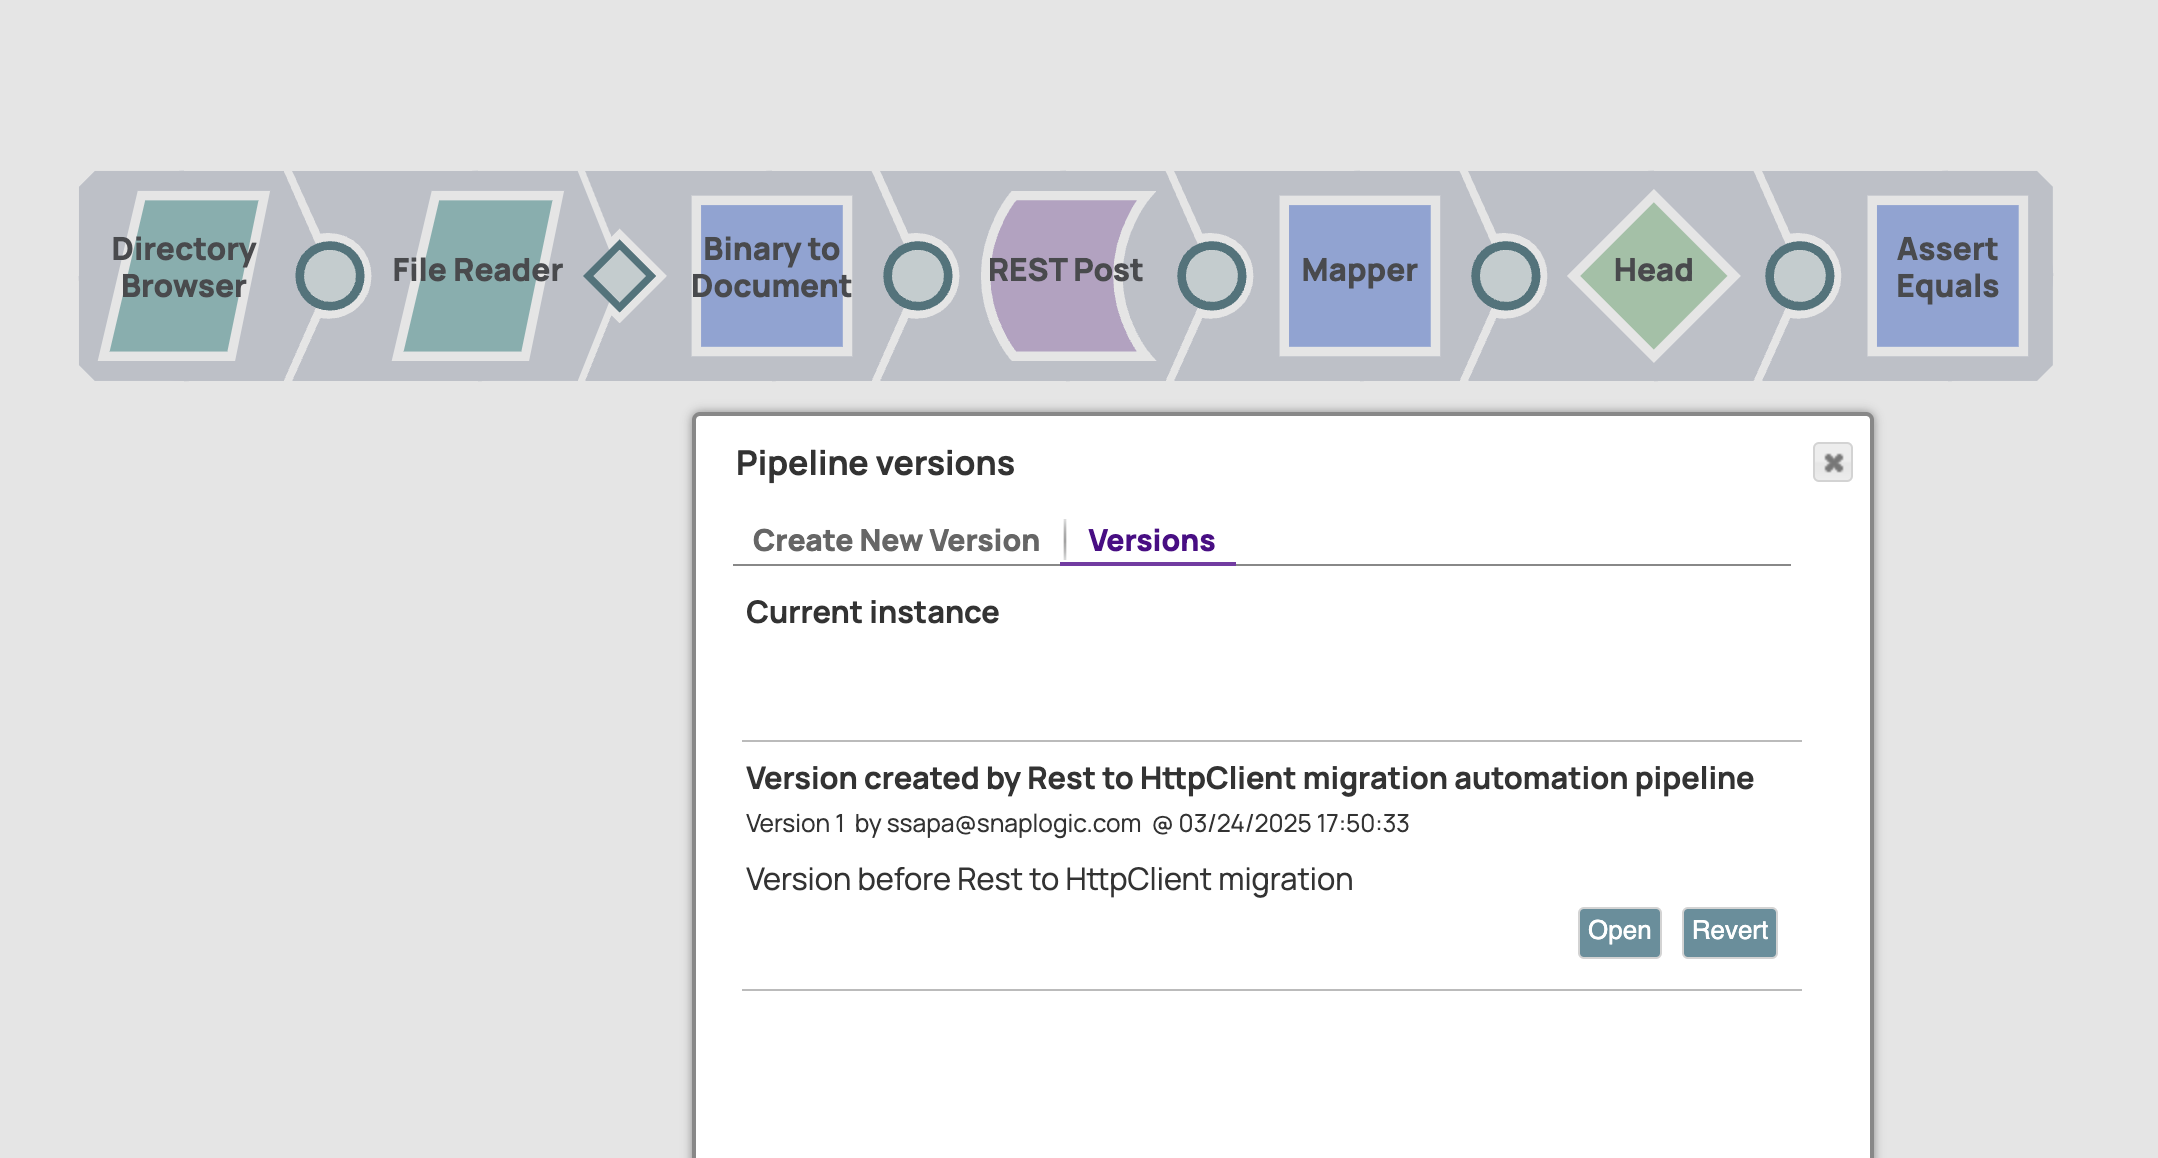
Version Creation Pipeline
This pipeline scans all pipelines in a project, identifies those containing REST Snaps, and creates new versions for them.
Step 2 — Use the Version creation pipeline to automatically create a version of all the REST pipelines in a given project.

Input
Configure the following Pipeline parameters:
path: /<org>/<project-space>/<folder>instance_url: https://cdn.elastic.snaplogic.com or https://cdn.emea.snaplogic.com
Output
- List Pipelines: Lists all the pipelines in a project.
- Filter: This excludes the pipelines which are having * in the pipeline path, as the Metadata Snap fails to read that pipeline path.
- Fetch pipelines: Reads the pipeline metadata.
- Pipeline scan: Scans through pipeline configurations to identify those containing REST Snaps.
- Create version: Makes an HTTP POST request to create a new version of the pipeline.
Child Pipelines
Step 3 — Use the REST to HTTP Client Account migration pipeline and the REST to HTTP Client Pipeline migration pipeline.
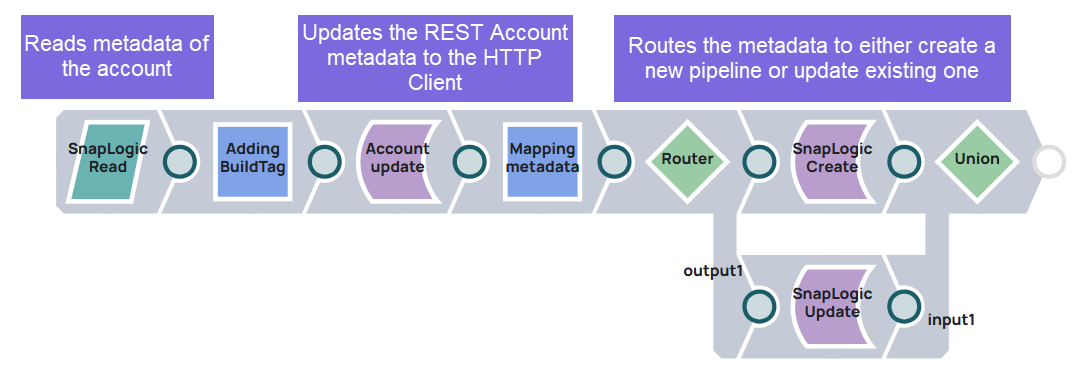
Accounts migration pipeline: This pipeline identifies the REST accounts and maps them to the compatible HTTP Client accounts. Learn more about the mapping of the accounts.
Input
Configure the following pipeline parameters:
path: /<org>/<project>/<folder>/<account_name>

descFolder: /<org>/<project>/<destination_folder>/ (This is required when the action is create.)

buildTag: 440patches30202

action: create/update- Set the Asset path in the SnapLogic Read Snap to read the asset (account).
Output
Using the Script (Mapping Metadata) Snap, the pipeline converts the REST accounts to the compatible HTTP Client accounts in the destination folder.
Download the REST accounts migration pipeline.
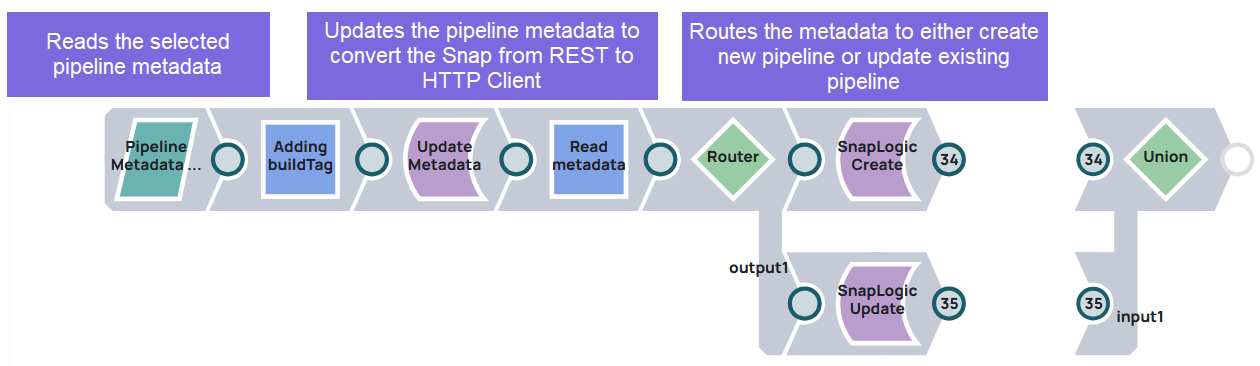
REST pipeline migration pipeline: This pipeline identifies the REST Snaps in a given pipeline and maps their properties to those of the HTTP Client Snap.
Input
-
Configure the following pipeline parameters:
buildTag:440patches30202

descFolder: /<org>/<project>/<destination-foler>/ (This is required when action is create.)

action: create/update

path: /<org>/<project>/<folder>/<pipeline_name>
Note: For the update action type, we recommend that you run the Version creation pipeline to create versions for all pipelines in the specified project before you begin the migration. - Set the Asset path in the SnapLogic Read Snap to read the asset (pipeline).
Output
- The pipeline converts the REST metadata to HTTP Client Snaps using the Script (Update Metadata) Snap.
- Based on the create action type, the pipeline creates a new pipeline.
Parent Pipeline
This pipeline routes to pipeline flow or account flow based on the migration type specified in the JSON Generator Snap. It scans the project path for REST pipelines and accounts and sends them to the Pipeline Execute Snap, which executes the child pipeline.
Step 4 — Use the parent pipeline to migrate the pipelines/accounts to HTTP Client.
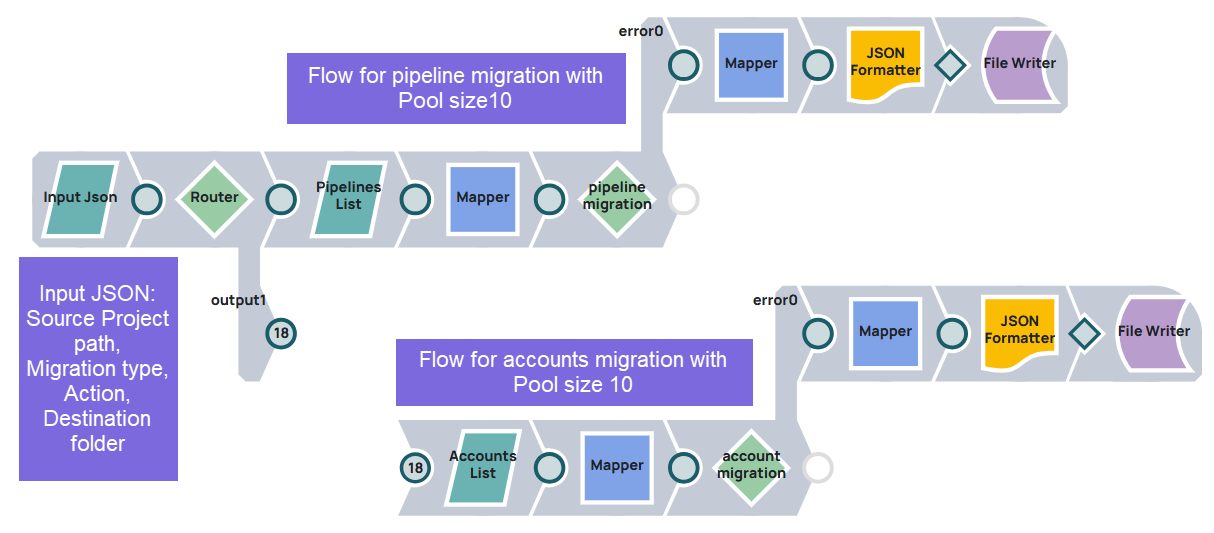
Input
In the JSON Generator Snap, provide the following JSON input:
[
                {
                "projectPath": "/<Org>/<Project>/<folder>",
                "type": "pipeline",
                "descFolder": "/<Org>/<Project>/<folder>",
                "action": "create",
                "apisuiteBuildTag": "440patches30202"
                }
                ]
In the Pipeline Execute Snap, the Pool size is set to 10 to migrate pipelines in parallel.
Output
The migrated pipelines are saved in Manager, and the errors are routed to the error view, and written to a file.