


AutoPrep Example
Use the AutoPrep Snap to prepare data for analysis, reporting, and machine learning without writing expressions, SQL scripts, or Python code. AutoPrep supports common data transformation operations. In contrast with the Mapper Snap, you do not need to understand or write expressions to use these transformations. Try this example to learn how to flatten a data hierarchy, remove fields, specify custom handling of nulls, and mask data.
Create a Pipeline
- Click the Designer tab.
- On the top left of the canvas, click + to create a new pipeline.
- For Label, enter
AutoPrep Example. -
Click Save.
Upload Data
Add the upstream data:
- Download
Example.jsonand save it locally. The following shows an element from the file, which tracks the addresses of customers that received a service call, how they rated the service, and when they were last seen. The location object contains nested fields:{ "id" : "FmGF1B-Rpsjq1f5b56qMwg", "is_closed" : false, "rating" : 4.5, "location" : { "last_seen" : "03/05/2022", "address1" : "373 Columbus Ave", "address2" : "", "address3" : "", "city" : "San Francisco", "zip_code" : "94133", "country" : "US", "state" : "CA" }, "distance" : 1465.2460213942109, "review_count" : 488 } - In Designer, from the left side of the palette, select Snaps.
- Search for the File Reader Snap and drag it onto the canvas.
- Click the Snap to open it.
- To the right of the File field, click Upload File icon to choose a file.
- Click Upload File and select the
Example.jsonfile. - Click Save and close the File Reader Snap.
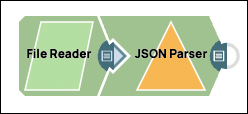
- Drag a JSON Parser Snap and connect it to the File Reader Snap.
- In the Designer toolbar, click Validate icon to validate. The
JSON Parser Snap is ready to pass the data as a JSON document:
Use AutoPrep
- From the left side of the palette, select Snaps.
- Search for the AutoPrep Snap.
- Drag the AutoPrep Snap to connect with the right side of the JSON Parser Snap.
- Click the AutoPrep Snap. A welcome dialog opens.
- Click the button to continue. AutoPrep opens:

location object is a root node with leaf nodes that you can flatten. Flatten the Data Structure
- In the Flatten Structure tree, select
location. - Click Update.
- Scroll the Preview Data pane or maximize it to view the fields
to the right of the
locationfield:
- The
locationobject is now empty and thelocationcolumn contains empty braces. - The leaf nodes are now at the root level and have
location_prepended to their names. - The
location_address2andlocation_address3columns have empty andnullvalues. To make the data easier to read, you can replace thenullvalues with a string that is easier for a business user to understand.
Manage Null Values
n/a instead of null: - In the left pane, click Handle nulls to open the Manage null values
table:
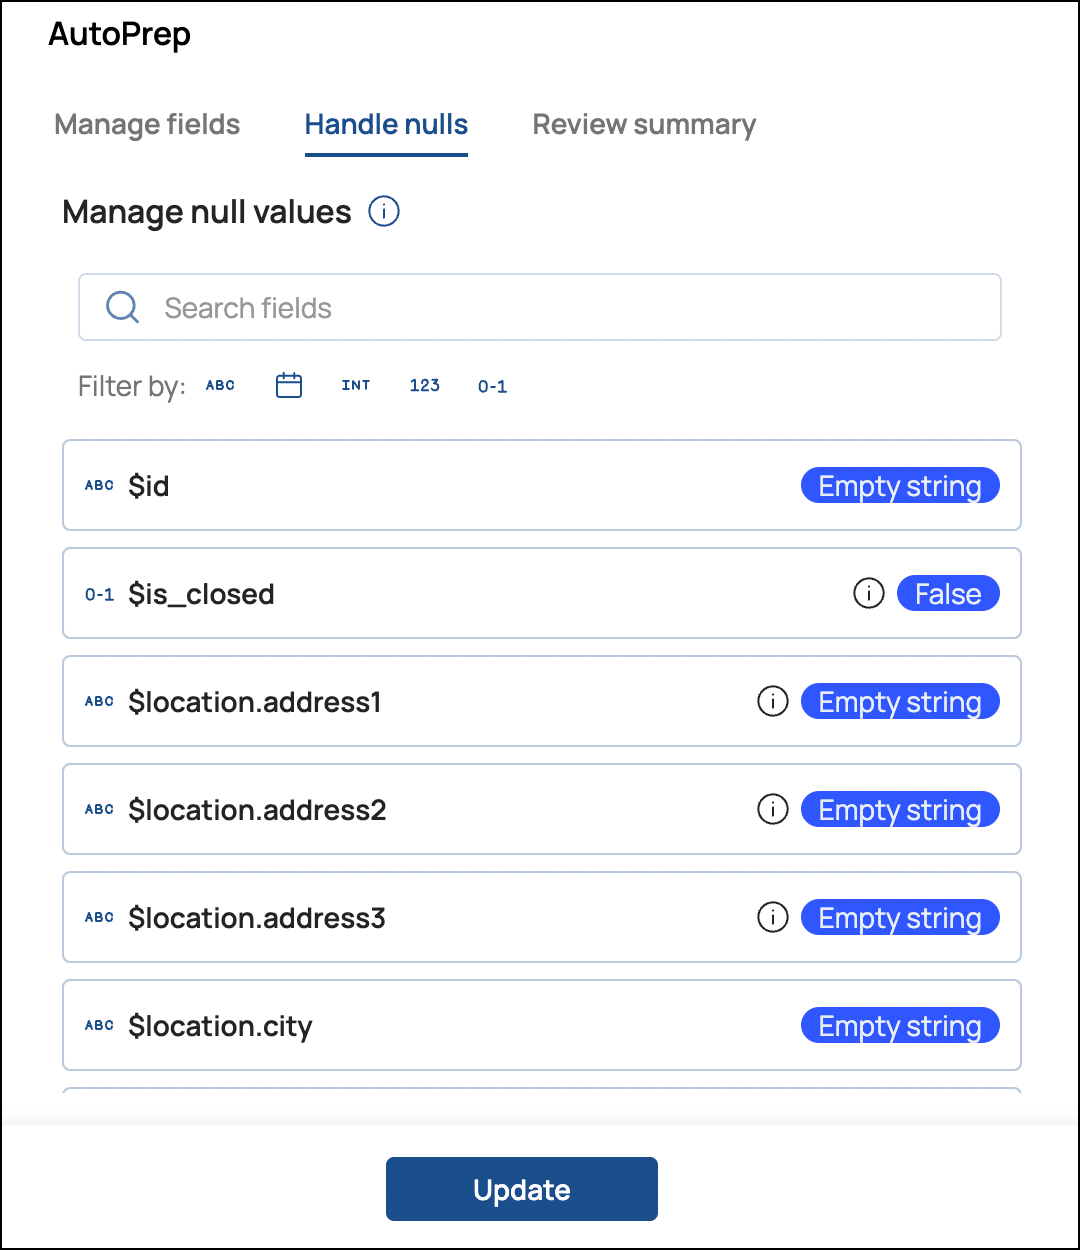
- For the
location_address2field, roll your cursor over the Empty string pill and click Custom input. - In the Input custom value field, enter
n/a. - Do the same for the
location_address3field. - Click Update to apply your entries.
- Click Review summary to verify the changes. Descriptions of the
changes are indented below the field:
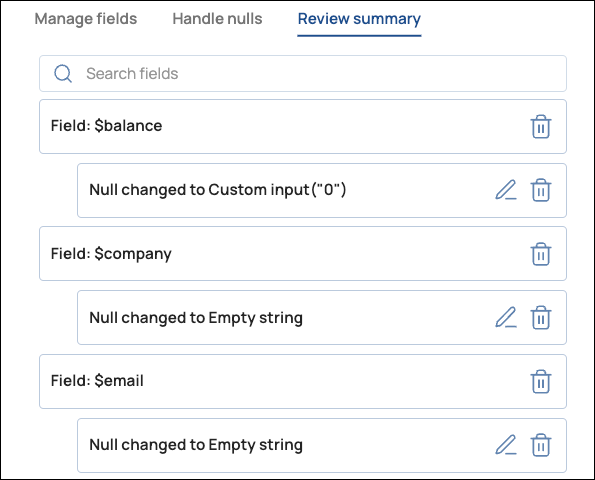
- Click the trash icon to undo a change.
- Click the pen icon to go back to the Manage fields tab.
Remove a Field
location field:- At the bottom of the Manage fields tab, click the Select fields arrow to expand the column list.
- Click the Remove icon in the pill for
location. The pill color changes from shaded to white. - Click Update.
location field was deleted and all null values in the two address fields
were replaced with n/a. Note that AutoPrep only replaces literal nulls and
missing key/value pairs, not empty strings: 
Mask Data
- In the field header, hover over the right side and click the three dots to open the
options menu:
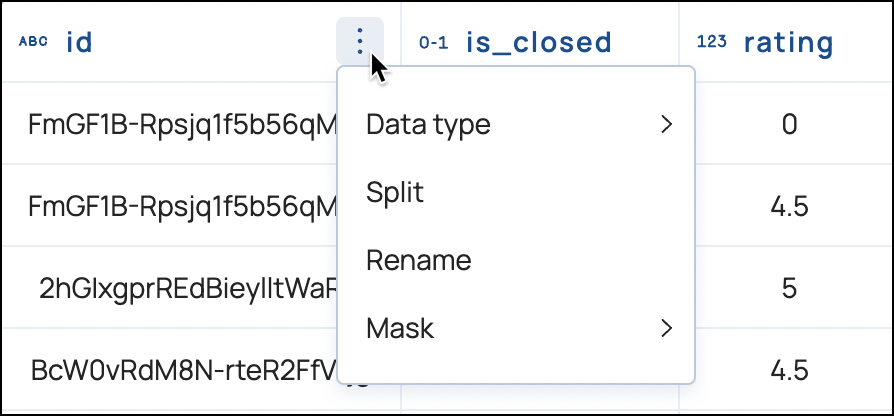
- Select Mask.
- Select the MD5 algorithm and note how AutoPrep changes the values in the id column.
- Click Done to save the transformations.
Change the Date Format
location_last_seen column contains a Date String in MM/dd/yyyy. To be
more precise about the time, choose the MM/dd/yyyy option that includes hours and
minutes: - Click the AutoPrep Snap to reopen it.
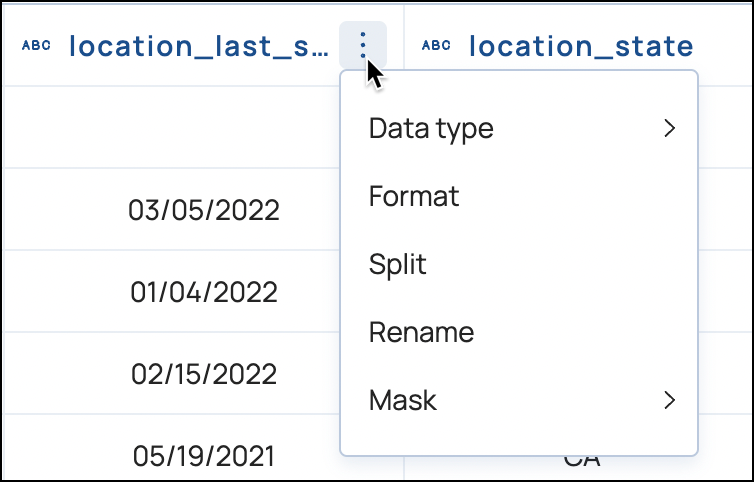
- In the location_last_seen field header, hover over the right
side, click the three dots to open the options menu, and select
Format:
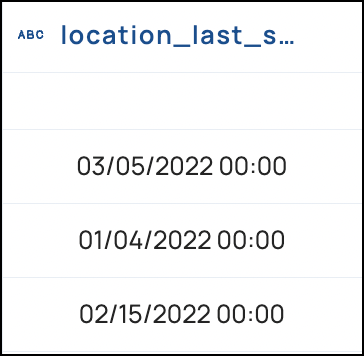
- Select MM/dd/yyyy HH:mm:
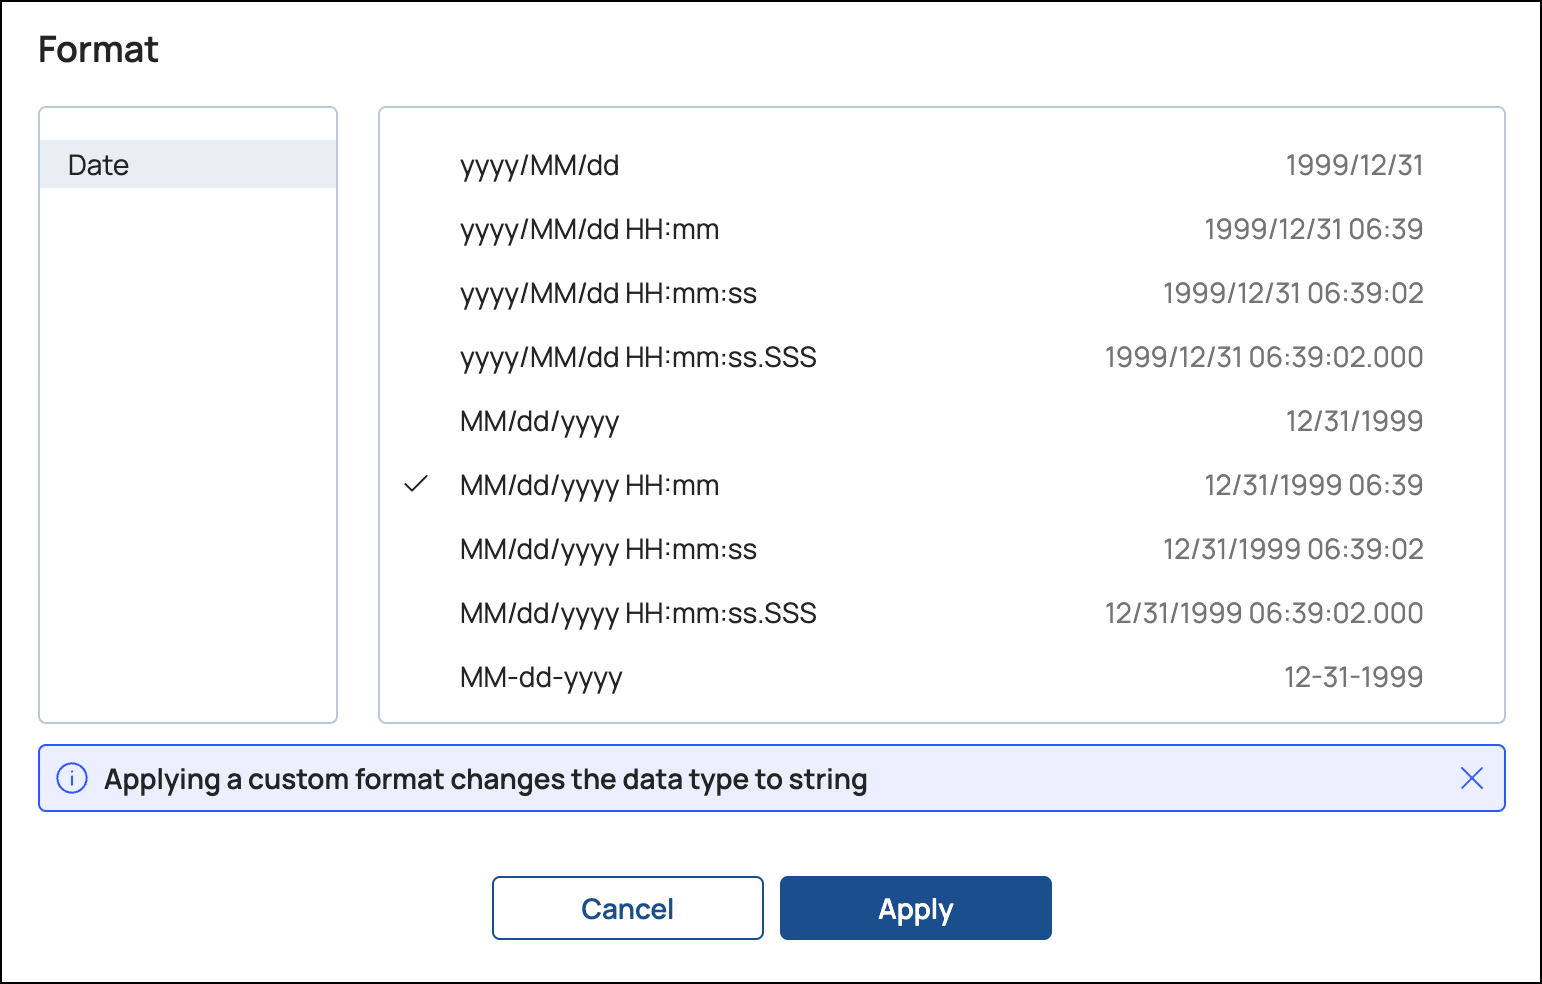
- Click Apply. AutoPrep changes the format:
View the Results
If Pipeline validation is not Pipeline Validation and Global User Settings and Designer Settings is enabled in user settings, you can preview how AutoPrep will prepare the data set at runtime. To finish this exercise:
- On the right side of the AutoPrep snap, click to display the Data Preview from a Pipeline.
- For Preview Type, select JSON.
- Click Expand All.
- Scroll to the record with the address of 373 Columbus Avenue.
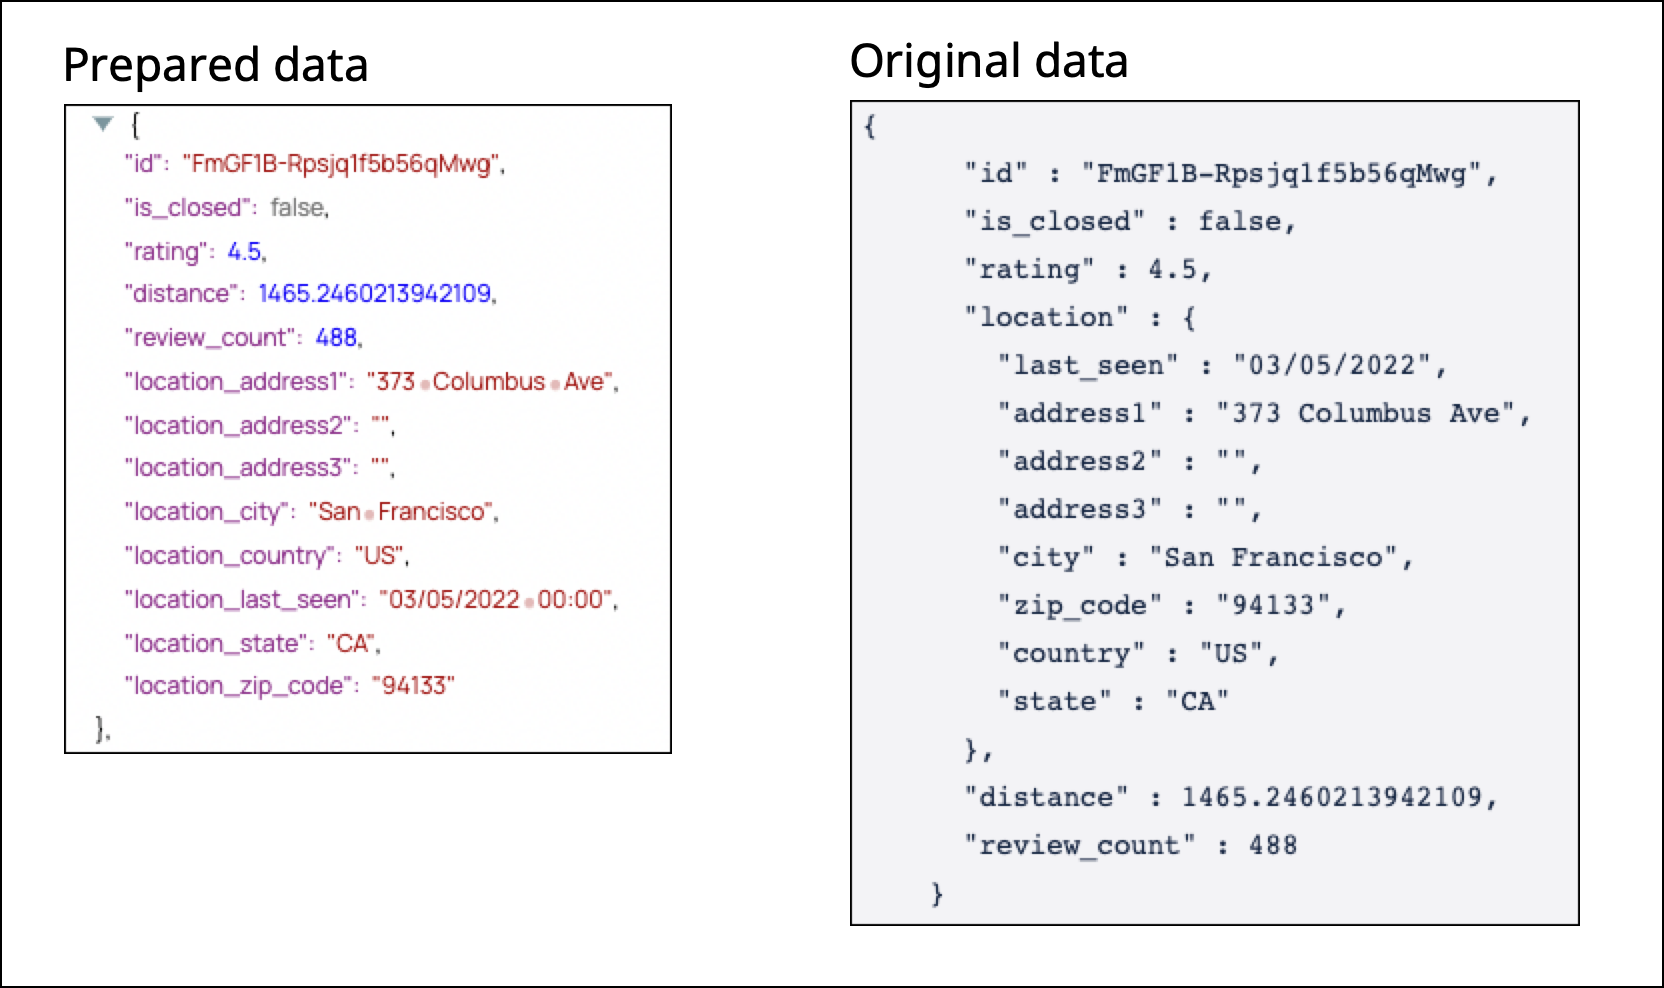
- The id field contains a masked value.
- The location field was flattened and then removed.
- The location_address2 and location_address3 fields have empty string values, so AutoPrep did not apply the custom null handling.
- The
location_last_seenfield includes hours and minutes.
Congratulations! You’ve transformed data without writing expressions!