


Configuring Microsoft Fabric Workspace
How to connect SnapLogic to Microsoft Fabric OneLake using Azure Data Lake Storage (ADLS) Gen2 and load data into Lakehouse tables.
Microsoft Fabric is a digital warehouse that can store complex data tools (like databases, data movers, and reporting tools). This article explains how to connect SnapLogic to Microsoft Fabric OneLake using Azure Data Lake Storage Gen 2 OAuth2 Account and load data into Lakehouse tables.
Steps
Create Fabric Workspace
- Sign in to the Microsoft Fabric portal.
- Click New workspace. The Create a
workspace dialog box displays.
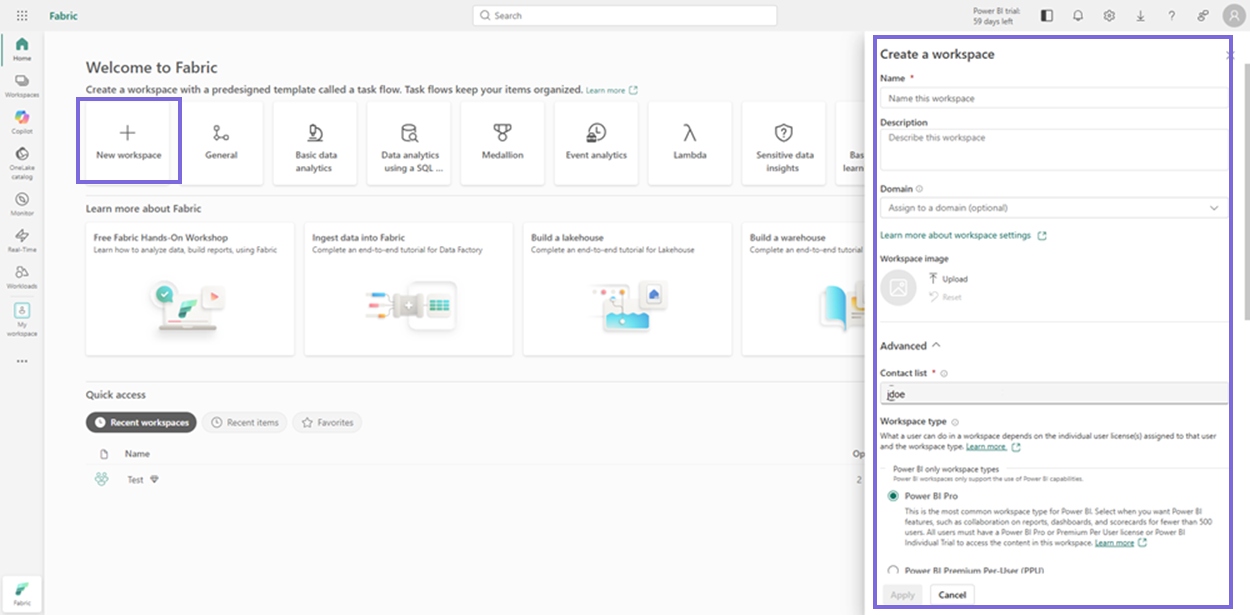
- Specify the following details:
- Name: Name for the workspace.
- Workspace type: Determines what a user can do in a workspace.
- Details: Select the remote computing resources your items will use with this workspace.
- Click Apply. The new workspace is created.
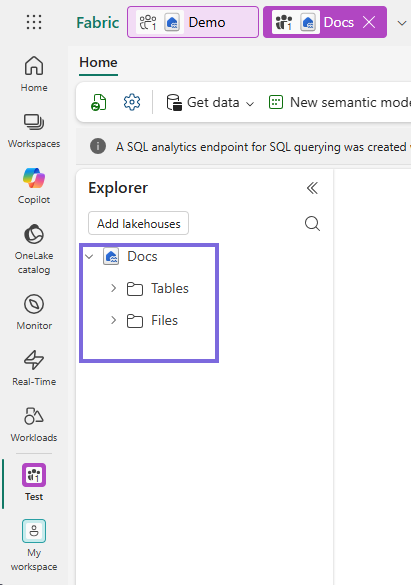
Create Lakehouse in Workspace
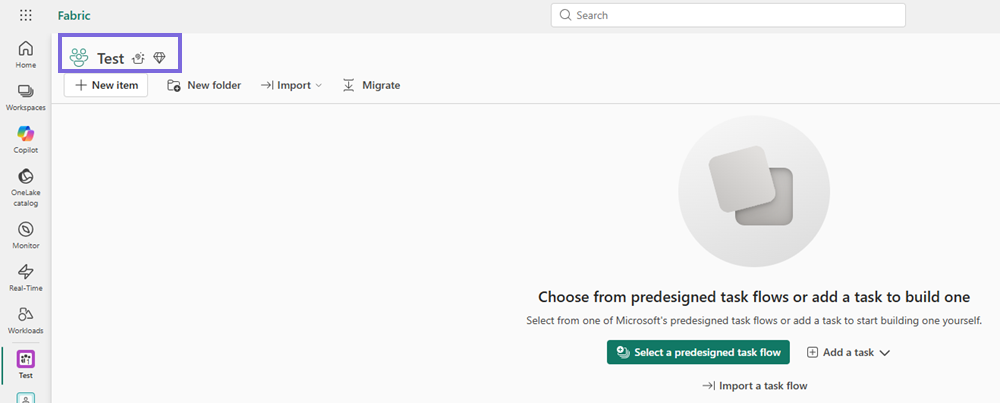
- Open your newly created workspace.
- Click +New item and search for Lakehouse in the Filter
box.
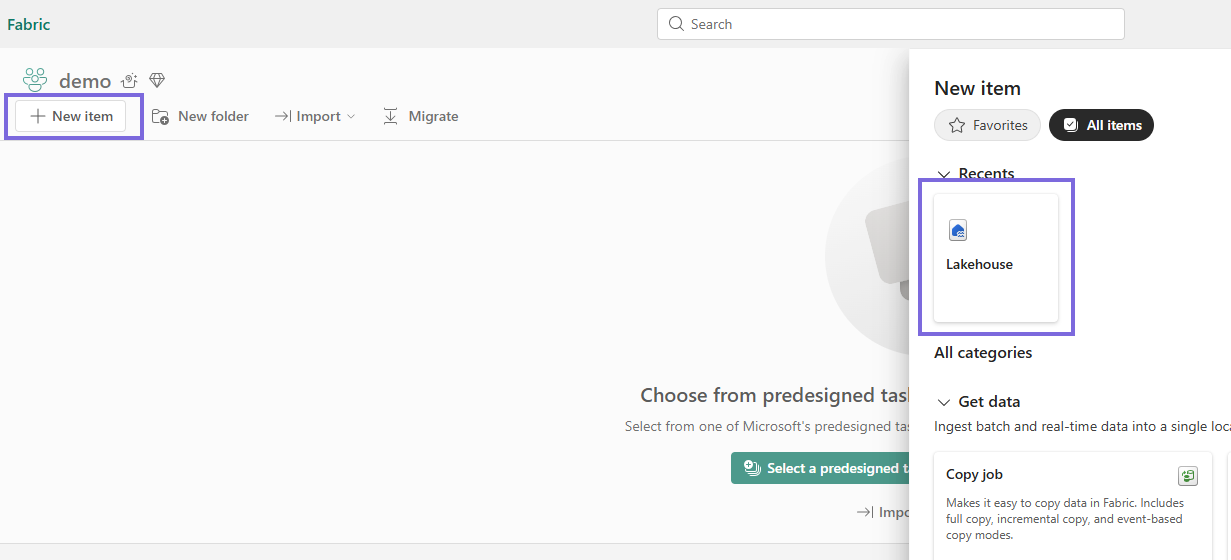
- Click Lakehouse and specify the Name and
Location.
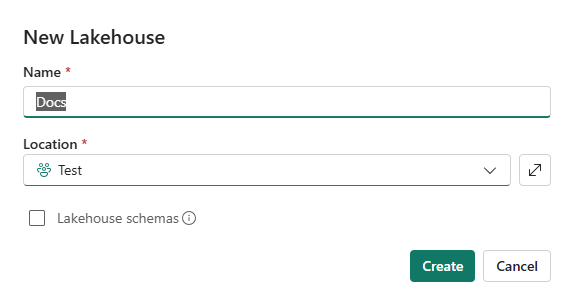
- Name: Name for the lakehouse.
- Location: Location to save the lakehouse.
Note: Make sure to deselect the Lakehouse schemas checkbox, because Load API has known limitations with schema-enabled lakehouses. - Click Create. The lakehouse is created. You can now view the Files folder and Tables folder.
Create Azure AD Service Principal (App Registration)
- Log in to the Microsoft Azure portal.
- Search App registrations.
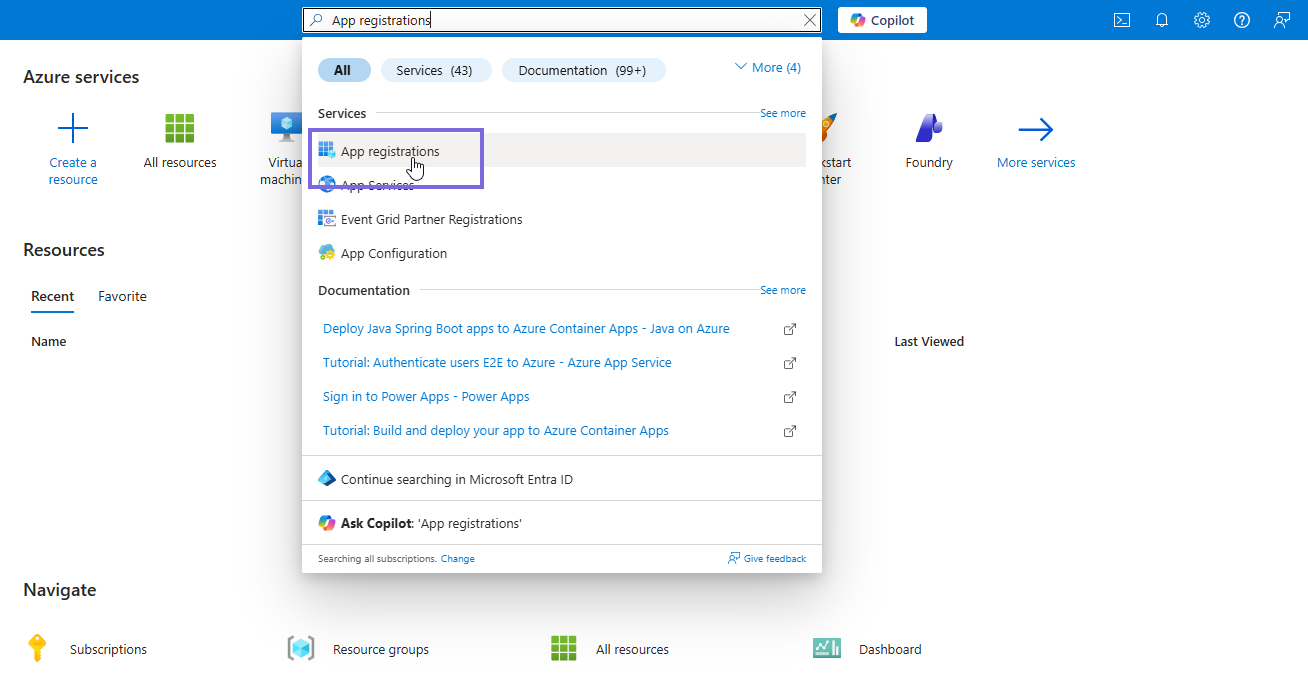
- Click New registration.
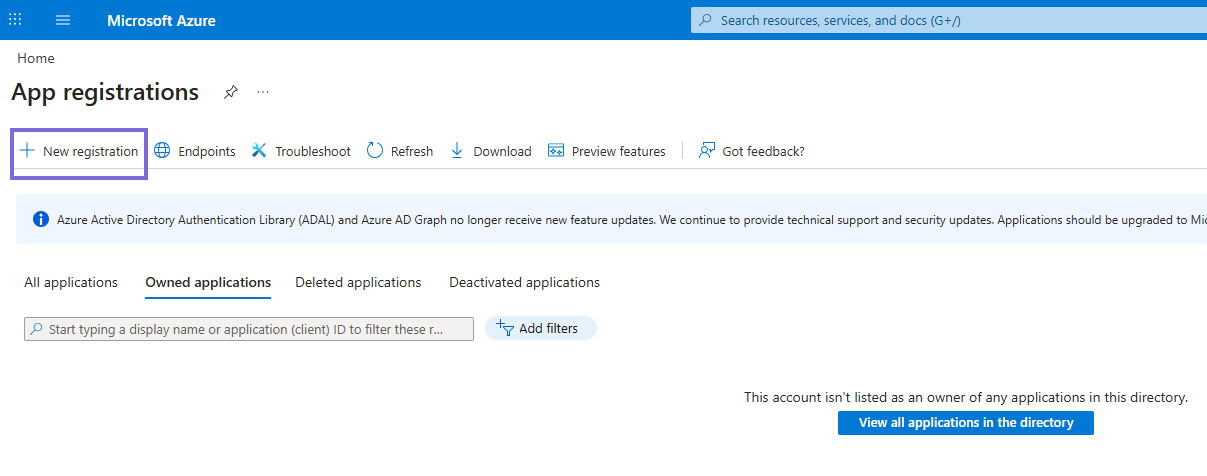
- Specify the following details:
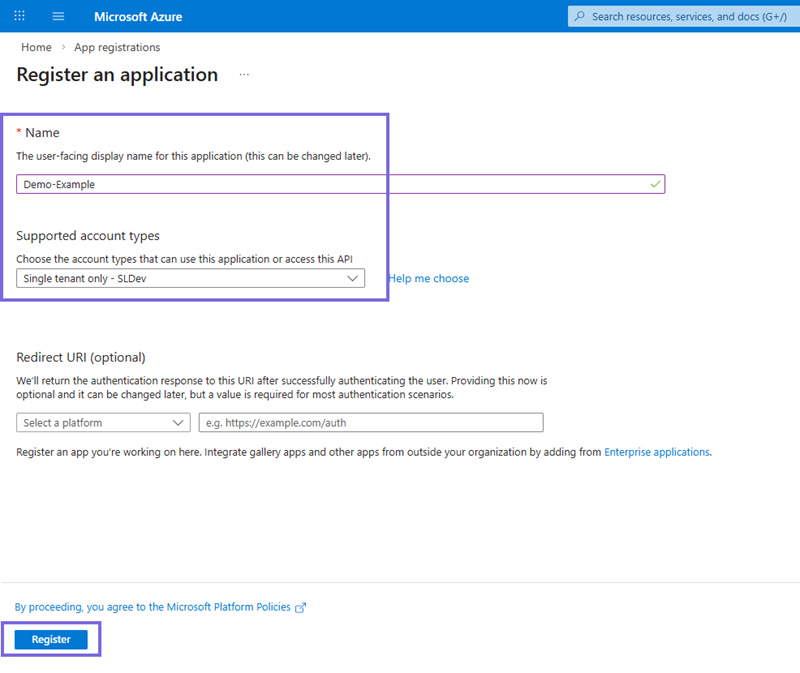
- Name: Name for the application.
- Supported account types: Select Single tenant only
- Click Register. The application is created.
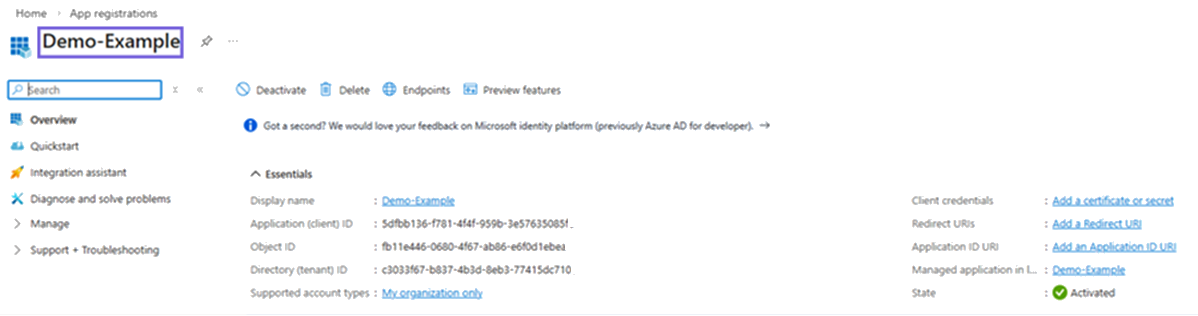
- Secure the Client ID and Tenant ID.
- Create Client Secret. Navigate to Certificates
& secrets.
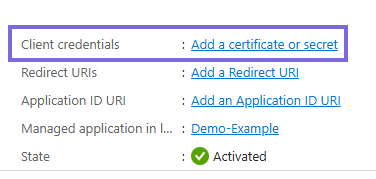
- Click Add a certificate or secret.
- Click New client secret.

- Optional. In the Add a client secret pop-up, specify the description.
- Click Add. The client secret is generated.

Important:The client secret is visible only once; copy and securely store it. Copy the Value, not the Secret ID.
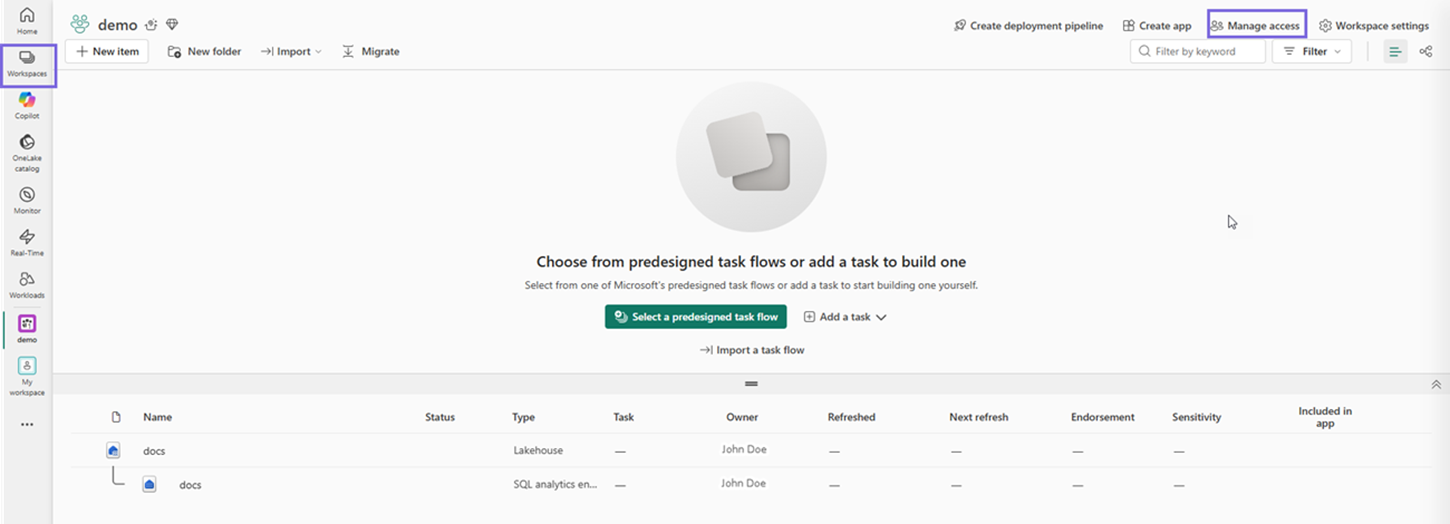
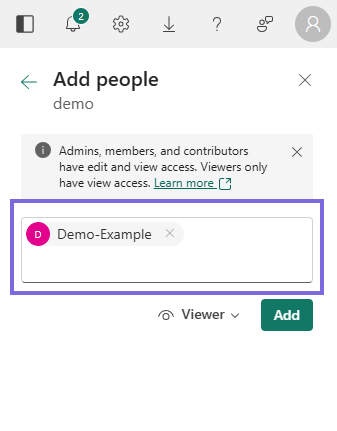
Add Service Principal to Fabric Workspace
- Navigate to your Fabric Workspace and click Manage
access.
- Click Add people or groups.
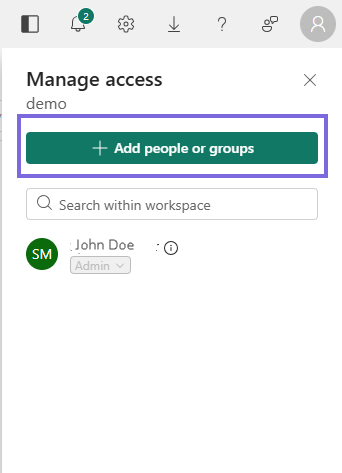
- Add your Service Principal, and assign a role (for example, Contributor).
Write data to Microsoft Fabric instance using File Writer Snap via ADLS Gen2 OAuth2 Account
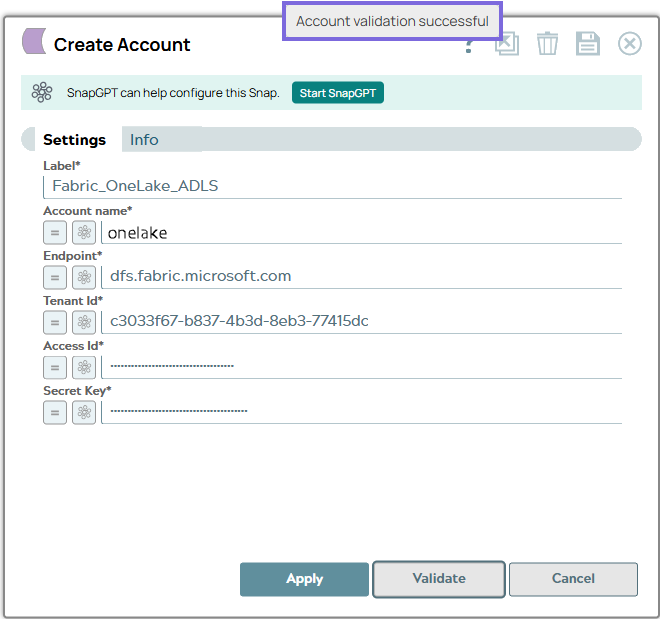
- Add the File Writer Snap and add Azure Data Lake Storage Gen 2 OAuth2 Account Account.
- Configure the account details:
- Account name: onelake
- Endpoint: dfs.fabric.microsoft.com
- Tenant ID, Access ID, Secret key: Use the values obtained after creating the app in Step 3.
- Click Validate and Apply.
- Go to the File Writer Snap settings.
- Set the file name using the ABFSS format:
Format:
abfss:///workspace_name/lakehouse_Name.Lakehouse/Files/data.parquetExample:
abfss:///fabric-jdbc-test/Abc_New_lakehouse.Lakehouse/Files/data50million.parquet - Validate the Snap.